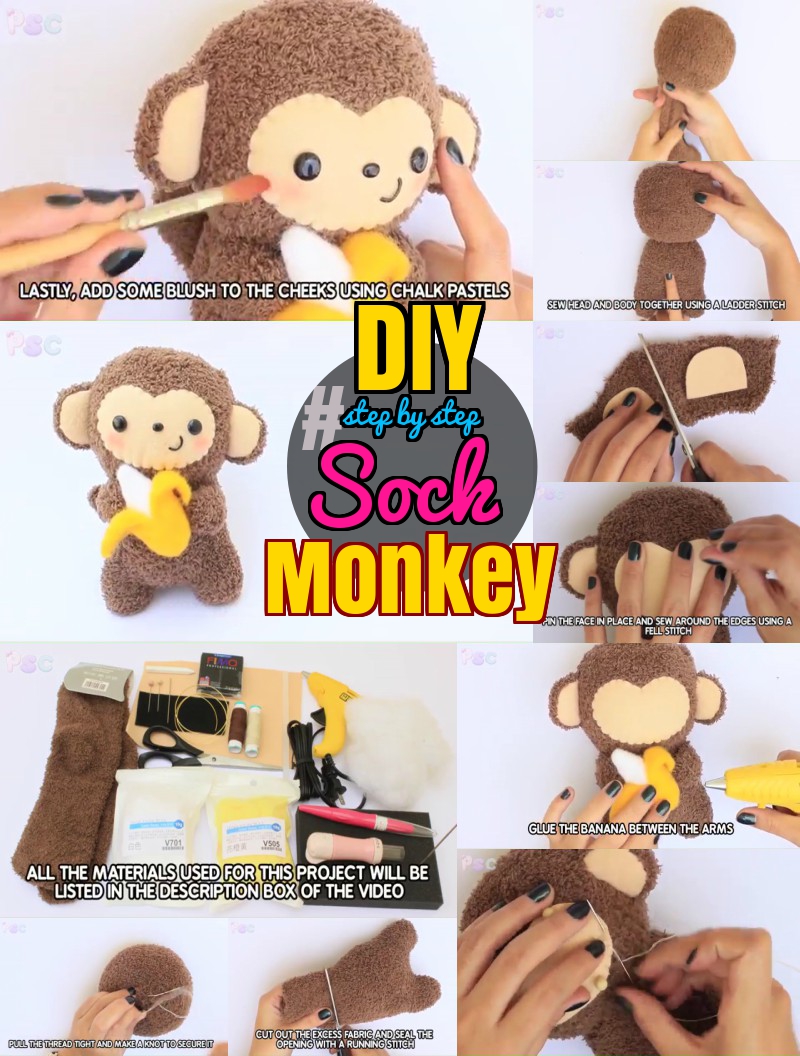
We have already talked a lot about the adaptability of socks, especially, when it comes to the matter of making soft toys. You can check our socks made Pokémon article on this issue. While we are discussing the subject of soft toy, it can’t be complete without a cute and funky money material, right? Hence, let’s make a soft and adorable monkey today holding a banana with the functional yarn socks. Check out the instruction below-

DIY Sock Plush Animals : How to Make a Cute Monkey


Materials Needed Sock Monkey :
To craft this super cute item you need, a pair of yarn made sock with brown shade, spongy filling, some felts, needle, marker, two string rolls, a scissor, white chalk, a packet of white wool, a packet of yellow wool, a multi-needle tool, a piece of wire, some black polymer clay, and some silicon glue.
You may also be interested in making sock toy donut stress toy and fridge magnet.
DIY Sock Toy Monkey Instructions:
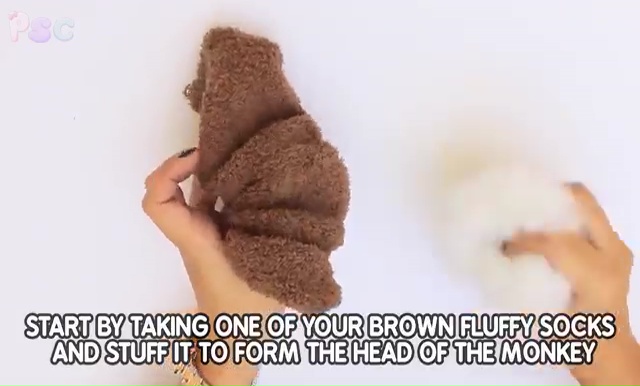
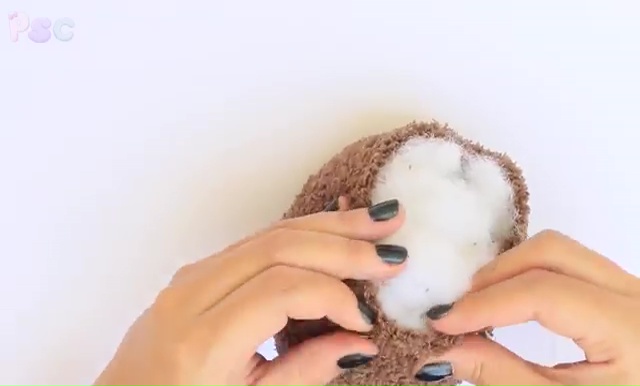
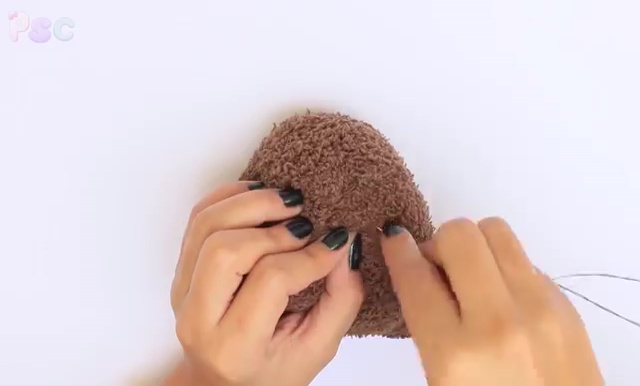
- At first, take one of the yarn fluffy socks and stuff it with soft filling to form the head of the monkey.
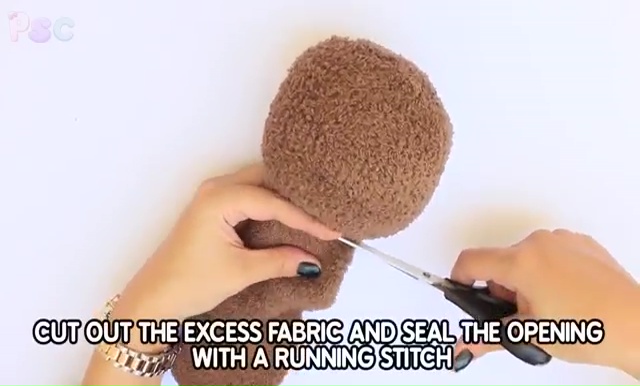
- Cut out the excess sock and then, sew the opening part with a running stitch.
- After completing the stitching, pull the thread tight and make a knot secure it entirely.
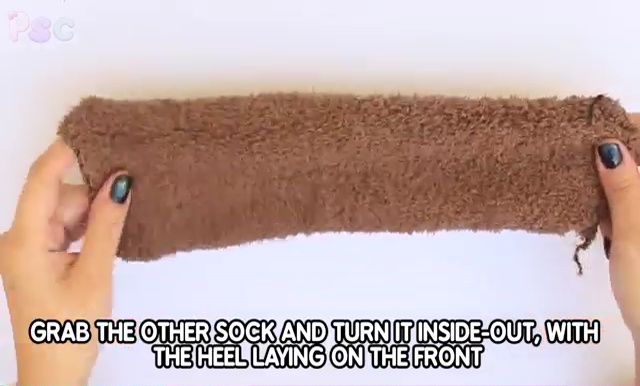
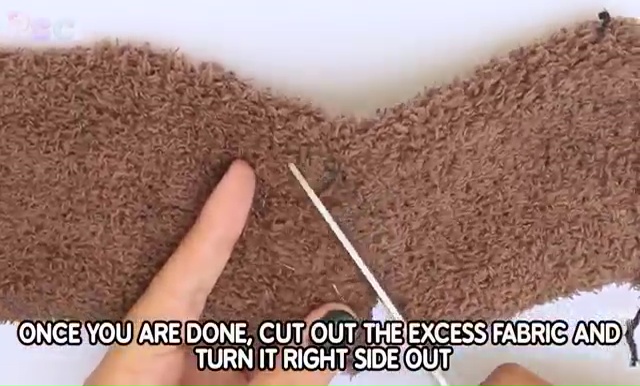
- Now, take the other sock, turn it inside out, so then you can get the heel section lying on the front.
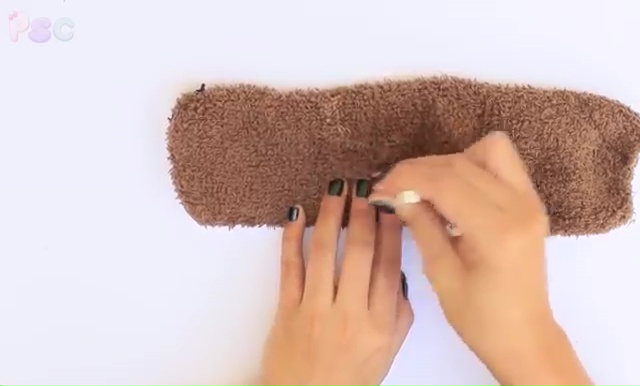
- Set three of your fingers by the side of the heel and measure the length of the legs of your crafting monkey and mark that measurement with a white marker.
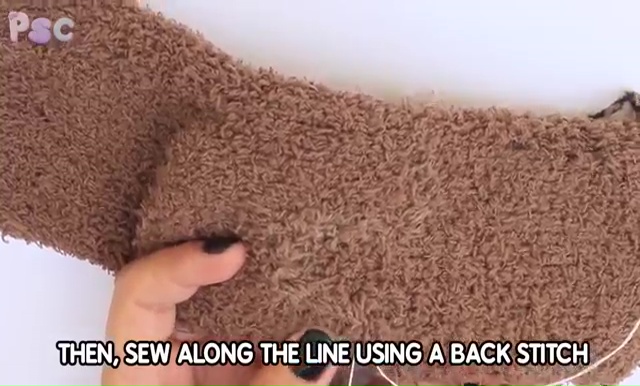
- After that, remove your fingers and sew along the line using a back stitch pattern.
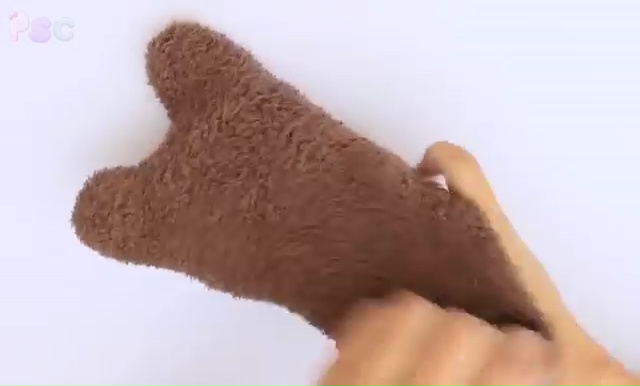
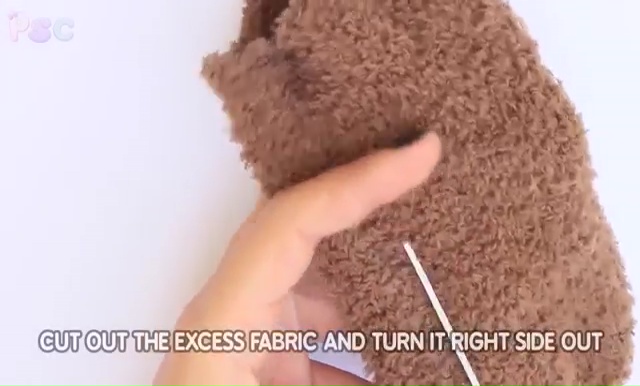
- Now, cut away the legs along with the body from the rest of the fabric and then turn it inside-out again.
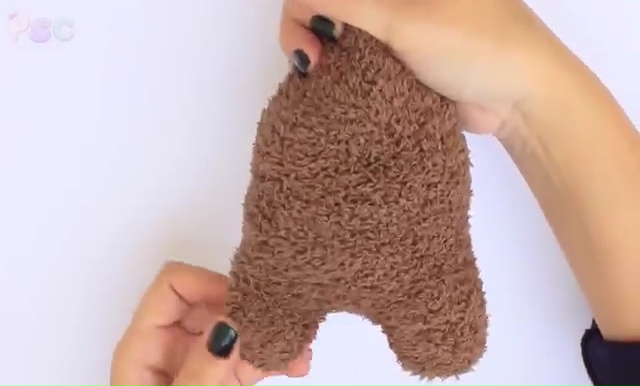
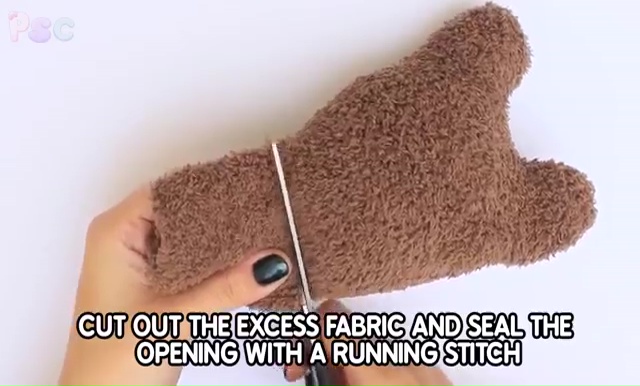
- Now, stuff the legs first and then fill the rest body part the spongy soft filling.
- Then, cut away the extra fabric and seal the open portion with a running stitch as we did before in the head section.
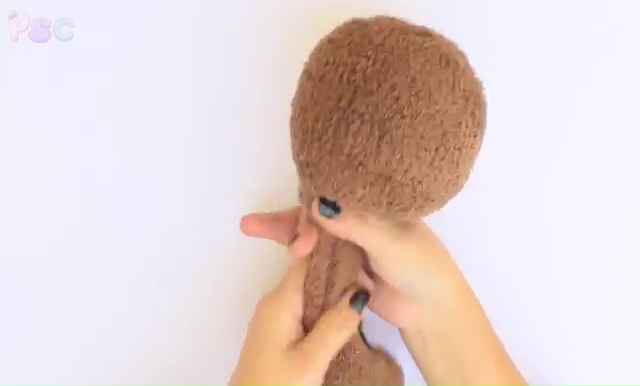
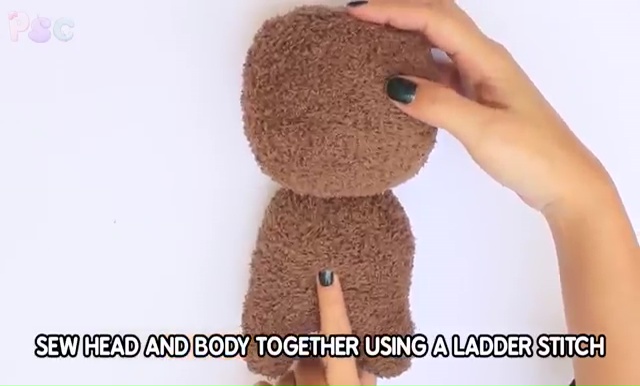
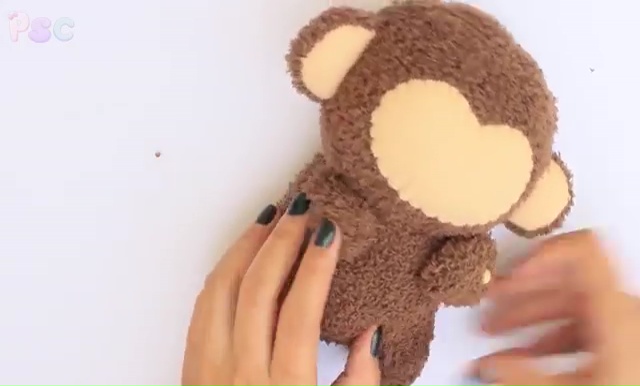
- Now, it’s time to attach both parts together, so, brings the head part, set it over the body and stitch them together with a ladder stitch.
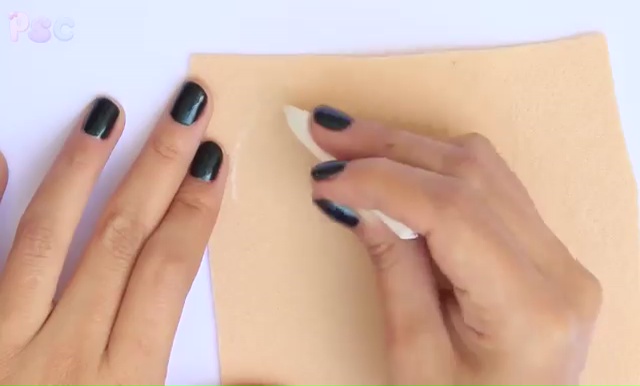
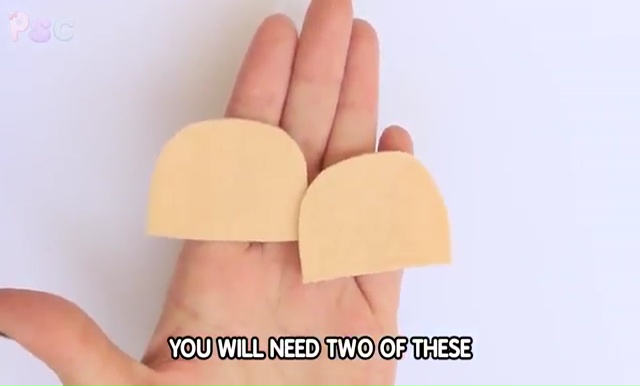
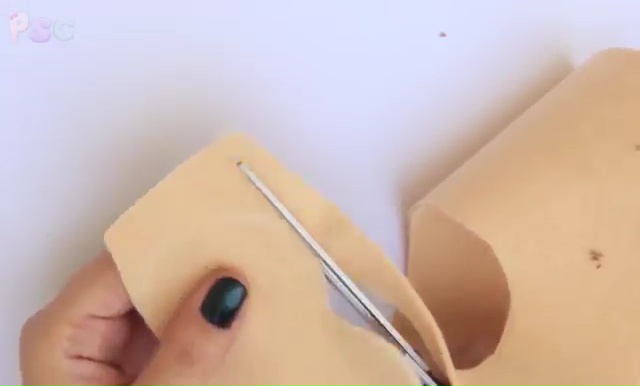
- Draw an ear shape over a flesh felt and then cut the ear out, then take a measurement from that ear and cut out one more from the rest of the felt.
- Take one of the remaining fabric pieces and set those ears on it.
- Now sew one piece of socks along with one piece of felt together with a back stitch and make two furry ears for your monkey. Once your stitches are done, cut out the excess sock and turn the right side out of the ear.
- Now, stuff both the ears lightly with the filling and attach them to the head with the ladder stitches. Make sure that you are keeping the felt portion front side of the head, while stitching them over the head.
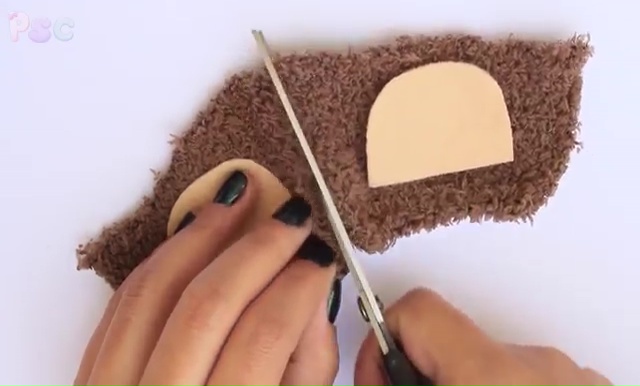
- Then, trace the face shape onto the flesh felt with the white chalk and cut it out from the main felt.
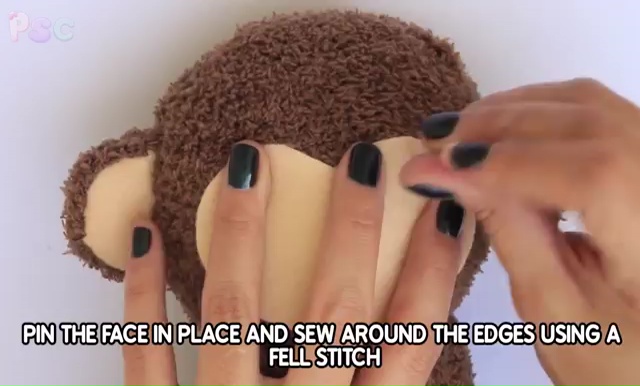
- Pin the felt face in the place and sew around the edges using a fell stitch, then take out the pins carefully.
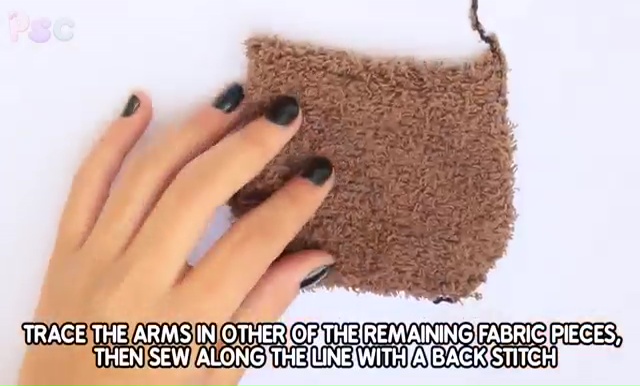
- Now, trace the arms over the remaining fabric pieces with the white chalk again and sew along the line with a back stitch.
- After that, turn the arms right side out and stuff them lightly as we did for the ears.
- Pin the arms in the place and then sew them to the body using a ladder stitch again.
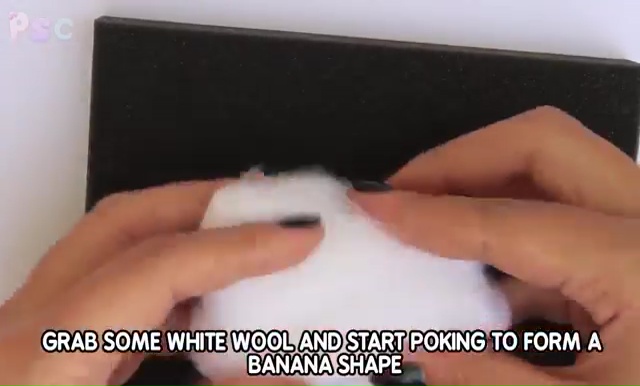
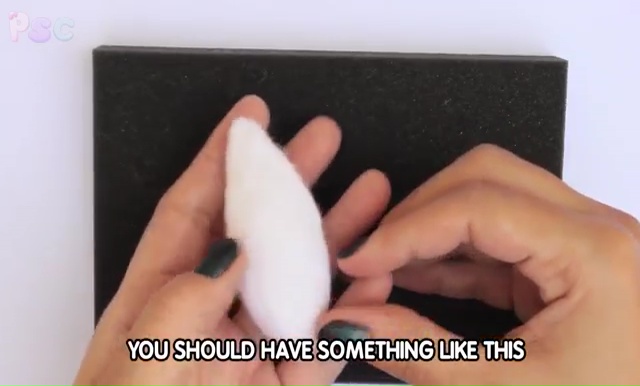
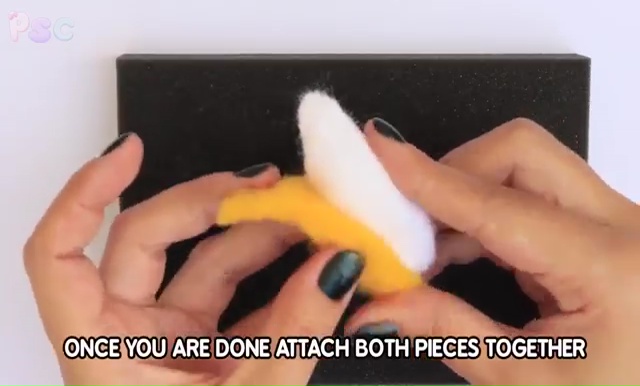
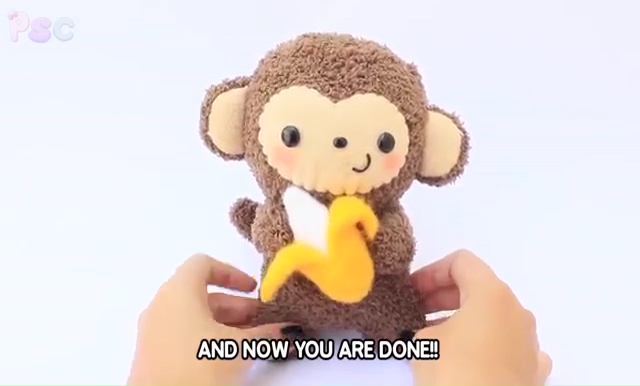
- Now, fetch some white wool and start poking to form a banana shape using a needle or a multi-needle tool for the best result. Check the video to get the exact shape idea of a woolen
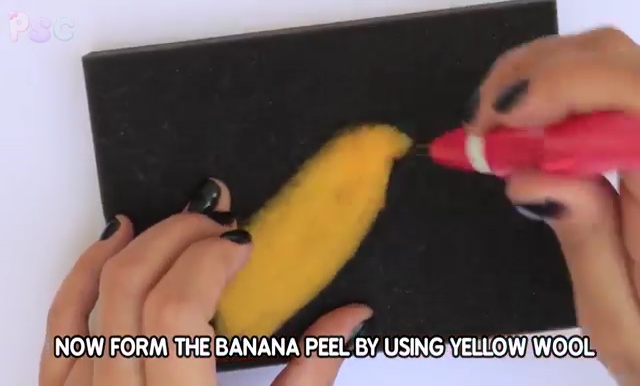
- Then, make the banana peel, by using the yellow wool and you can make this by making the same needle process as you did for the banana. Here make two different peels separately with yellow wool.
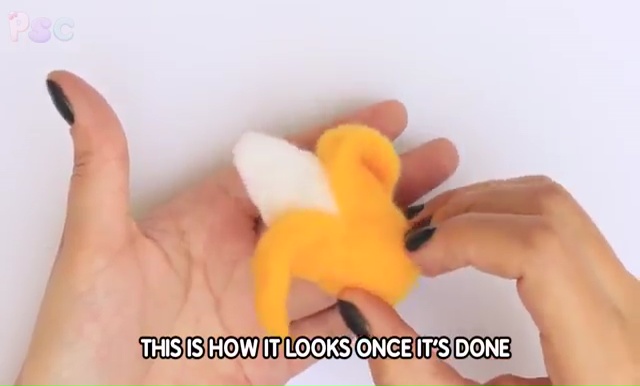
- Once your formation is done, assemble both pieces together and twist the upper section of the peel a slight to get the flawless banana stroke. To attach all three sections together, you need to repeat the multi-needle tool action again with these parts.
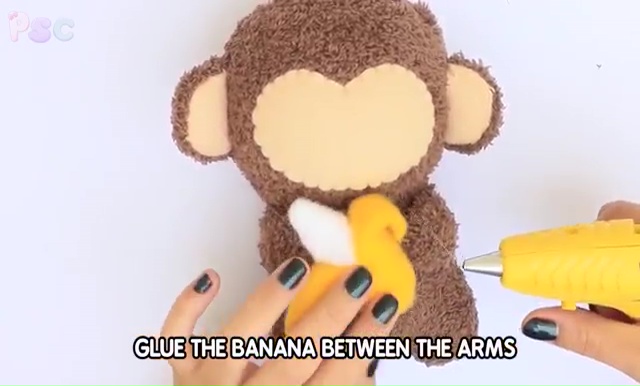
- Glue the banana between the arms of your sock monkey, once you are done with the banana.
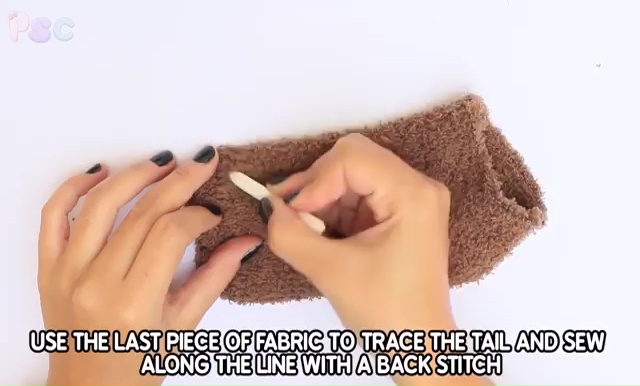
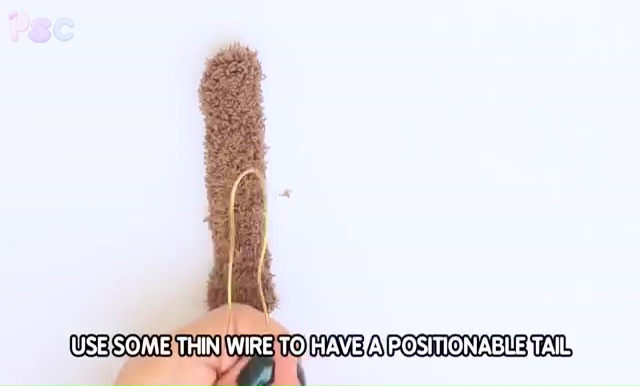
- Take the last piece of fabric and mark the tail and sew along the line with a back stitch.
- Cut away the excess part and turn it right side out as we did for the several times before for the other body parts.
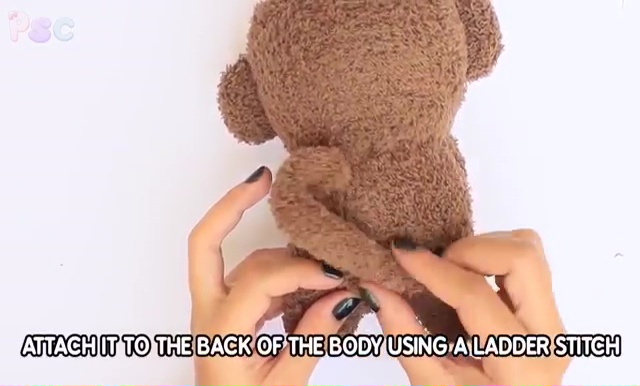
- Now, take some wire, insert the wire into the tail part to get a positionable After doing the process, attach it to the back of the body using a ladder stitch.
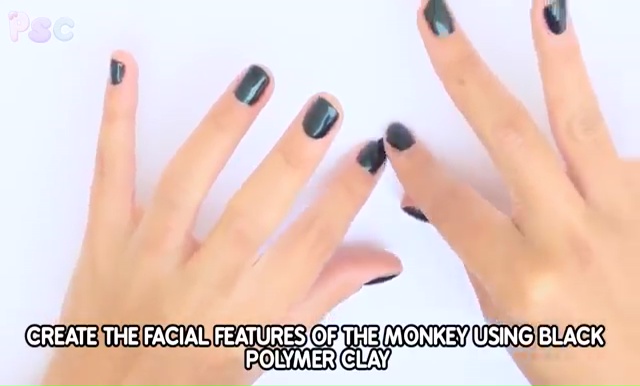
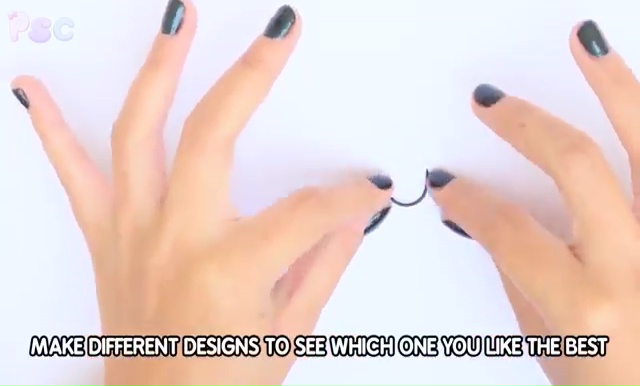
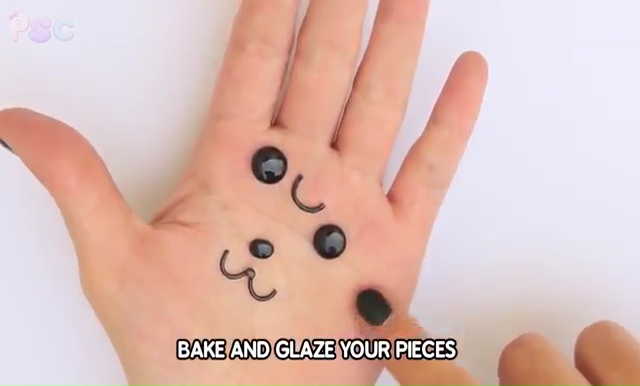
- Now it’s time to complete the face with the perfect facial features and for that take some black polymer clay, try with a few different designs to know which one suits most excellently with the face of your monkey.
- For an apparent idea, you can check our video above. Now, after completing the each part, bake and glaze your polymer clay pieces.
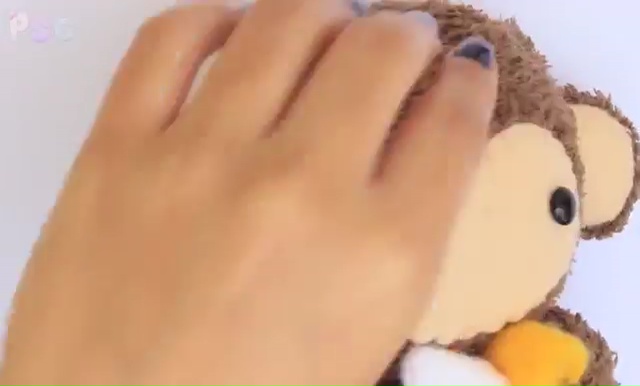
- Now, just set them at the right places of the face and glue them with silicon.
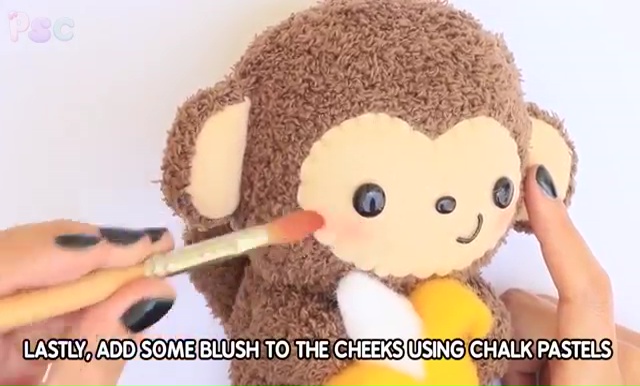
- Finally, add some blushes to the cheeks using chalk pastel which will help to complete the monkey with true perfection.
DIY Step by Step Sock Toy Monkey Craft Tutorial
Also try our DIY animal crochet to feed your inner fire.