Wall shelves are a brilliant home furnishing component that not only hold some of your important kinds of stuff in an organized way but also, increases the whole beauty of your room.
A shelf could fit in any place of your room and most amazingly it doesn’t require too much of space to fit in, especially, when you are placing it on a wall.
Actually, the whole interior could enhance the prettiness of your house, when you choose a good wall shelf for your room. But sometimes our budget couldn’t allow us to do so much of experiments with the designs or looks of a shelf, which we can easily get in the DIY products.
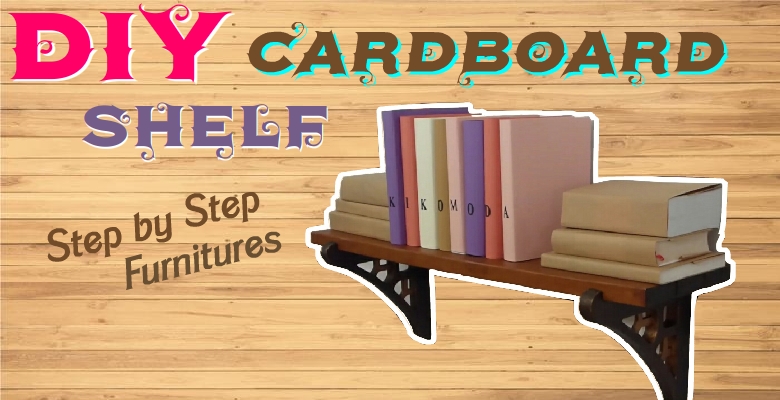
DIY Cardboard Shelf
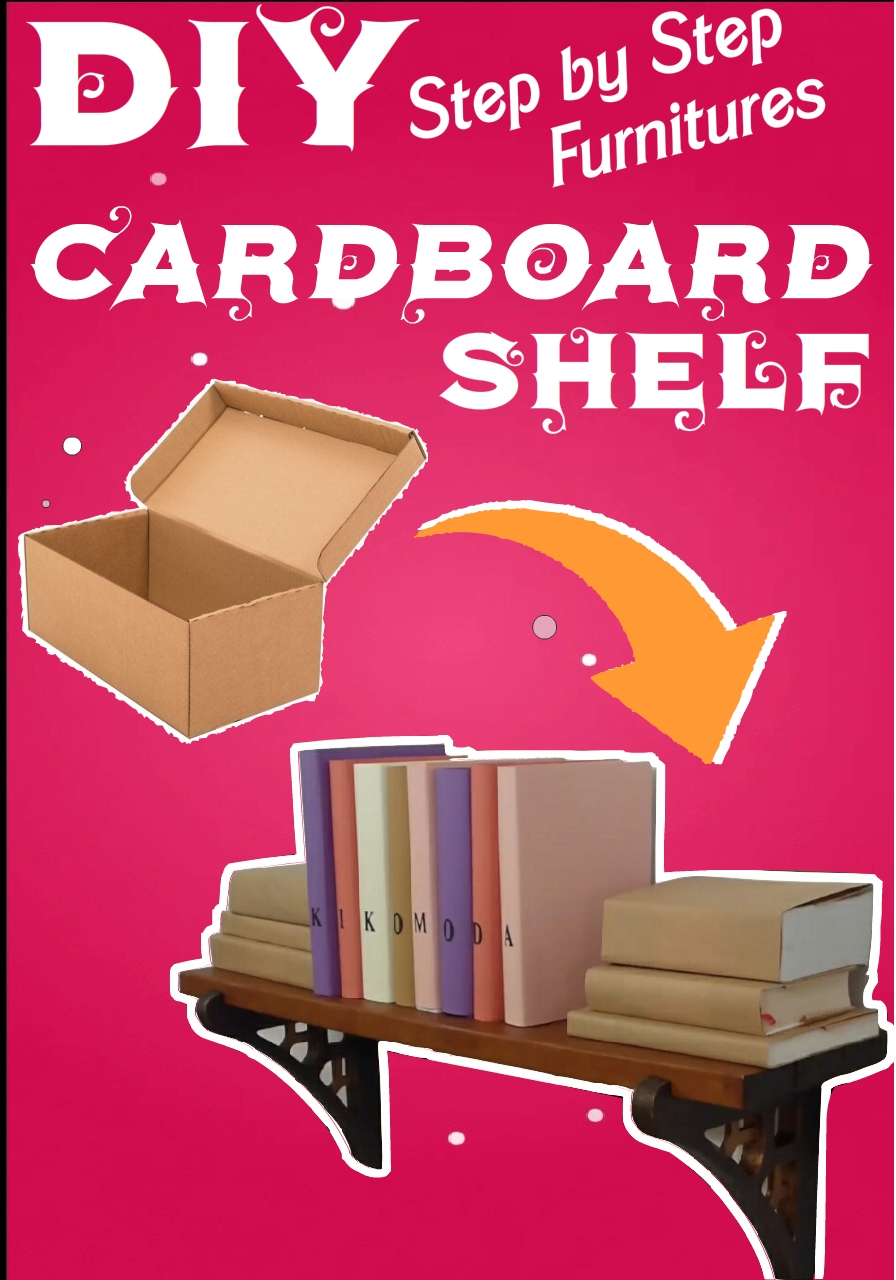
Using cardboard to make this type of art project is most inspiring, as they are easy to access from our storage anytime and extremely adaptable for crafting any shape or item, apart from the low-cost quality.
So, here we go with a brilliantly useful DIY cardboard shelf project for you which will escalate the whole look of your room with its classy resembles. This self is challenging and could be made in the quickest as well as the easiest way with the proper processing, take a quick look on the preparing method below and treat your house with your crafting quality for one more time-
Supplies You Need:
- Art paper
- Pen or deep markers
- Craft knife
- Scale
- 4-5 large Hard cardboard piece
- 2 small wooden clumps
- 2 metallic or steel clumps
- Screws
- Some nails
- Glue
- Wrapping paper
- Paint
- Paintbrush
- Some paper Mache
- And a drill machine
How to Prepare:

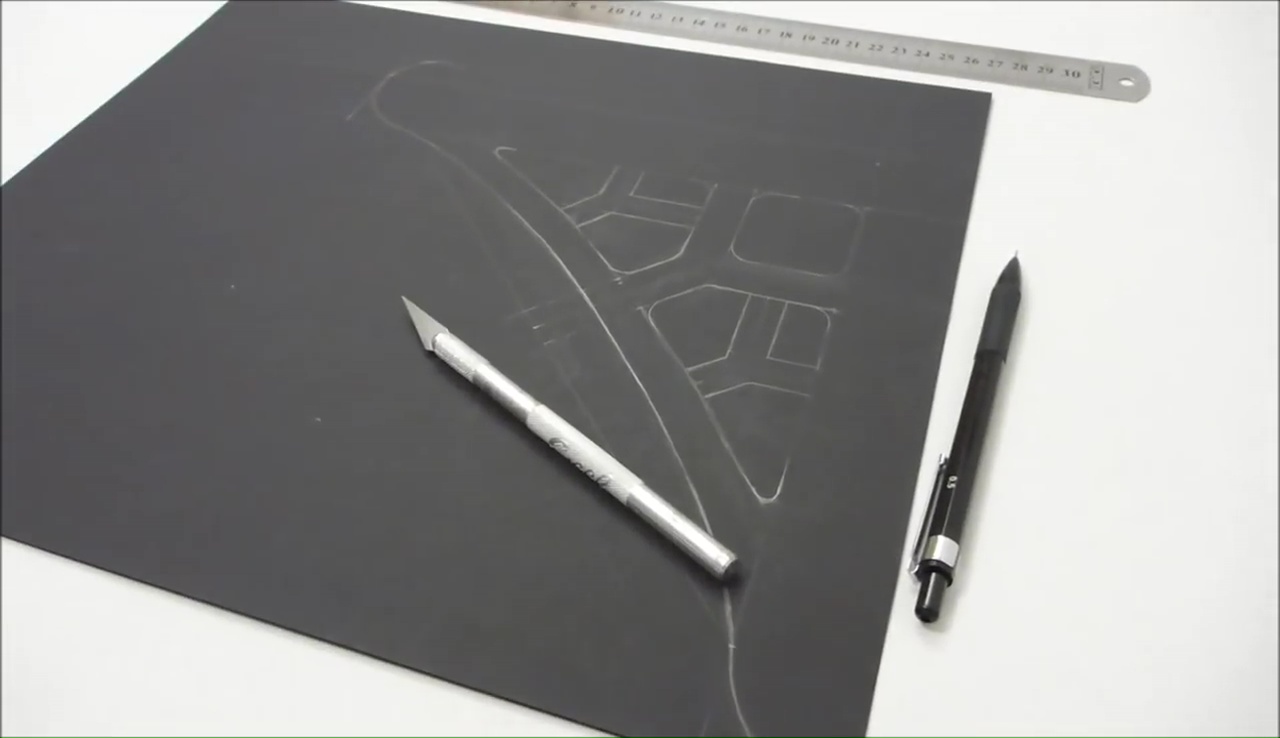
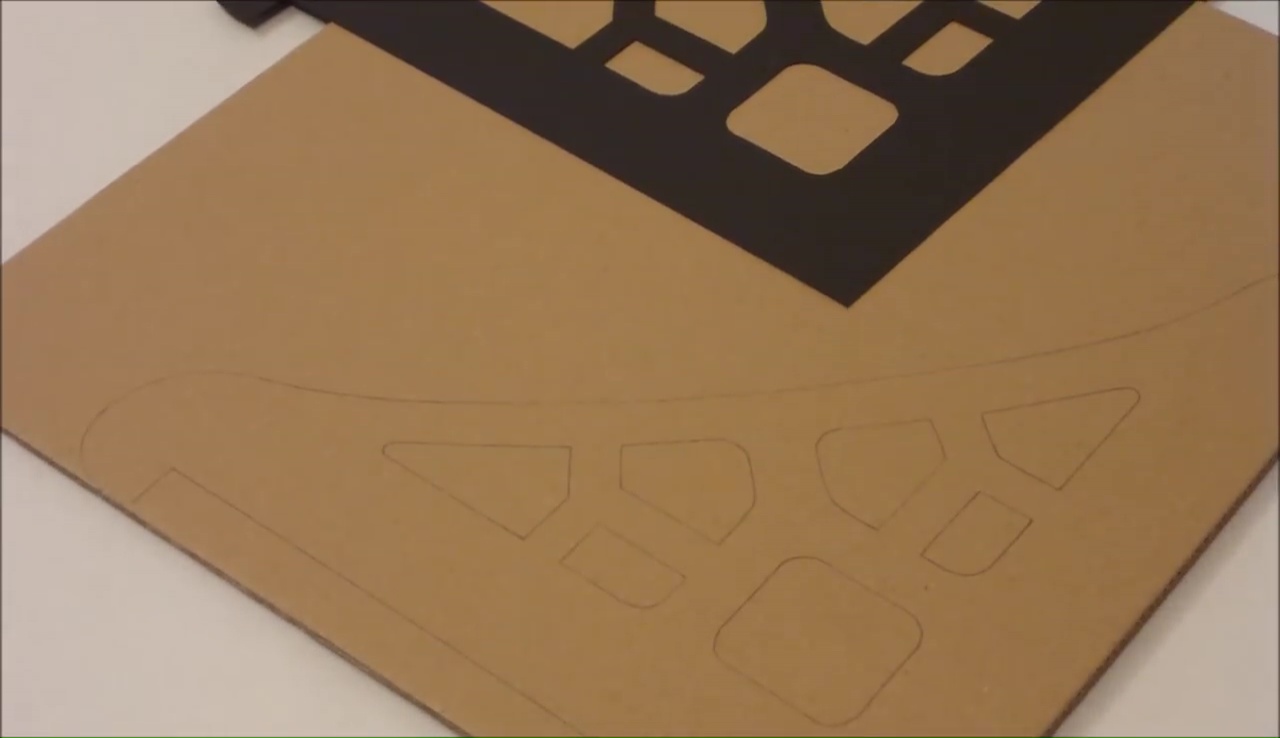


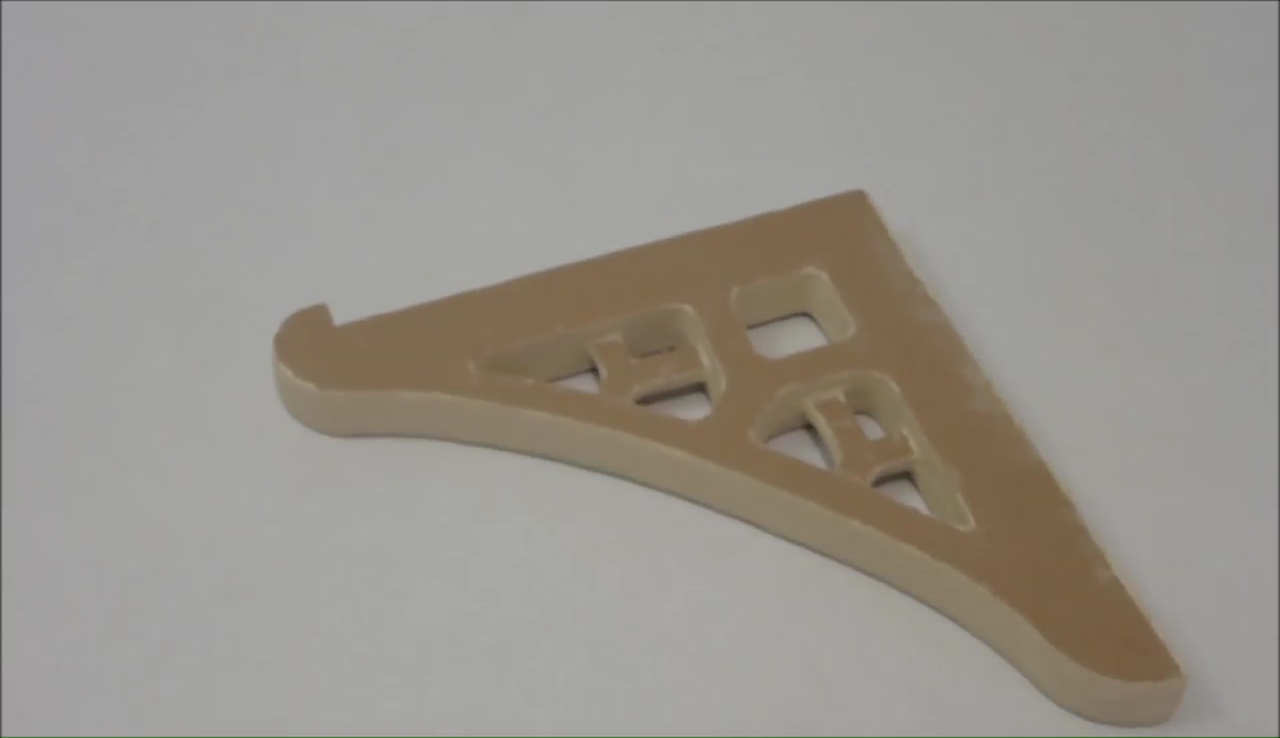


- At first, draw a nice design of shelf-stand on an art paper with a dark marker and cut the design out perfectly with a sharp craft knife
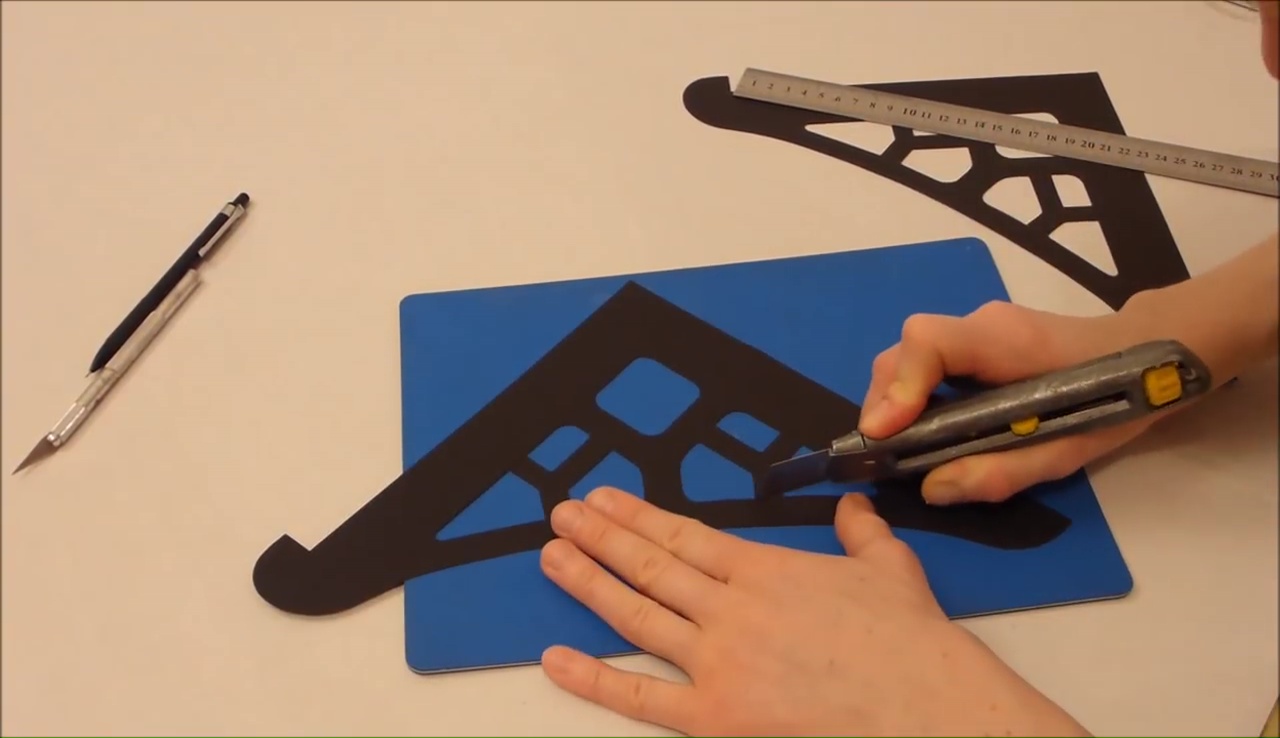
- Now, cut out a small square from a large cardboard piece and take the shape of that paper design on it
- Cut the design out from that cardboard piece after taking the perfect proportions of that design and set it aside
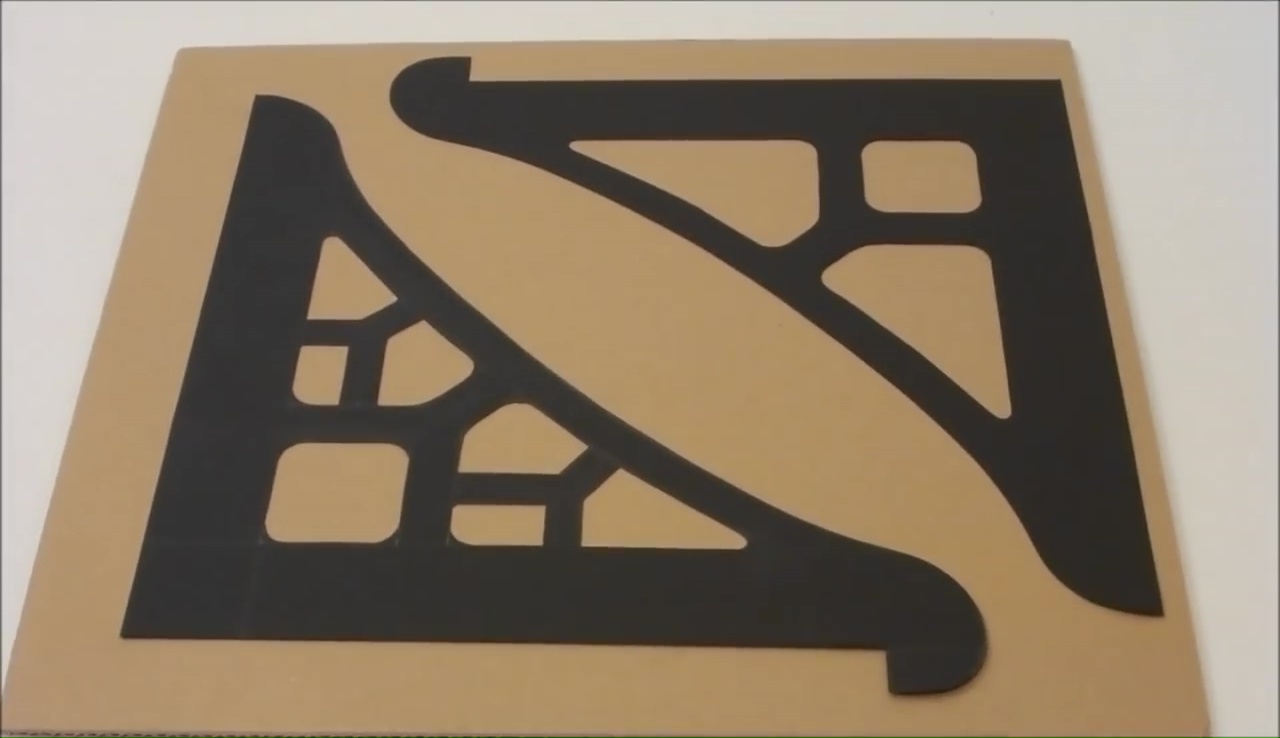
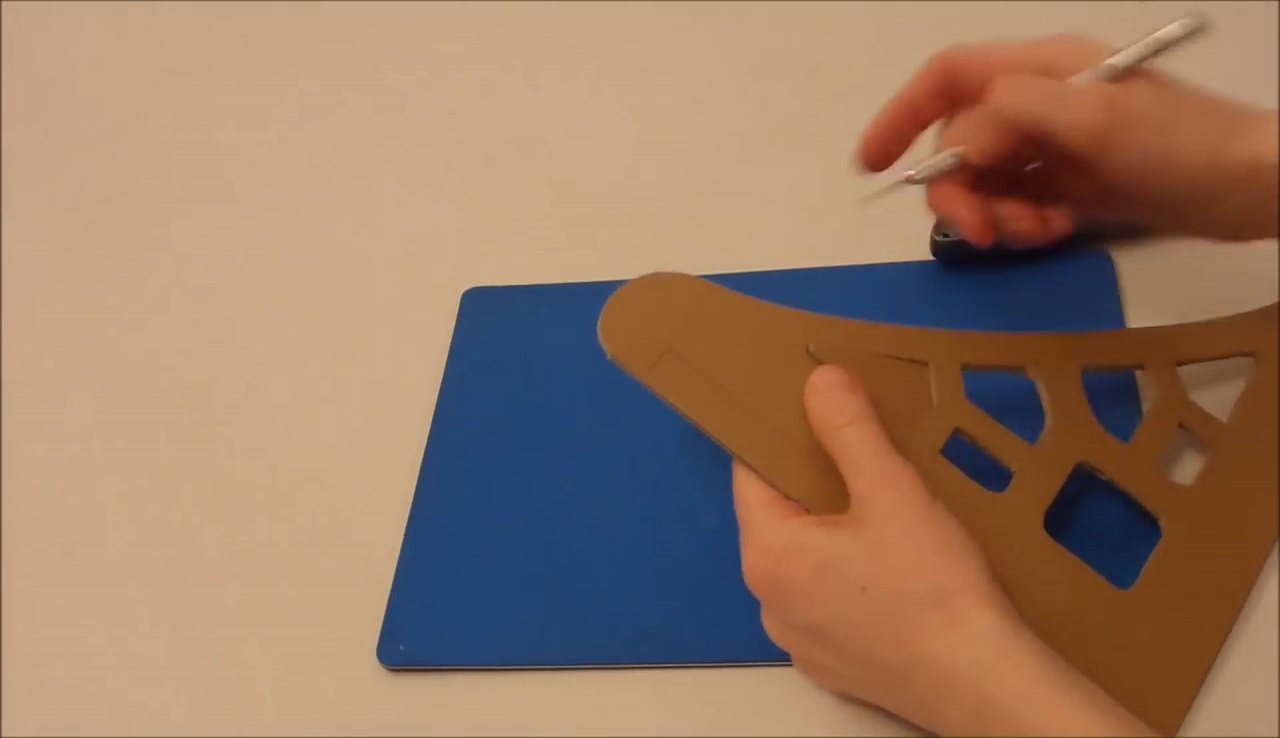
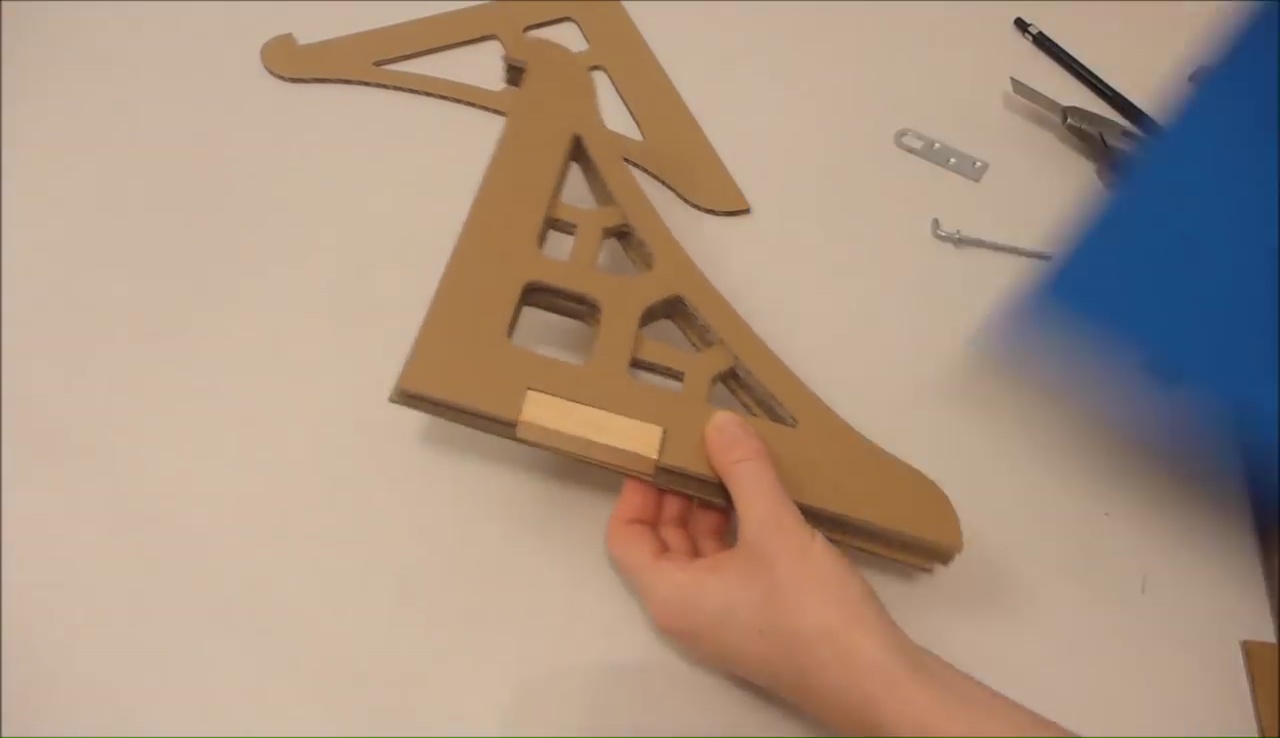
- Now, set that cardboard design on the cardboard base and cut out at least 10-12 pieces with the same design, if the cardboard is ¼ inches thick
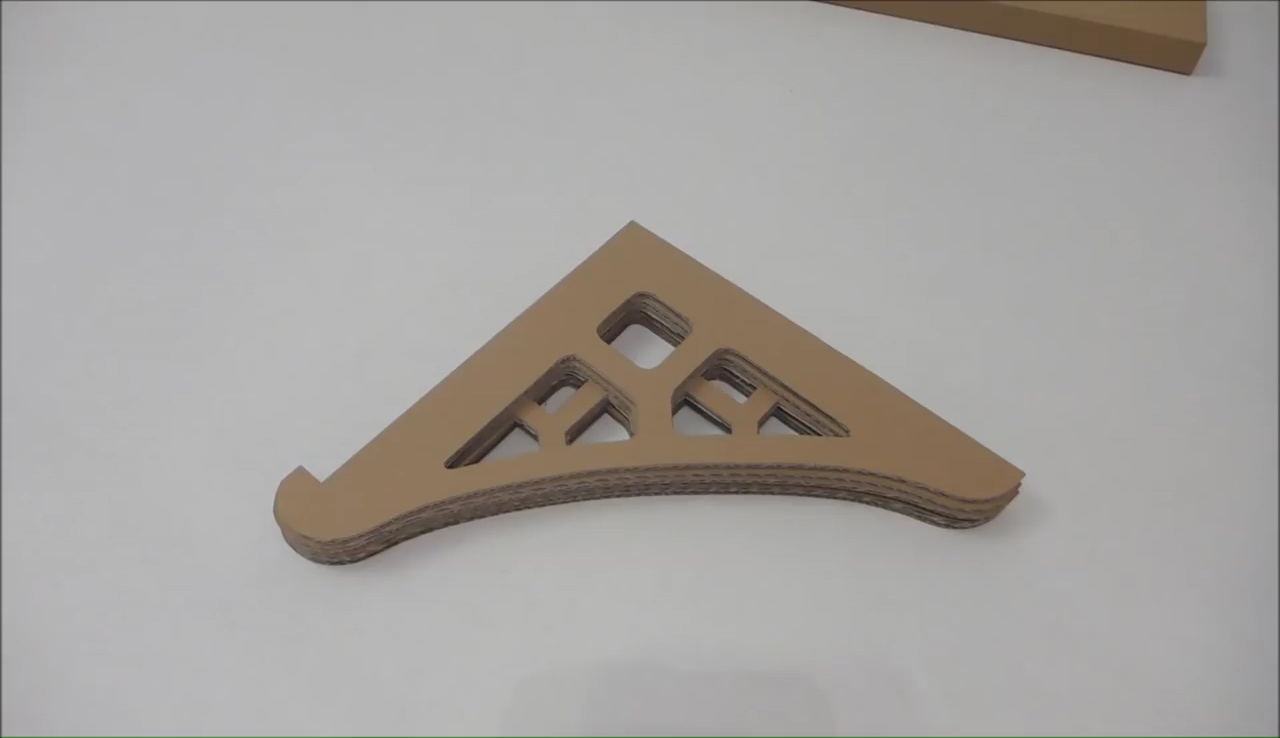
- After cutting the all shelf-stand design pieces this way, place them jointly to see that whether all the pieces are exact in shape and size or not, as you have to make each piece with the same design and size
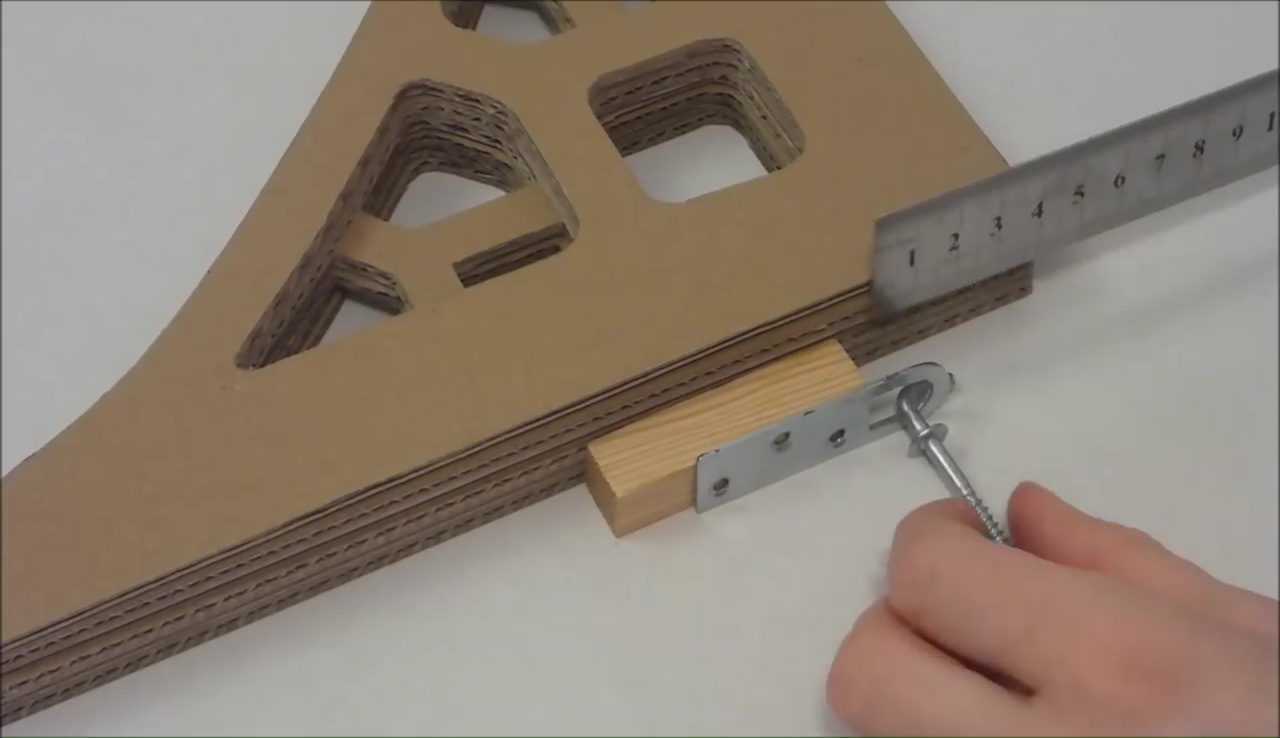
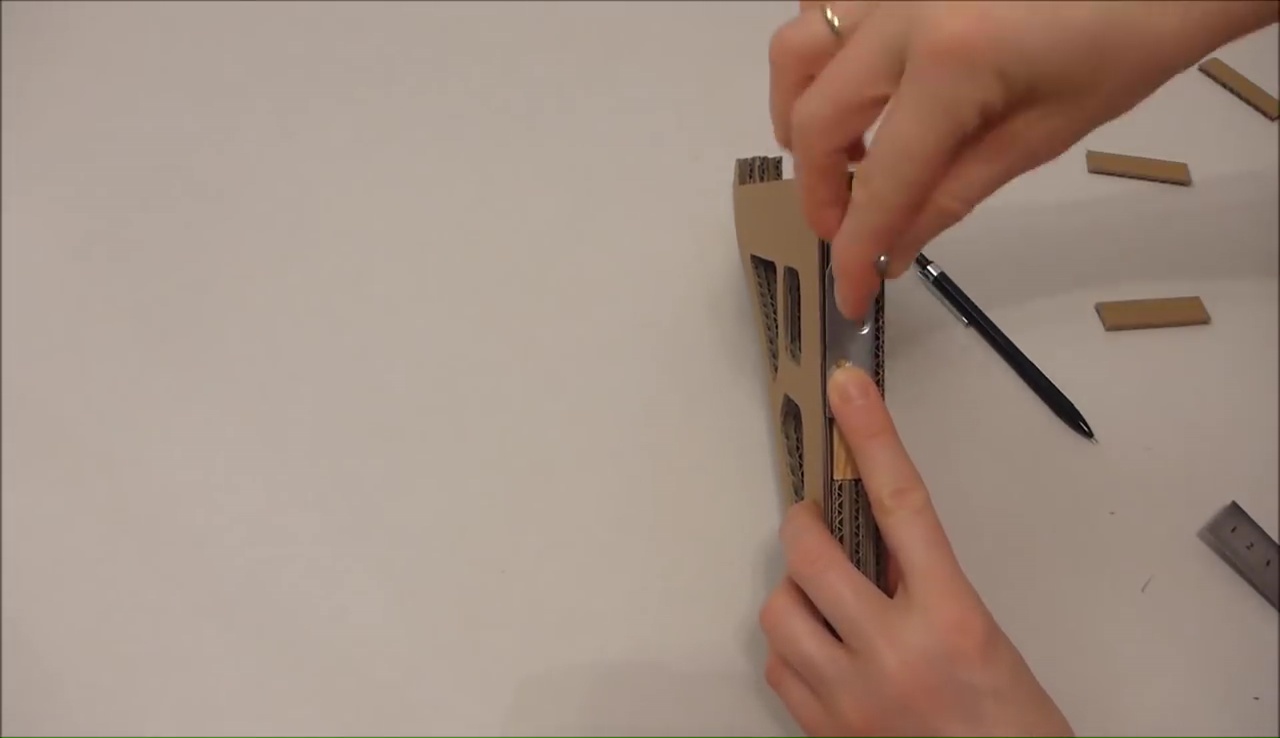
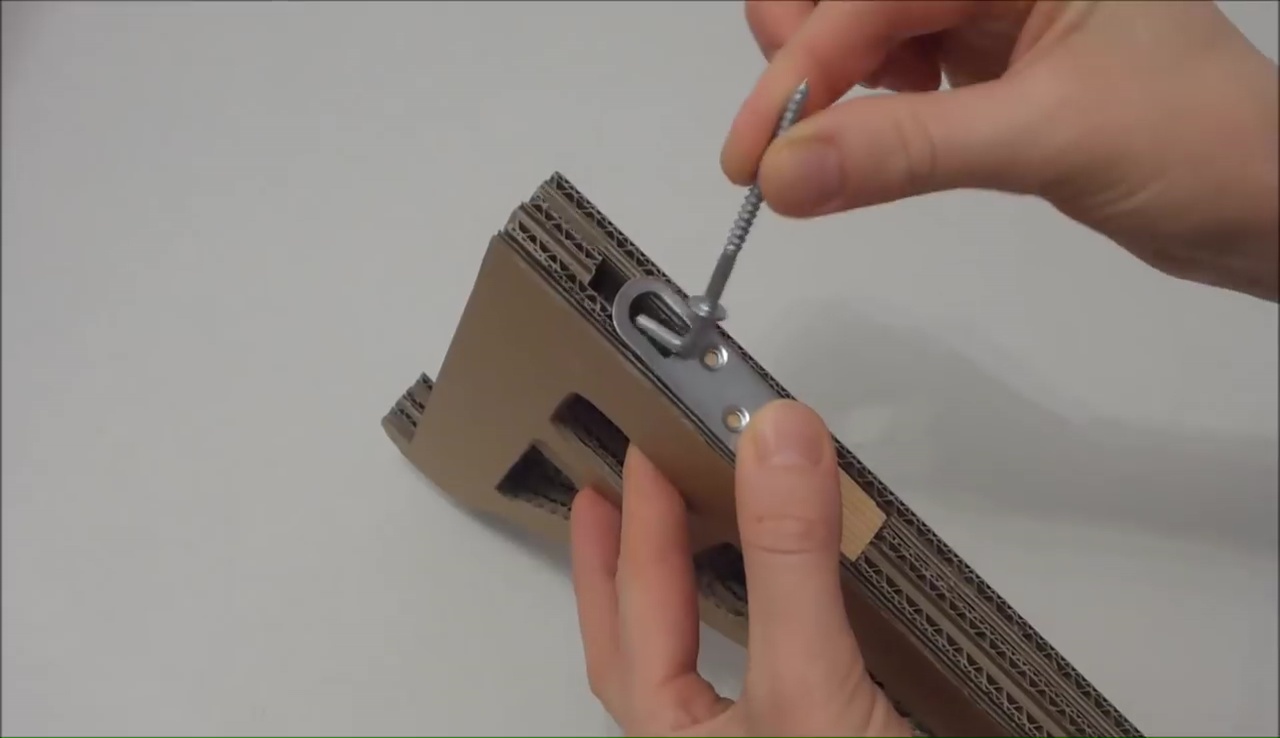
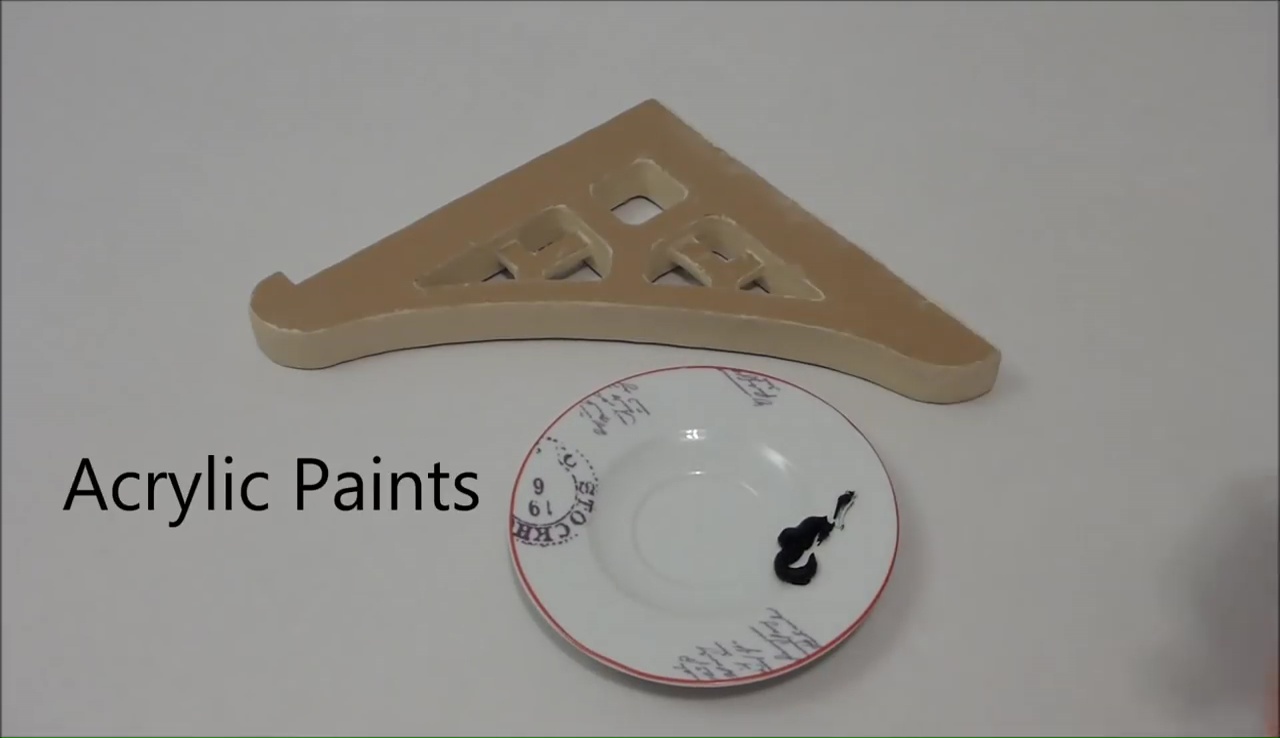
- When you get this perfectly, bring 2 pieces of wooden clumps with the same size along with 2 steel clumps and two nails with twisted heads
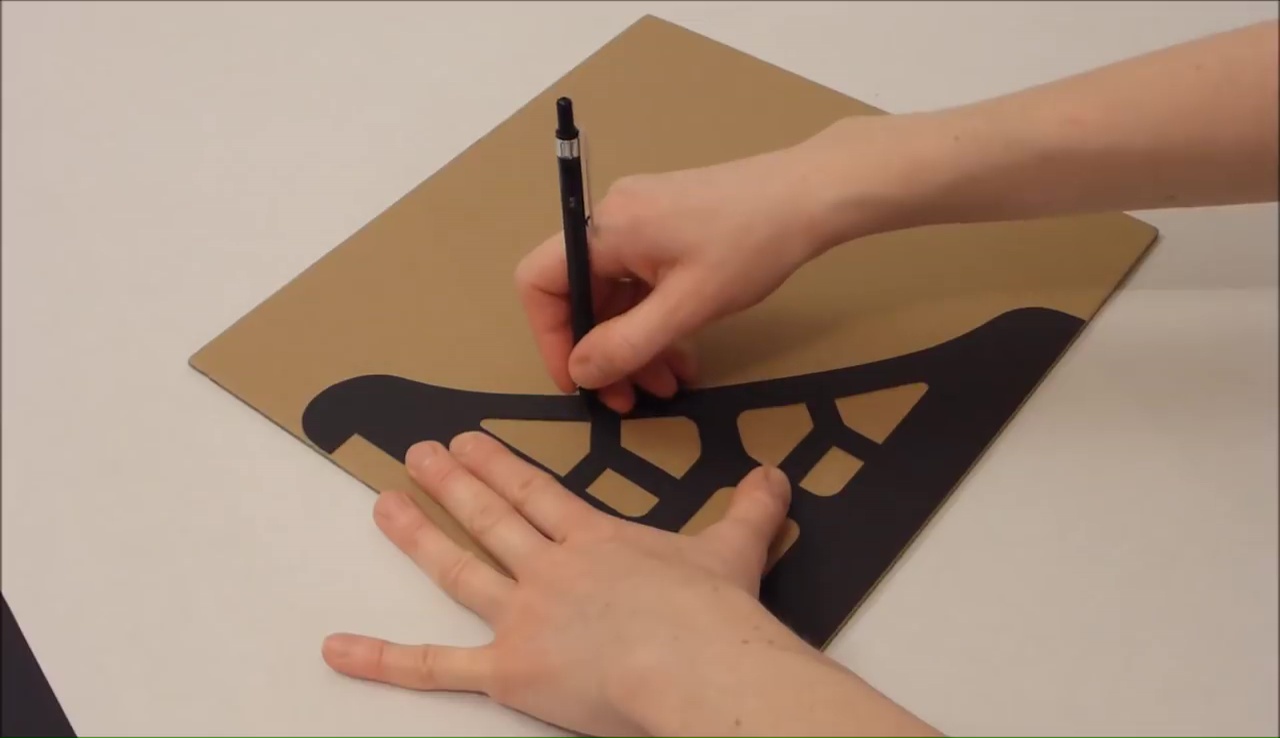
- Separate the cardboard designs and take the size of one of those wooden clumps on the cardboard pieces with a marker
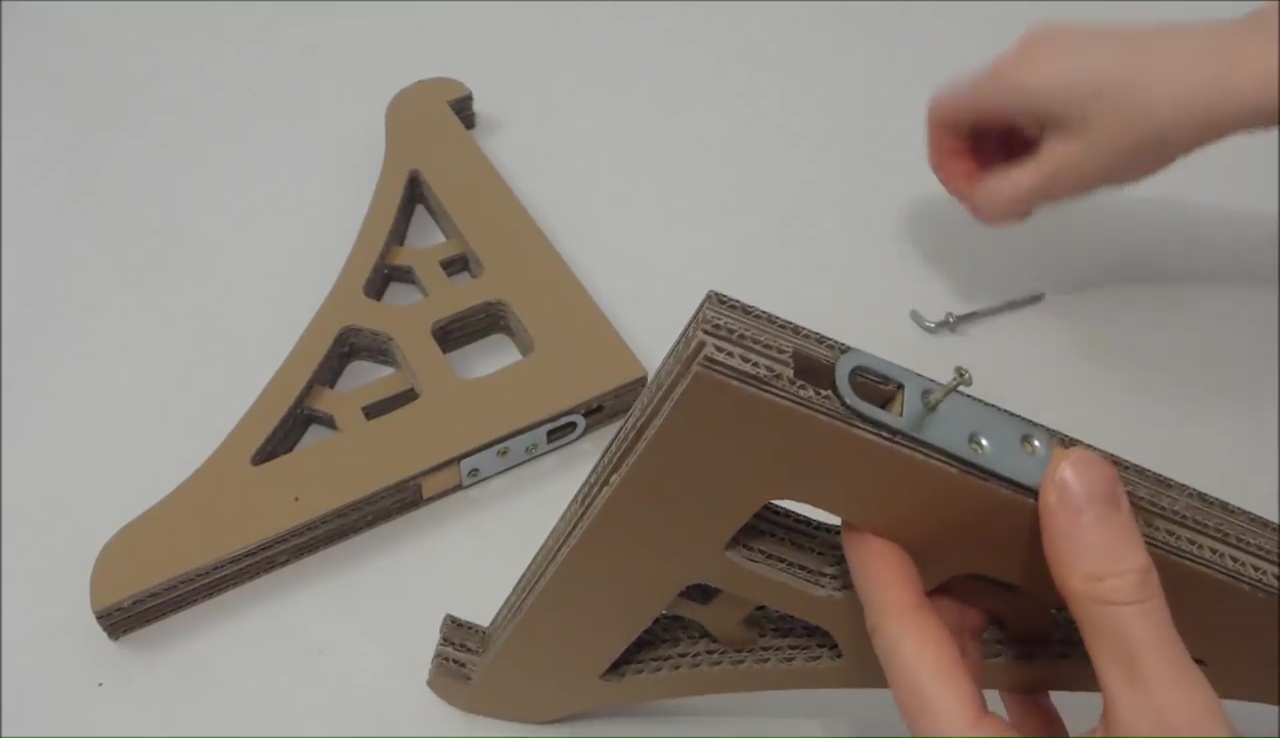
- Leave 4 cardboard designs here, take the size on the rest pieces cut that portion carefully with a knife, so then, when your set all the piece together, the wooden clump could fit into that gap appropriately
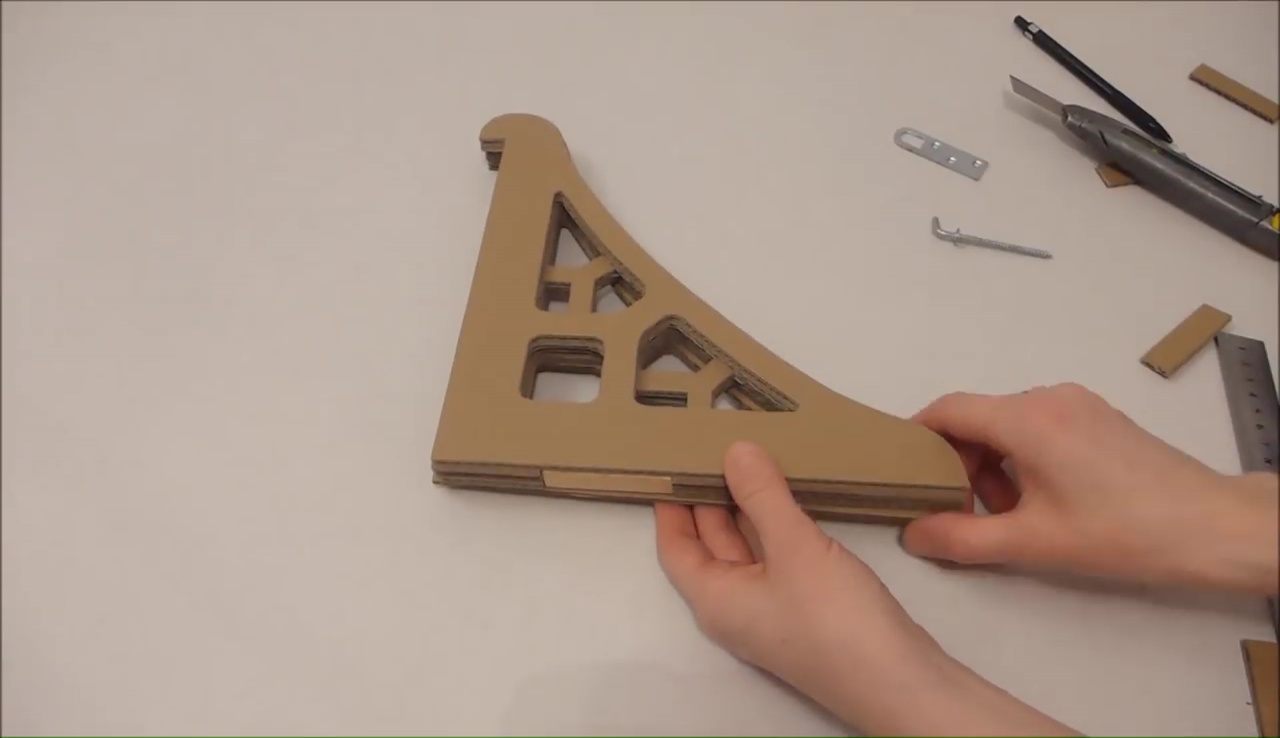
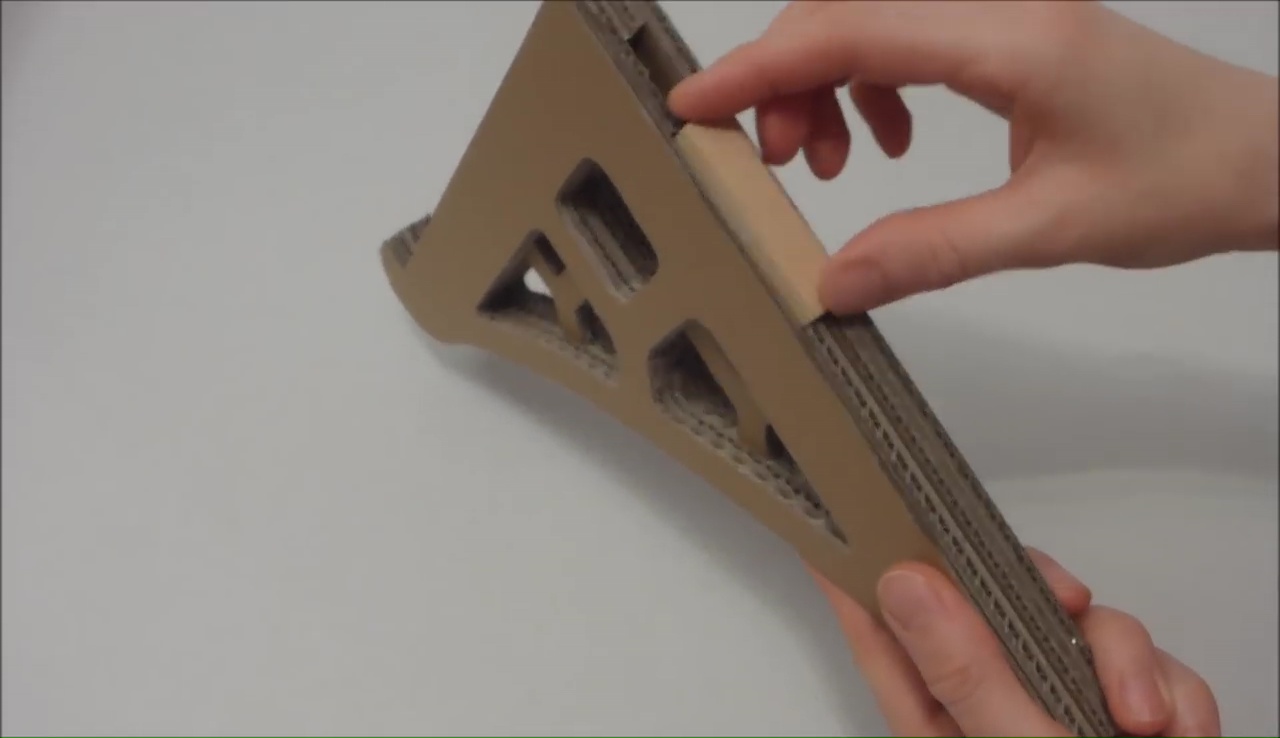
- The 4 pieces, which you leave from taking the shape of those designs, will cover up both sides of two stands when you are going to attach them at the end
- Try to cut the cardboard designs with a little longer length than the wooden clump, so then, the empty place could offer the metallic clump enough space to fit in
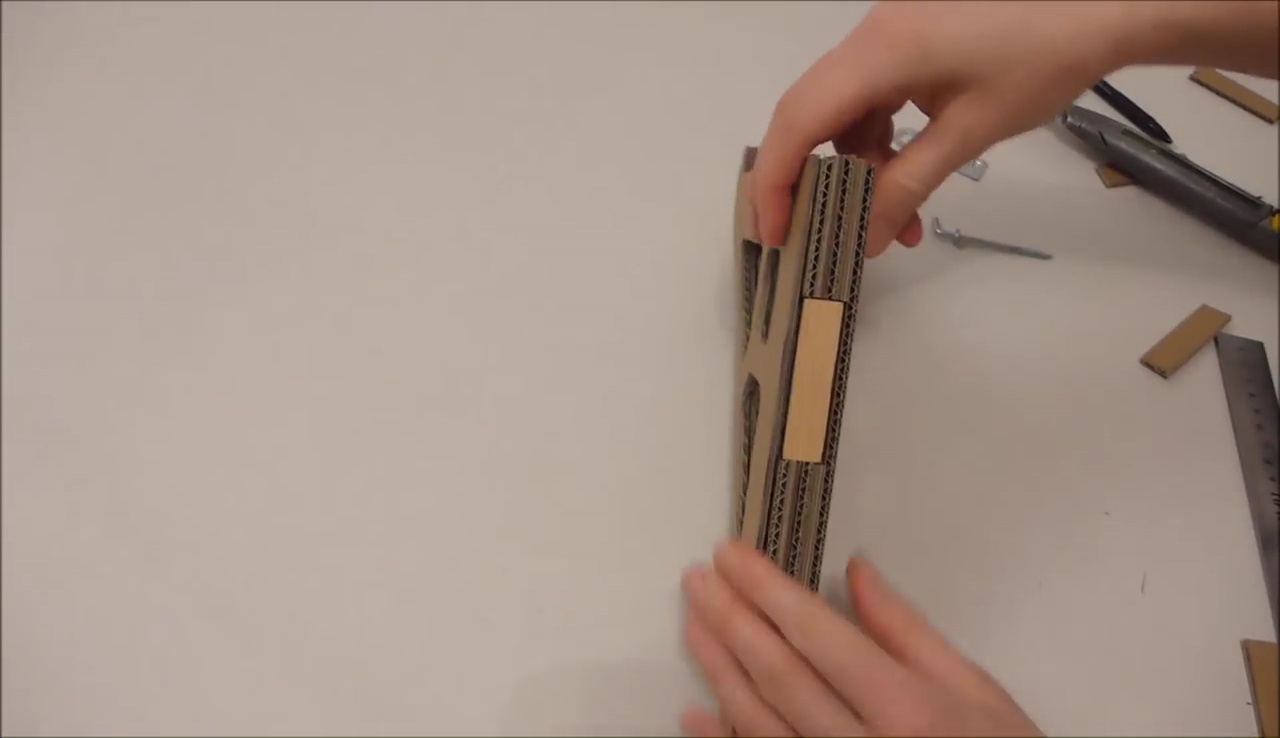
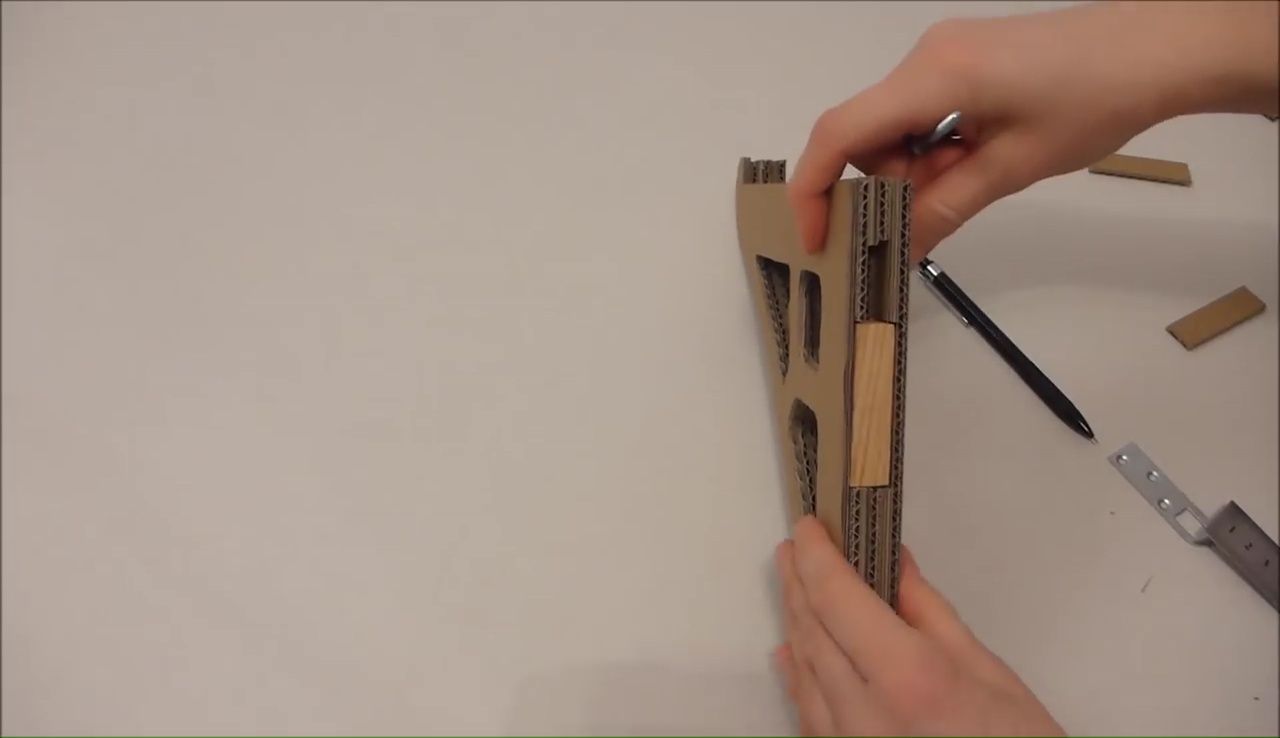
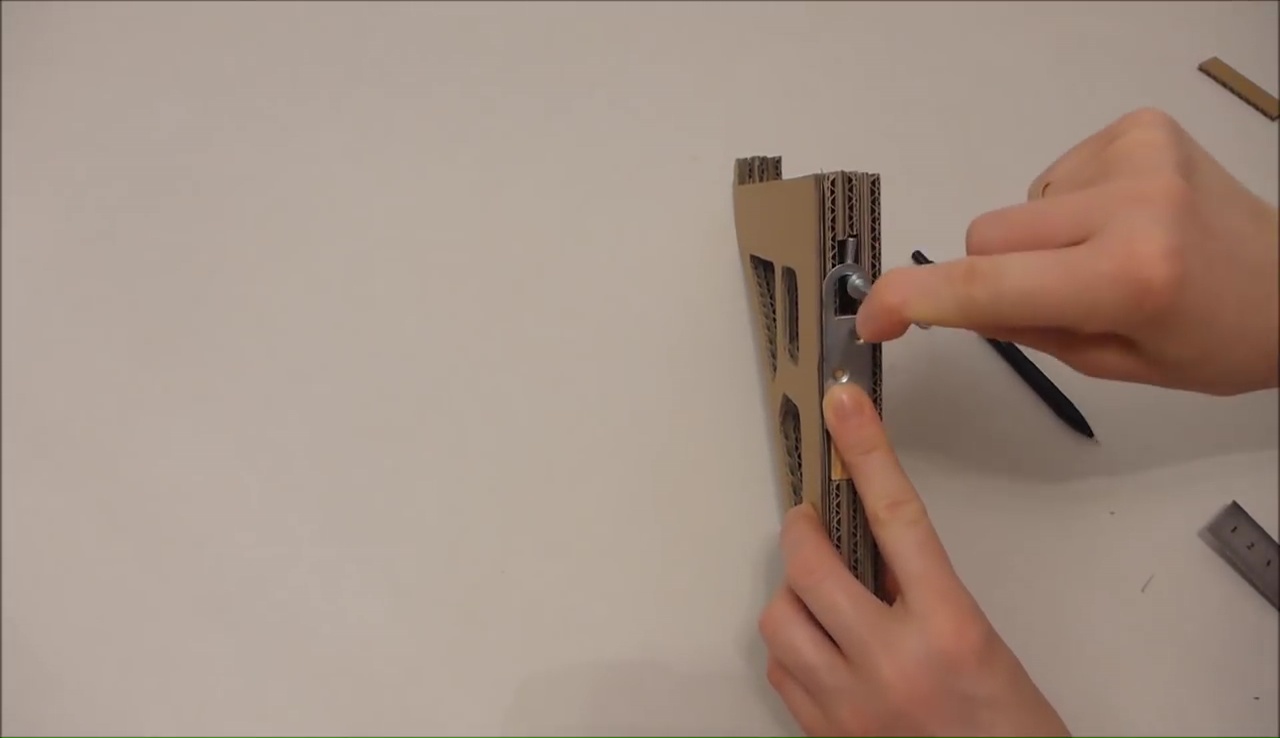
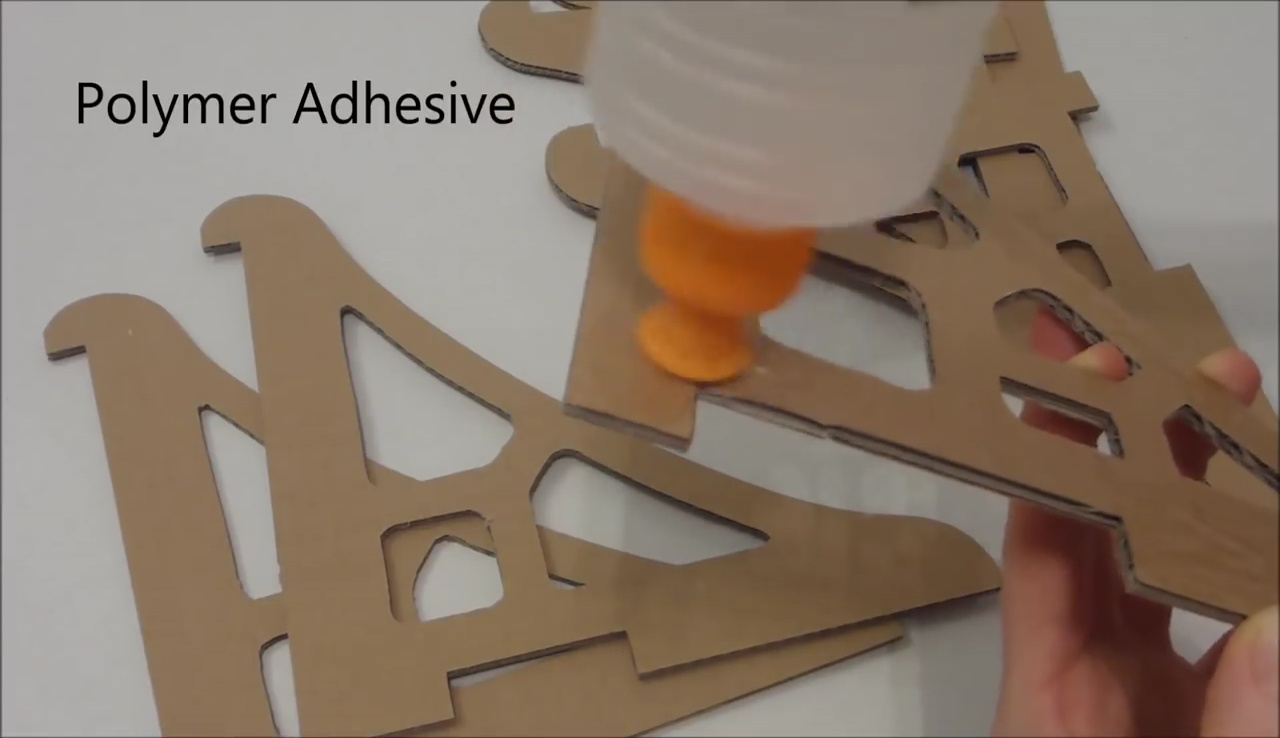
- Once you finish these entire steps appropriately, start gathering the designs along with the wooden clumps inside the gap with glue
- Set the two sides of each stand at the end and smoothen the level properly after finishing the fixing process
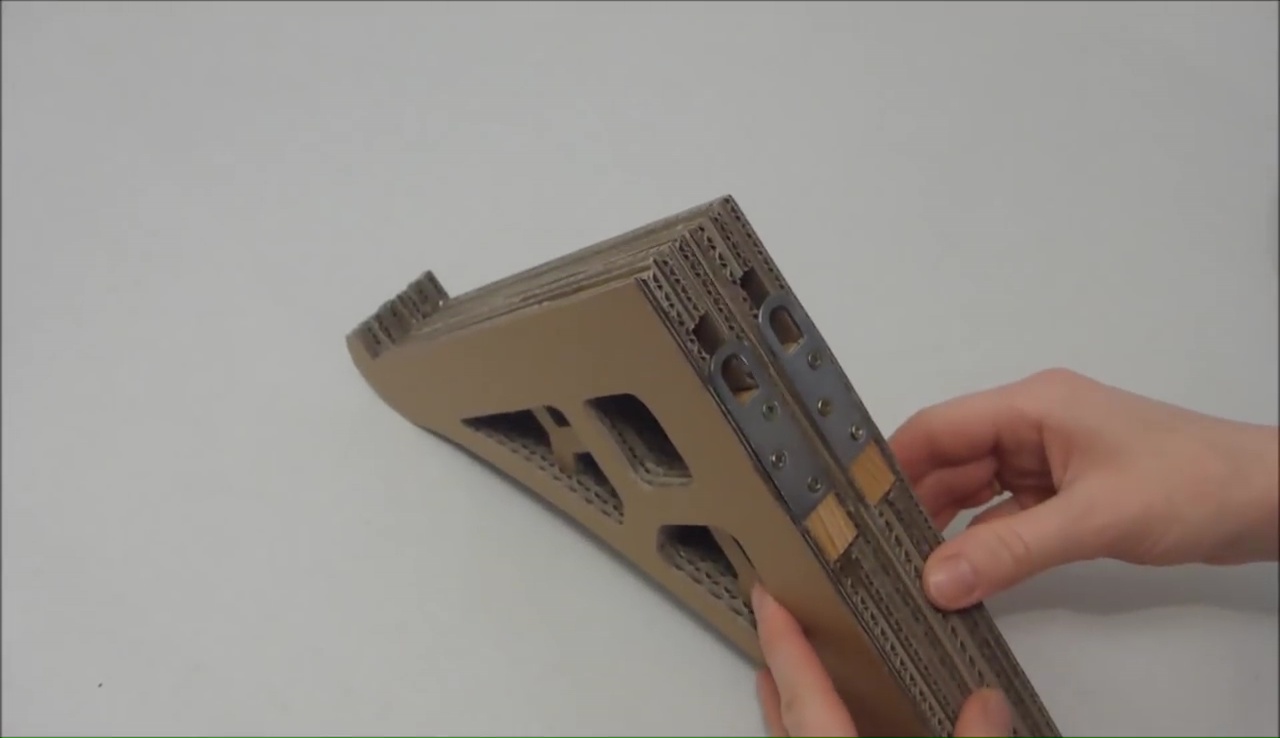
- Now, let the stands dry for a couple of hours and then set the metallic clumps on those wooden clumps tightly with the help of 2-3 screws
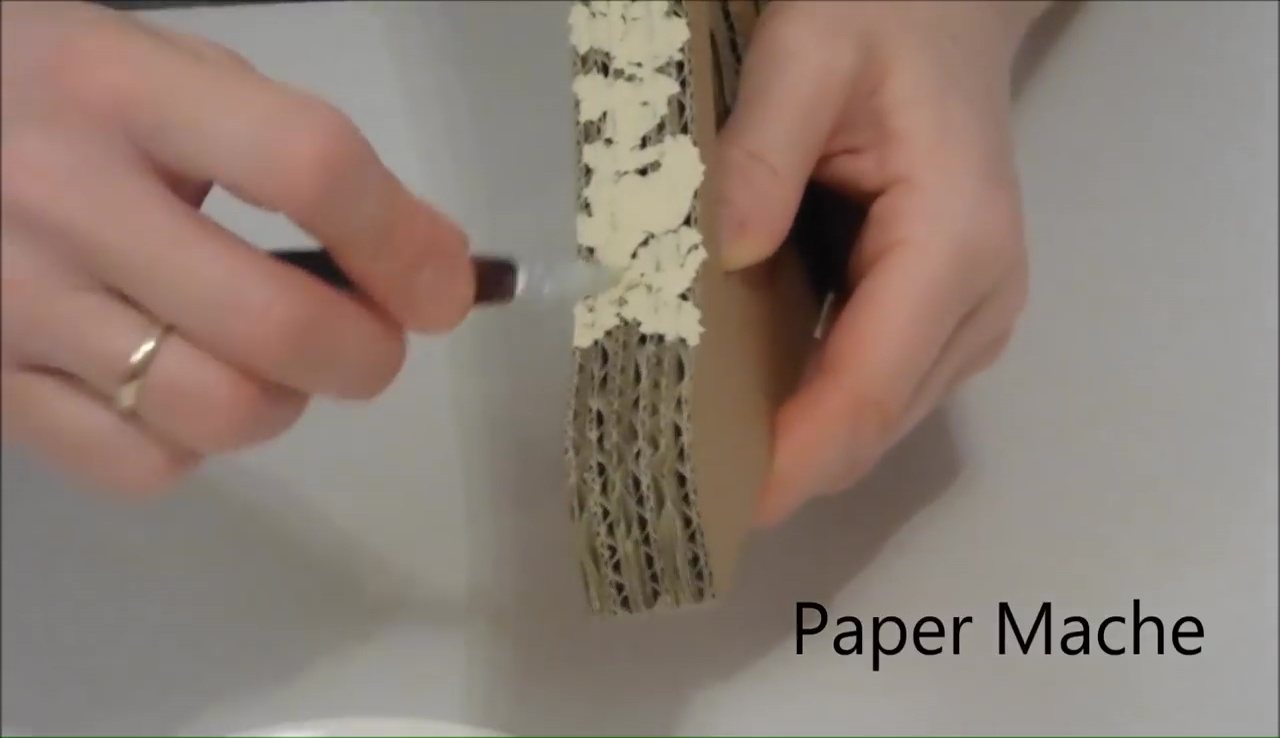
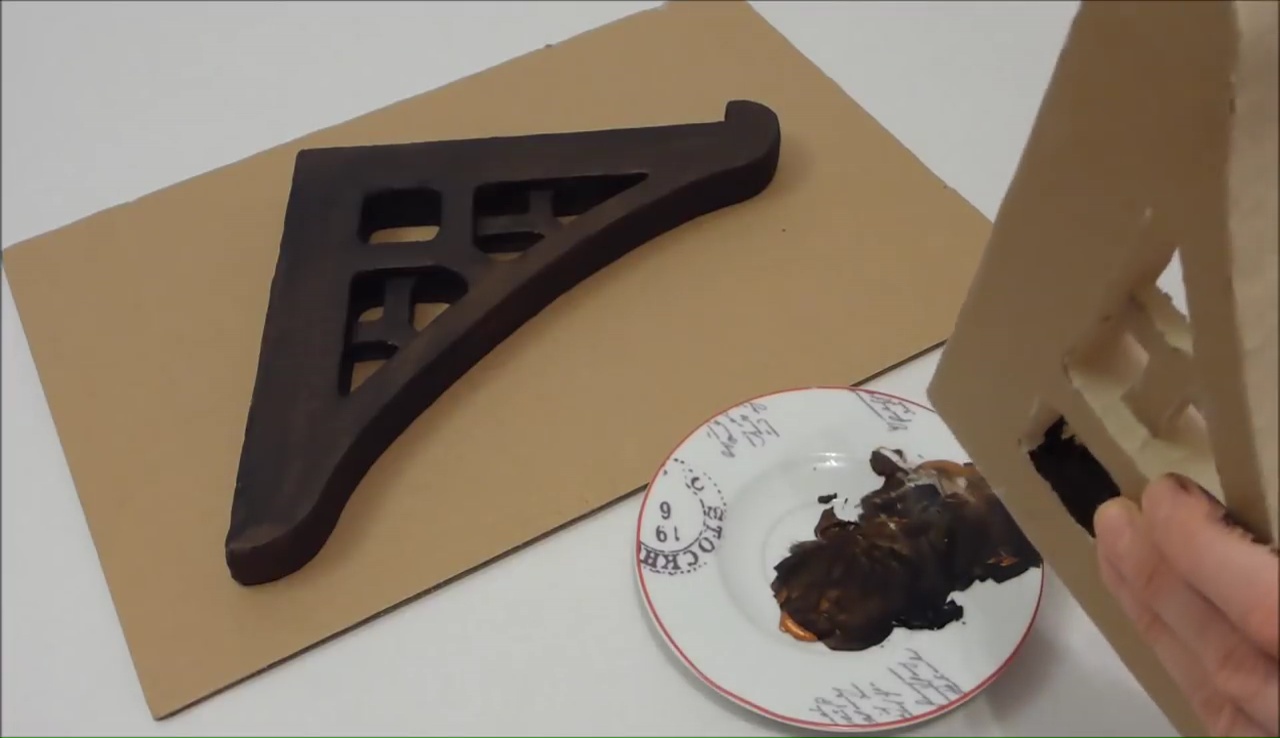
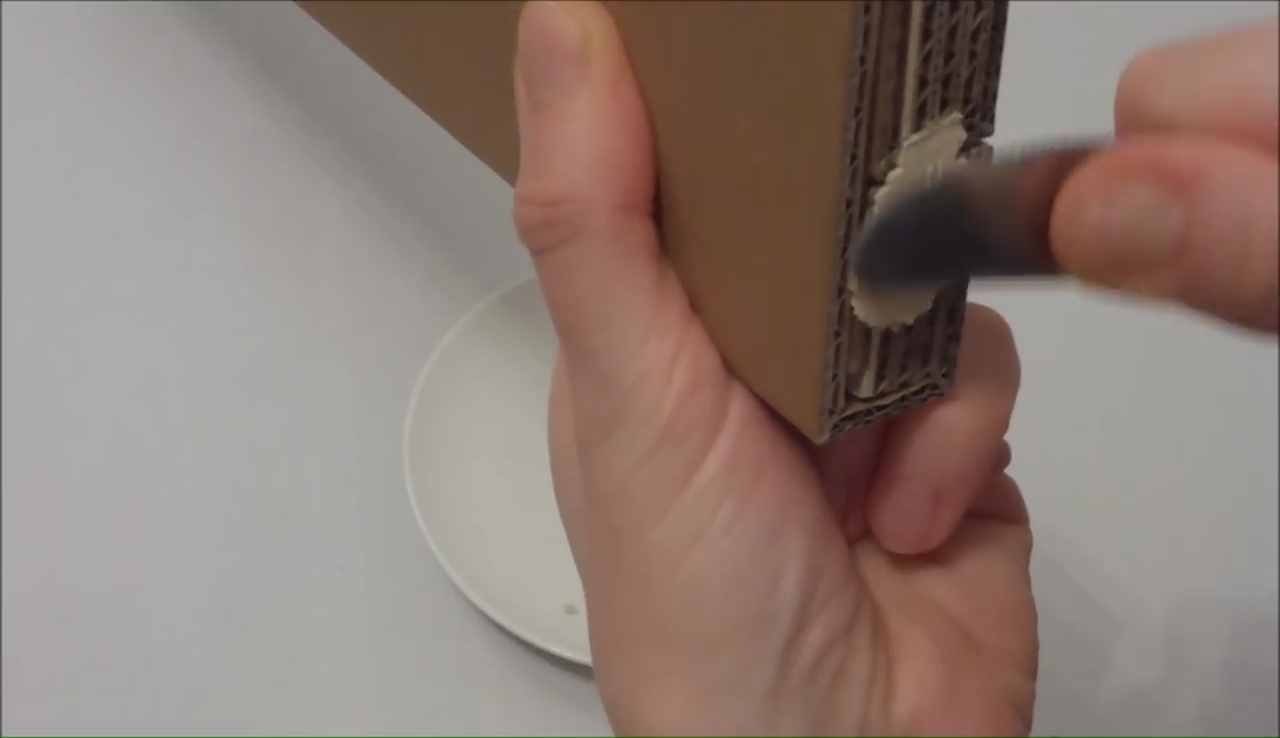
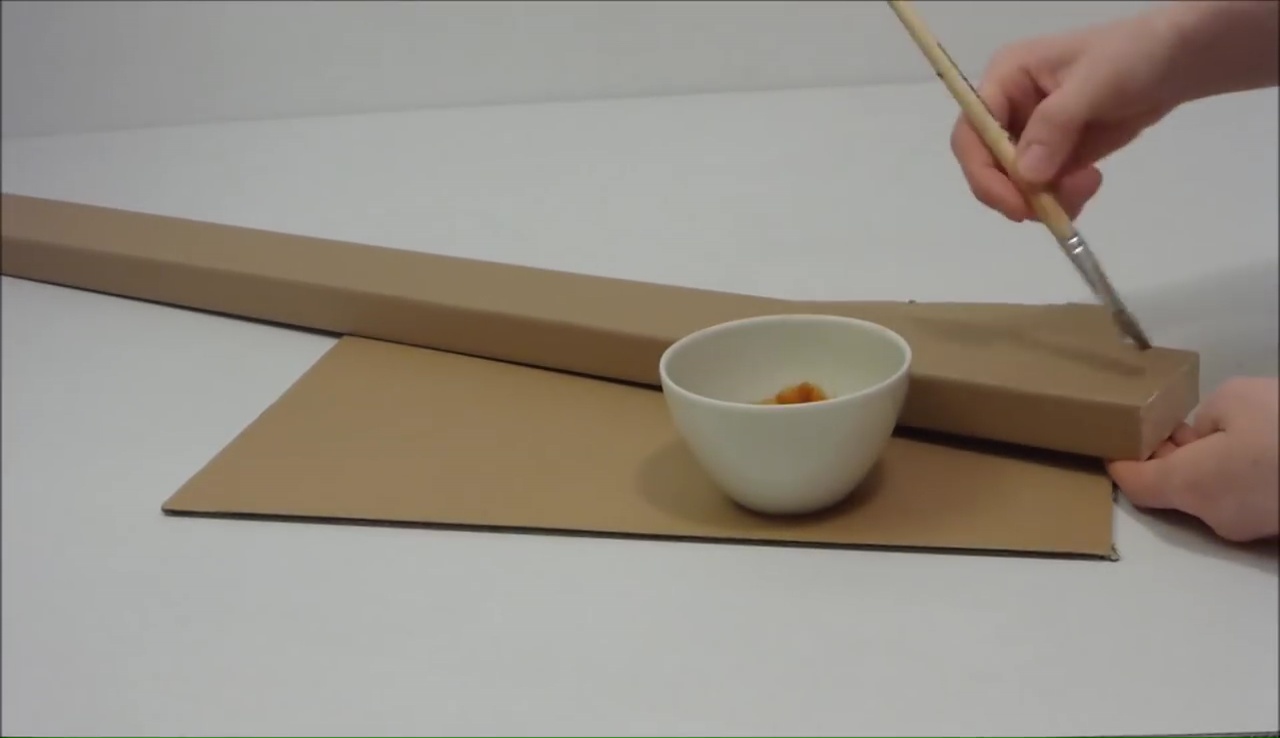
- Then, cover or seal the entire edges with the paper Mache thoroughly and smoothen the layer firmly with your fingertips
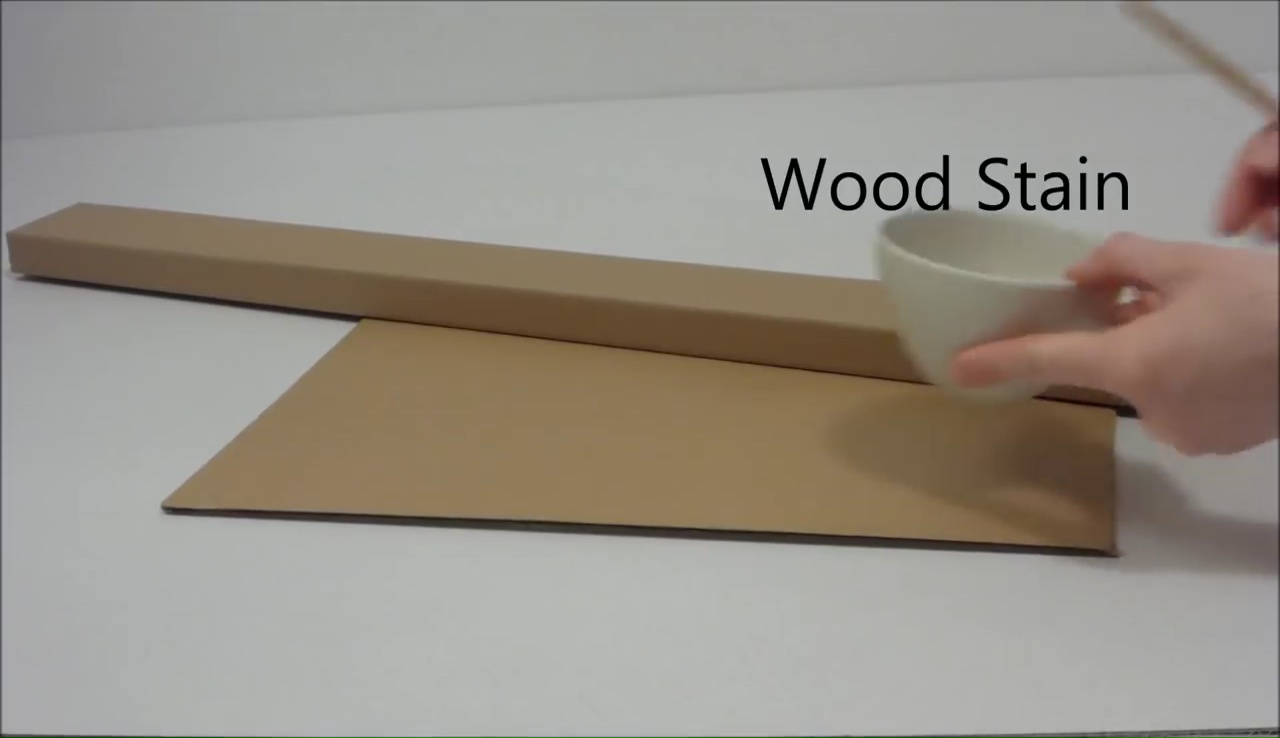
- Once you cover the open edges like this, use some brown paints and apply it on those stands with the help of a paint brush
- Let the paint dry for 2-3 hours under direct sunlight and your cardboard-made shelf stand is ready to carry the shelf appropriately
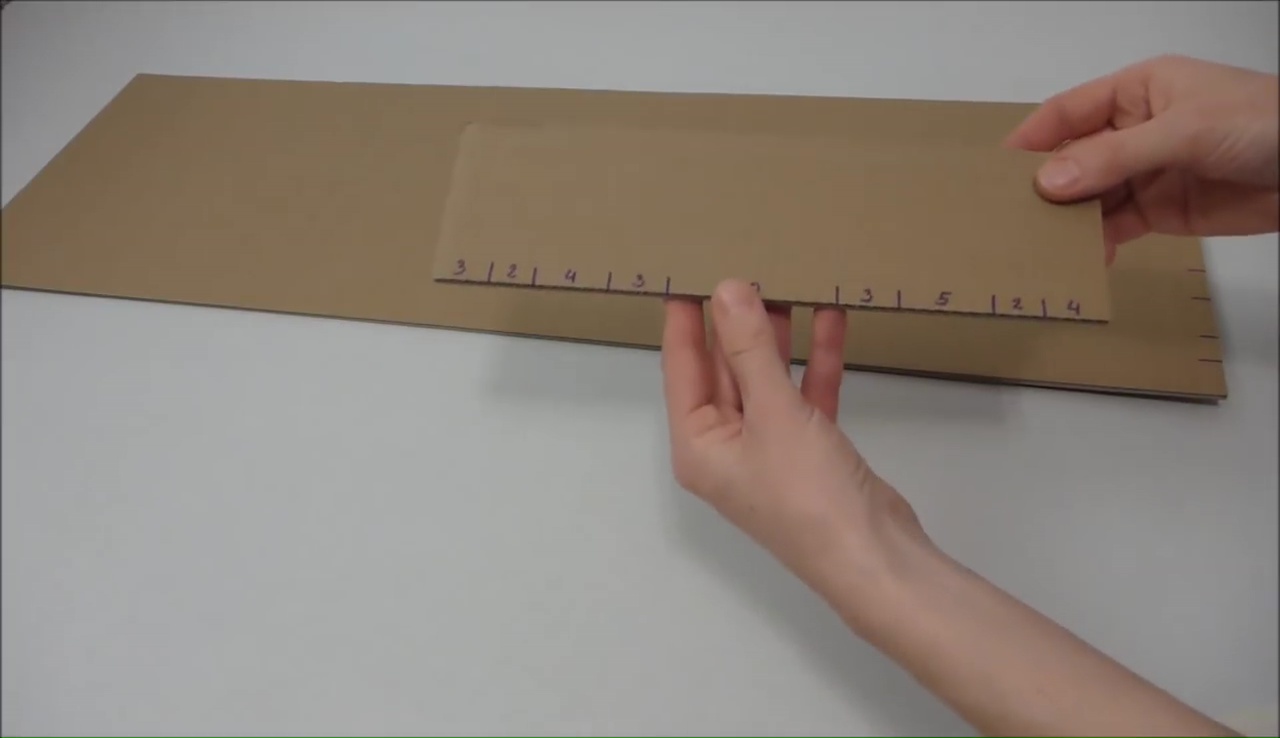
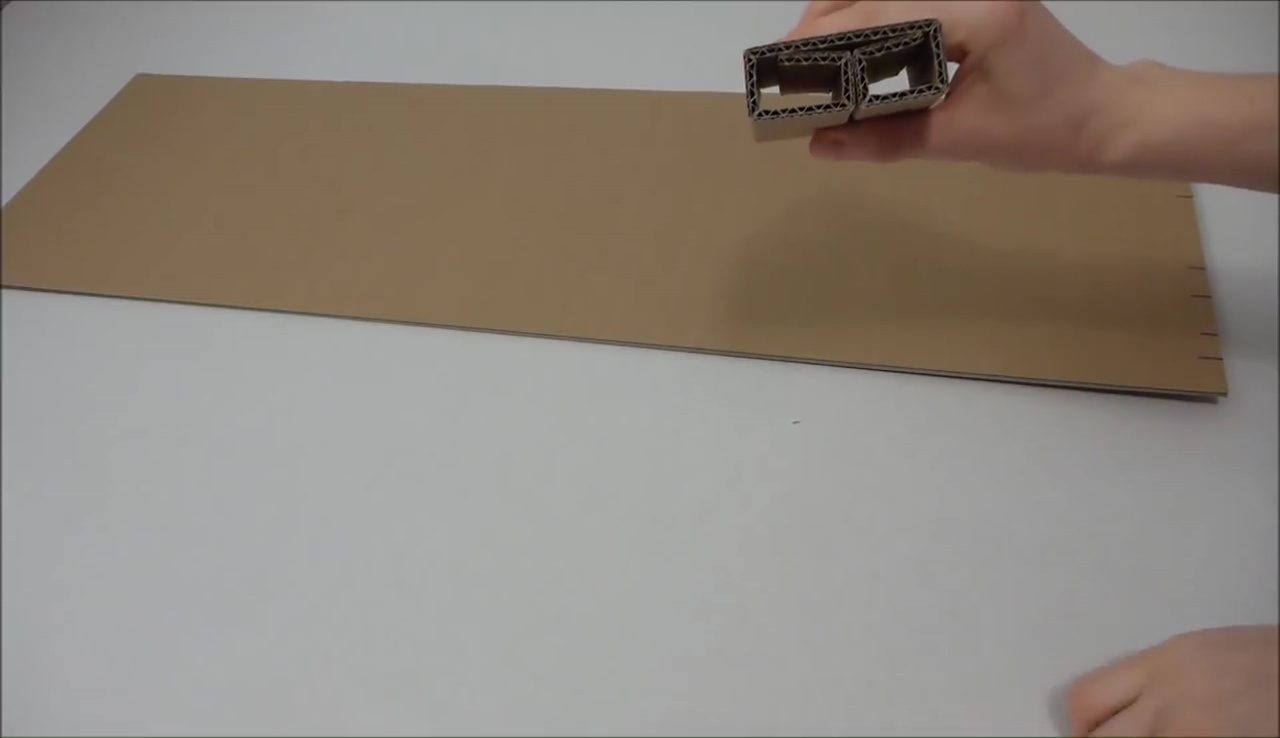
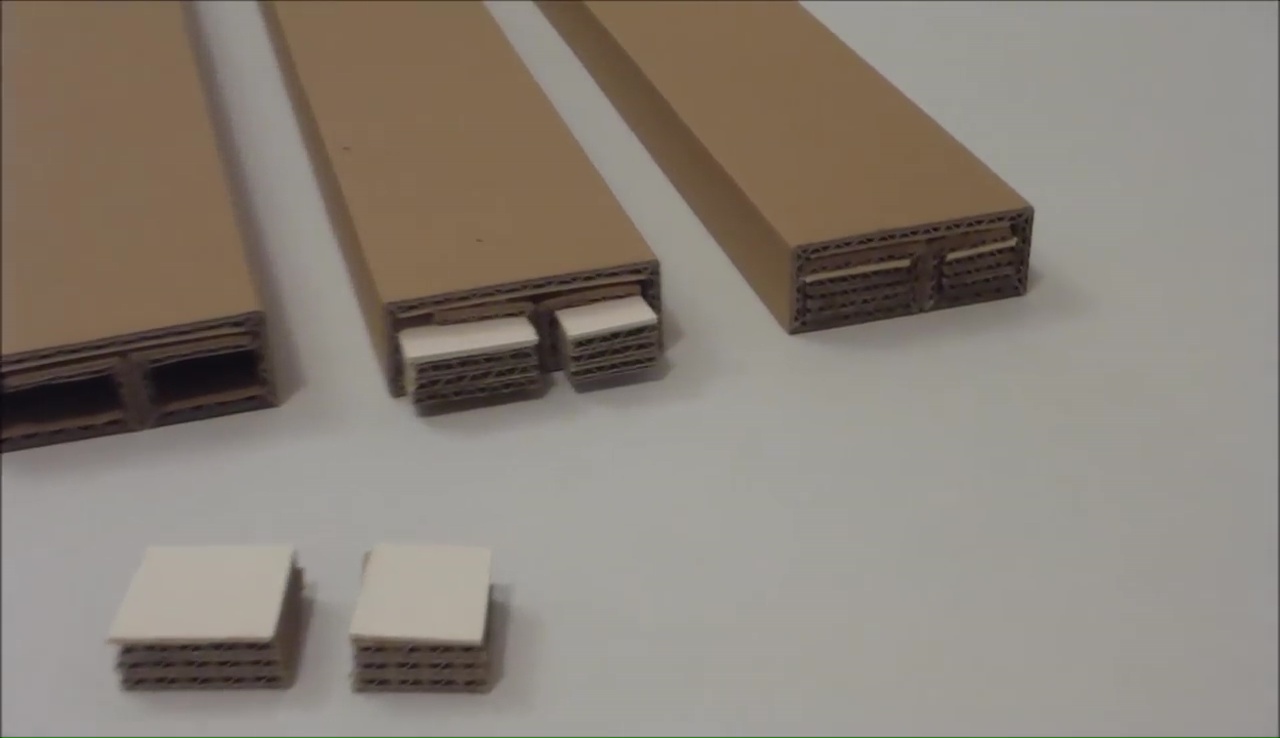
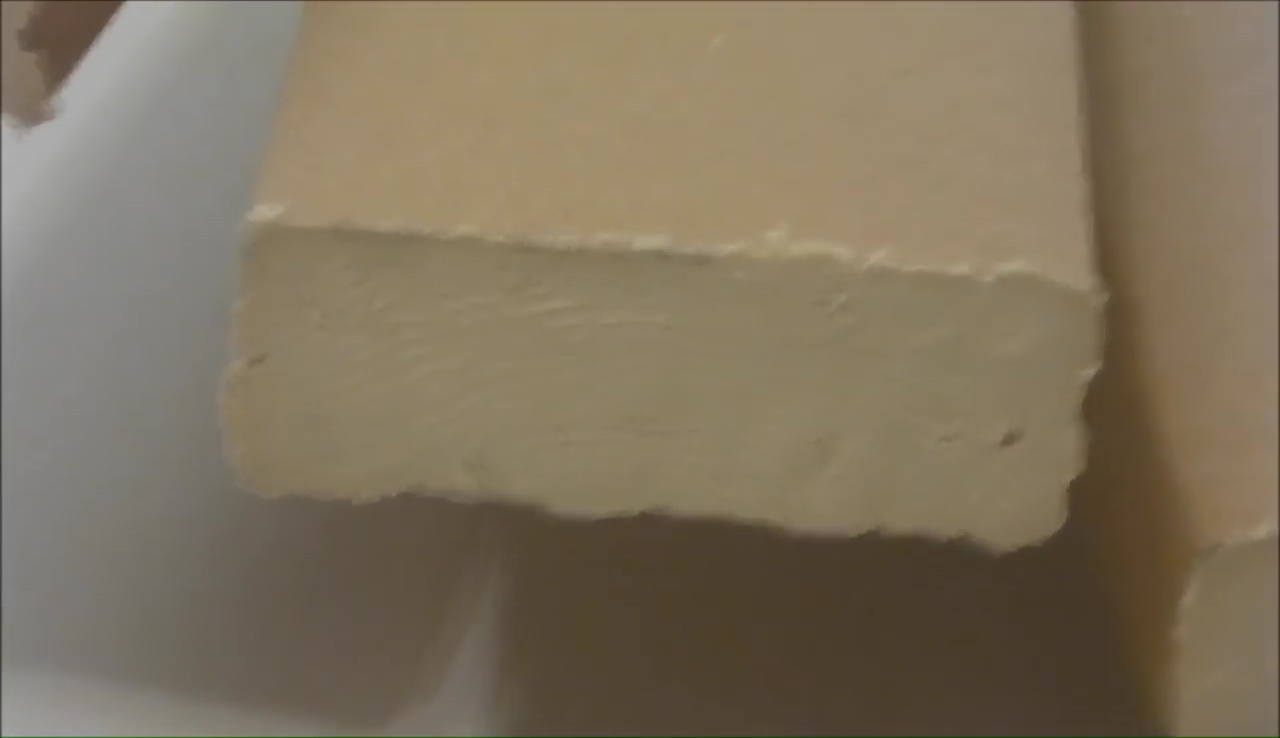
- Now, on the next stage, bring 3 large pieces of had cardboard which are at least 2-3 ft long along with 1 ft of width
- Use a scale and marker or pen to mark with proper inch-measurement on one of those pieces
- You need to point out here with the exact way what the video is demonstrating you and make sure you make the mark on breadthwise
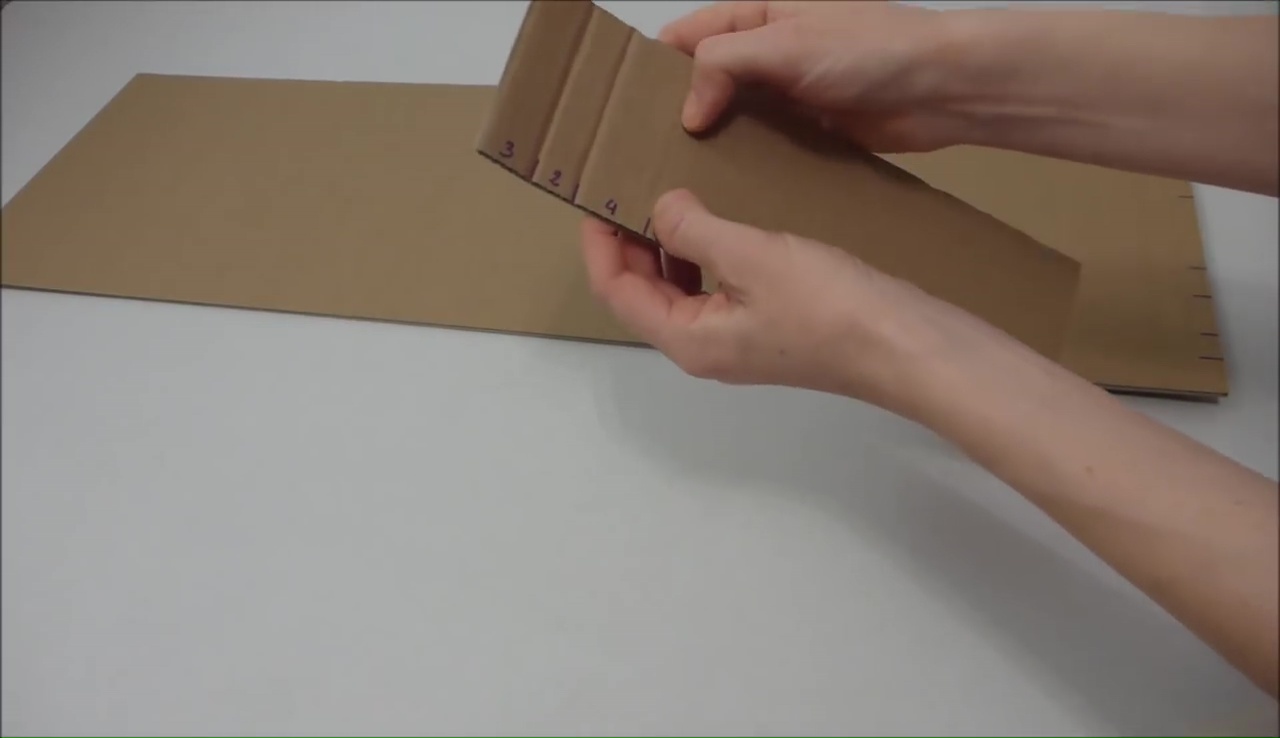
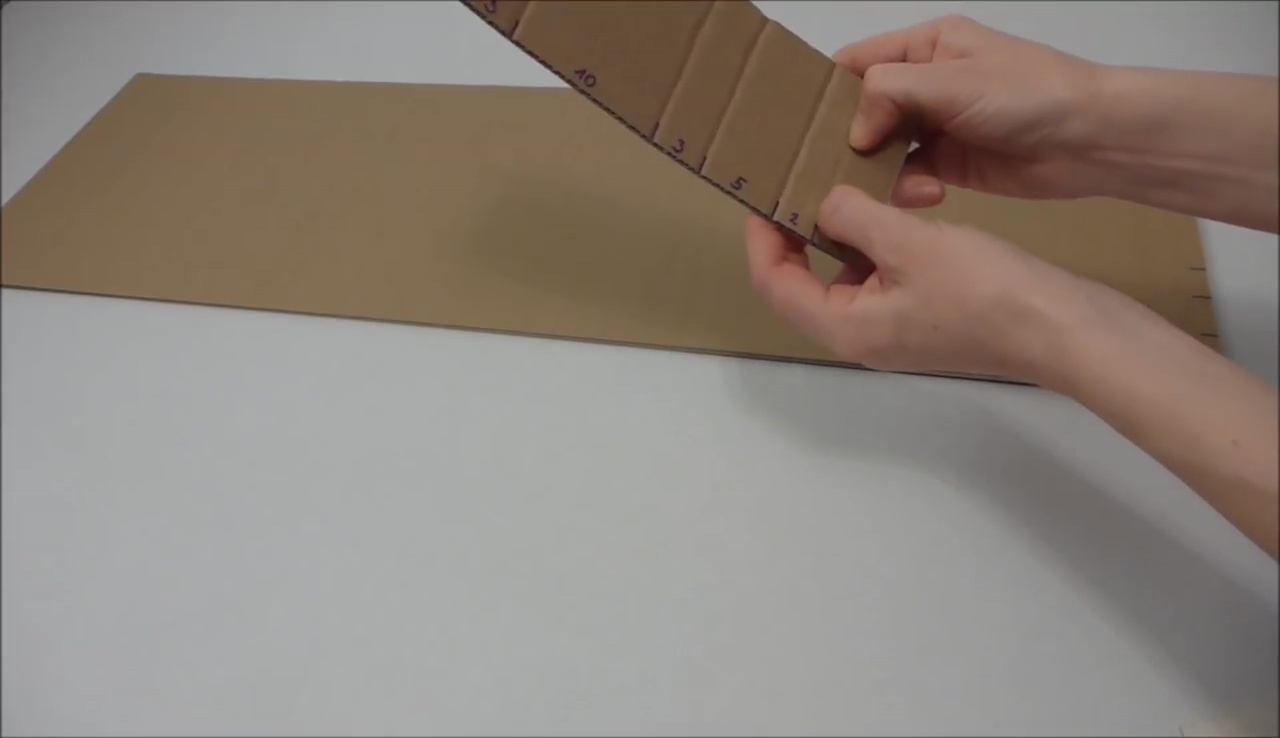
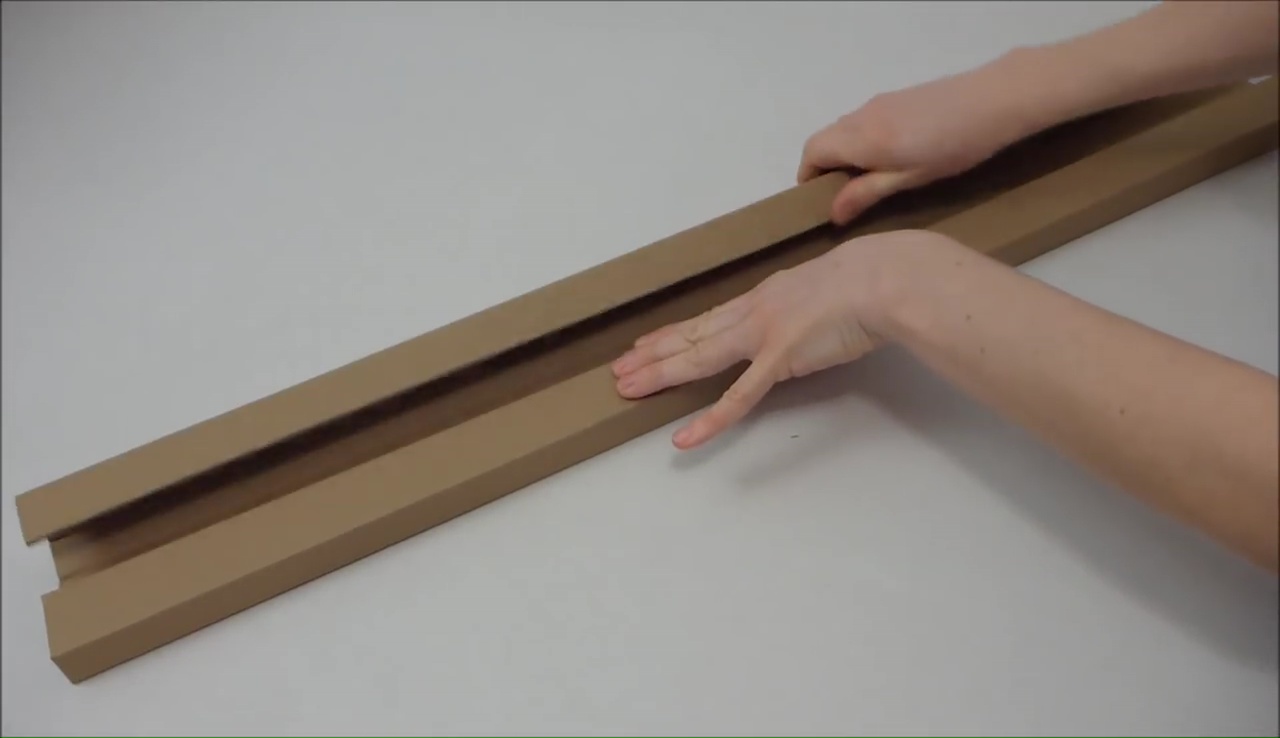
- Now, start folding the piece from both sides pressing the inches marks which you have made with the marker and fold the entire piece into a long folded cardboard tuft when you finish the fold
- Try to press on the marks lengthwise with your nails in the exact order you are going to fold the cardboard piece, as you can see in the video below
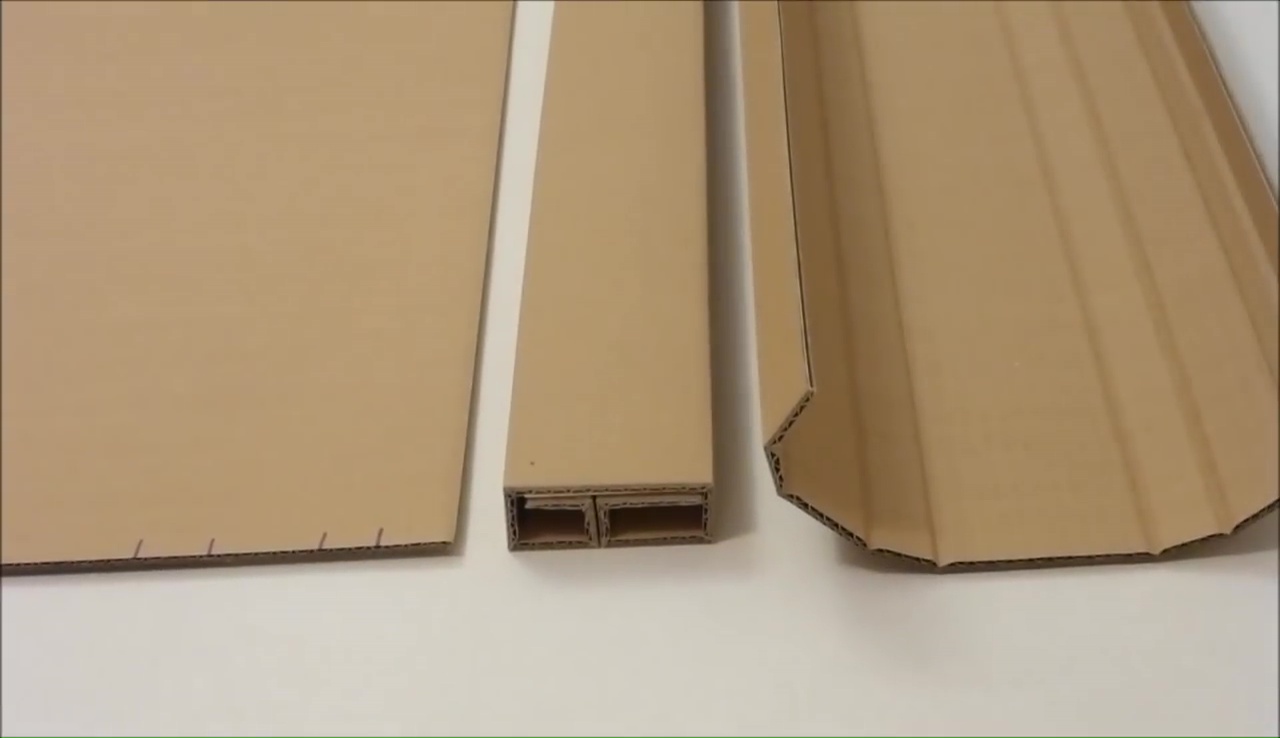
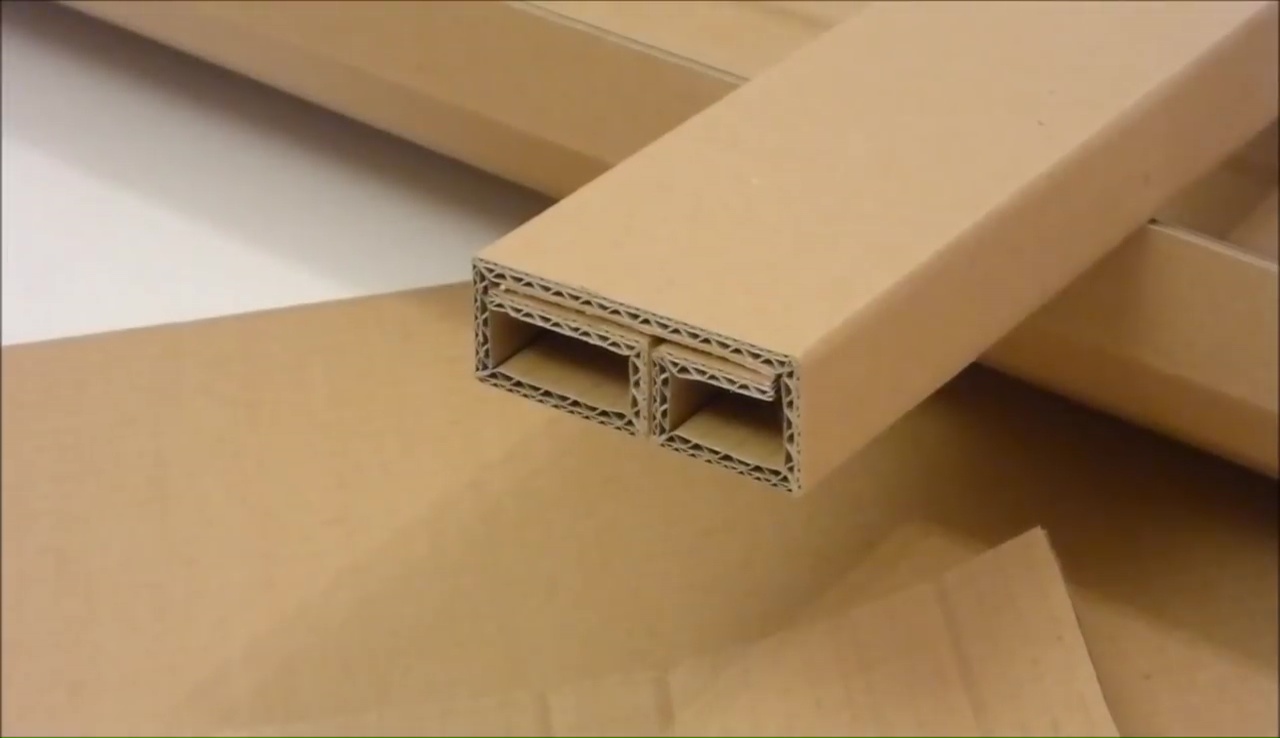
- Cut out some long & thin cardboard slices to fit into the thin gap of that clump to secure it more firmly and fold the rest 2 cardboard pieces similarly this way
- You can make even 4-5 clumps this way instead of three if you want
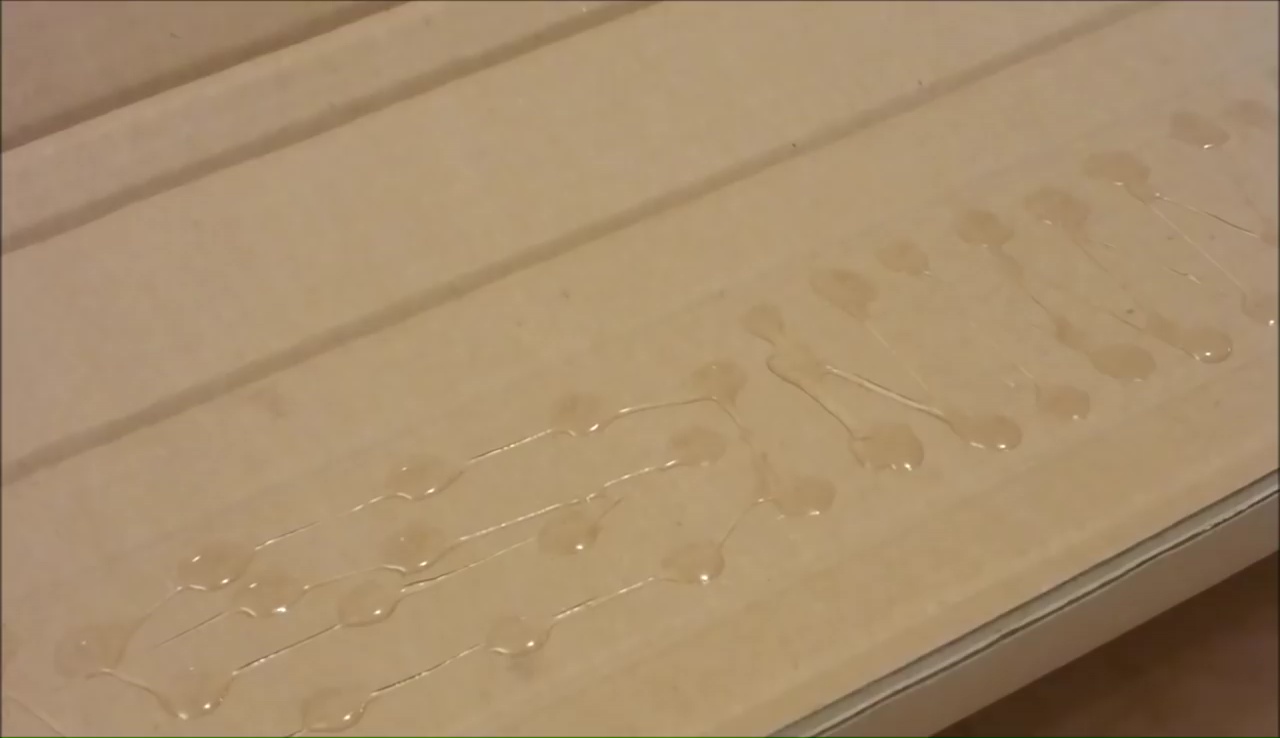
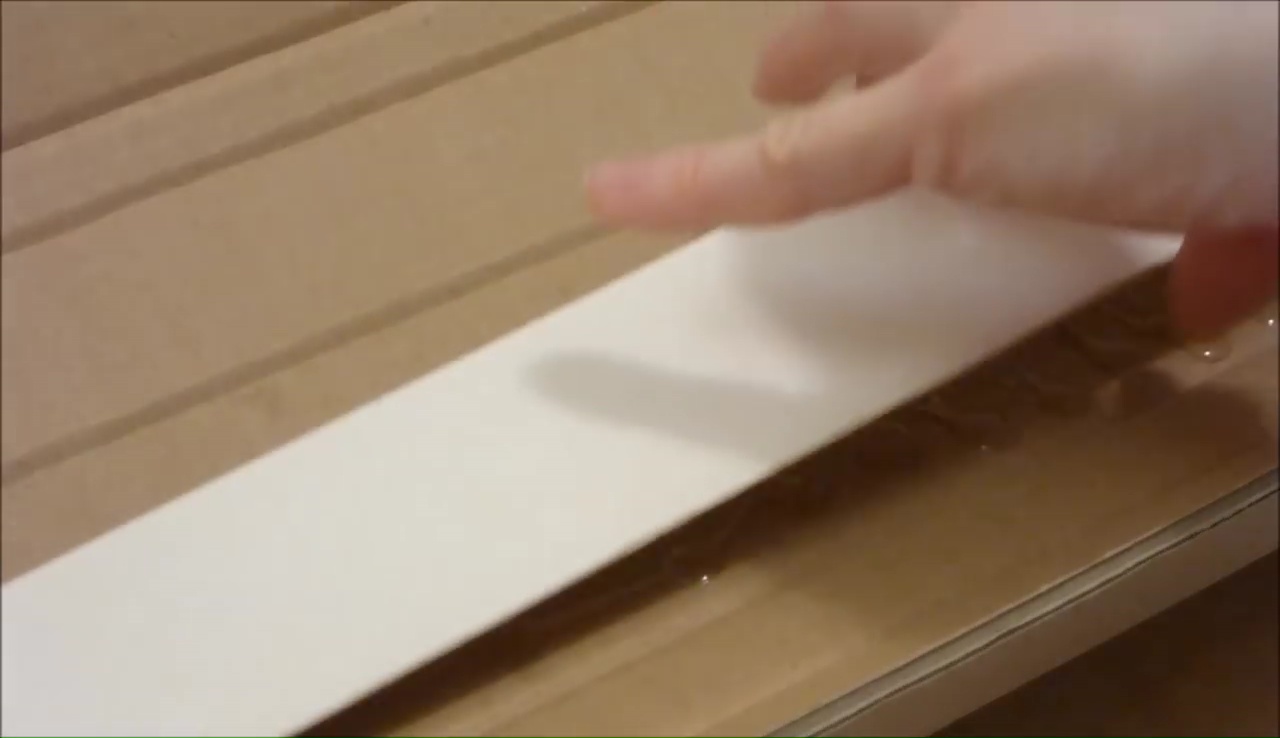
- Open the folds and set them permanently after spreading some glue inside the cardboard piece
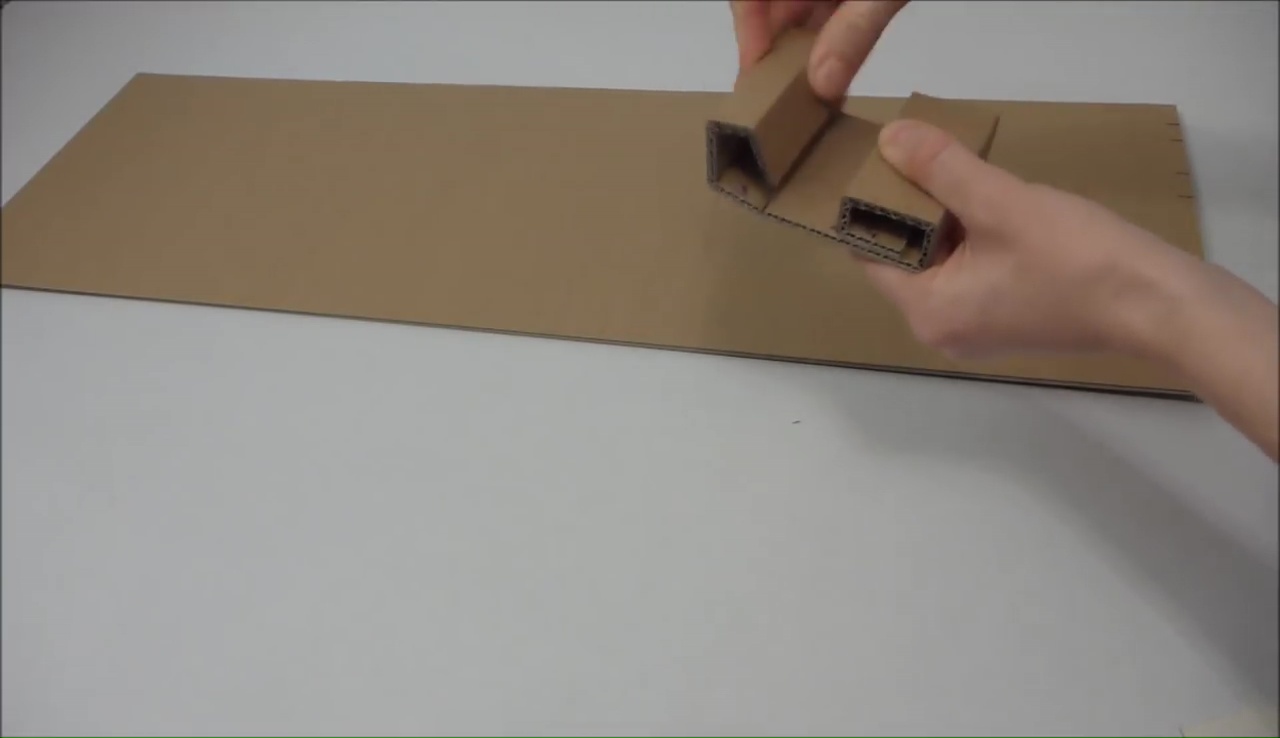
- Once you follow this folding process appropriately, you will get three long thick and hard cardboard made clumps for your shelf
- Use some paper Mache here as well to seal the bare ends of these clumps and then paint it out with a suitable paint
- Let them dry properly after leaving them under sunlight and an open-air area for several hours
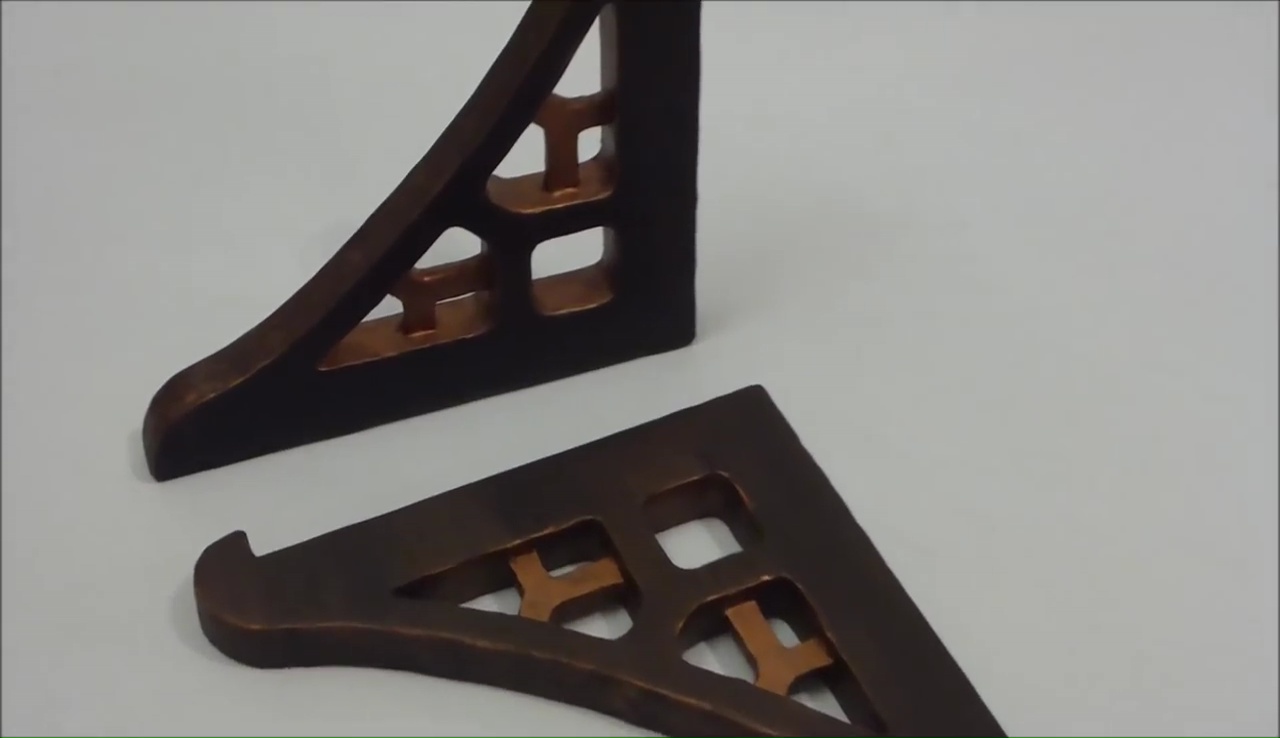
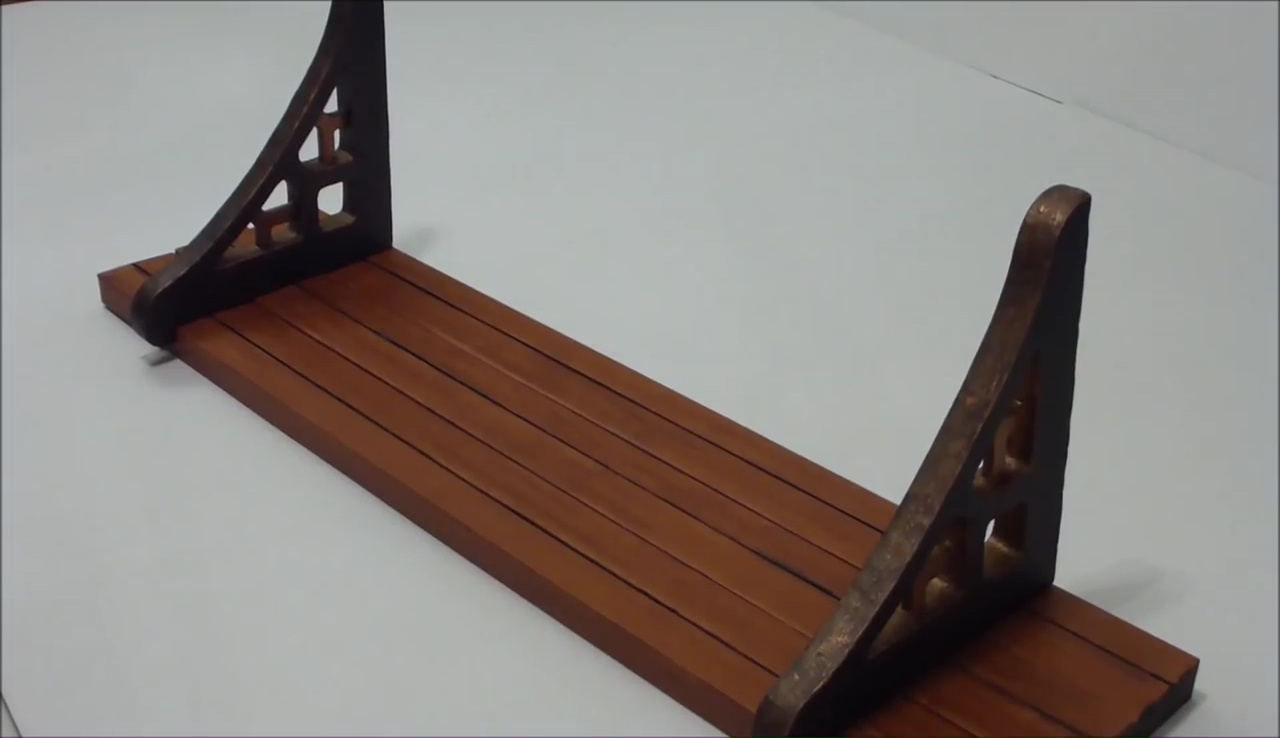
- We would recommend you here to use wood color to paint the cardboard pieces as well as the stand because this will give your shelf a vintage classy look with a chic glance
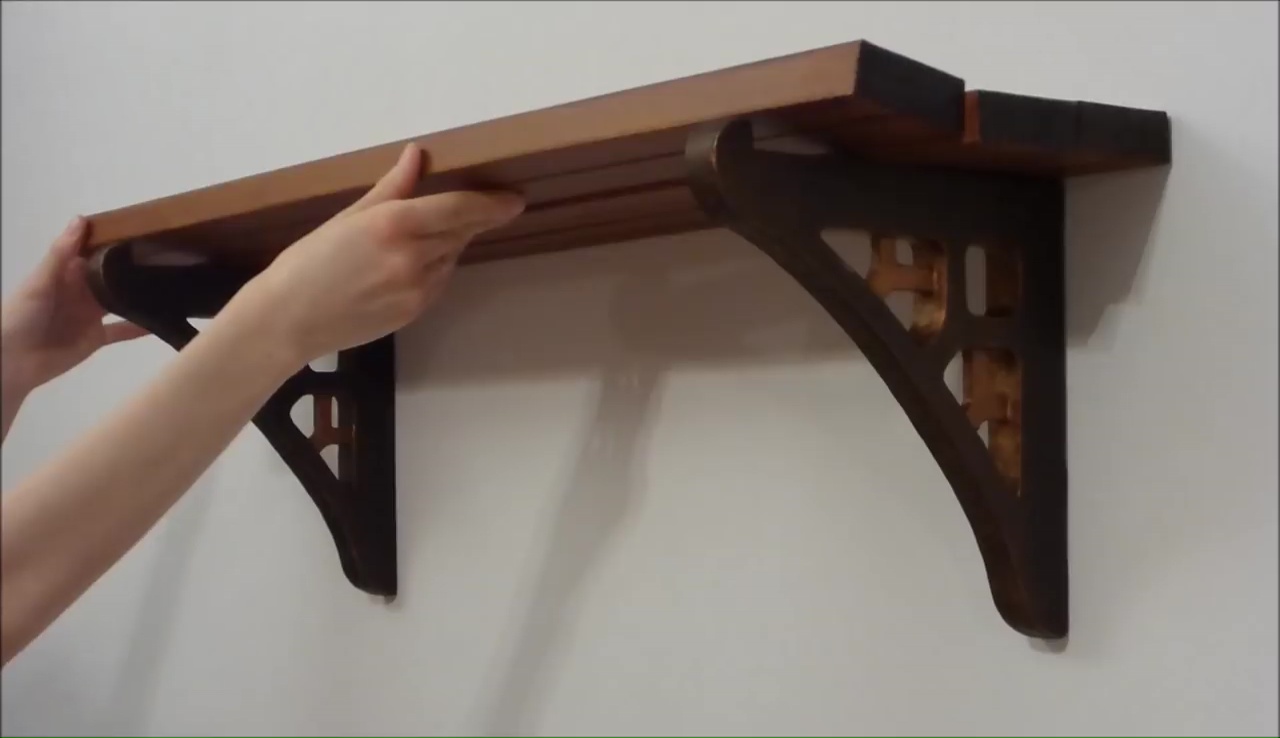
- When all the parts of your DIY shelf are ready and dried well, set two nails with twisted head on the wall after taking the proper measurement of your stands and fit the metallic clumps into those nails properly
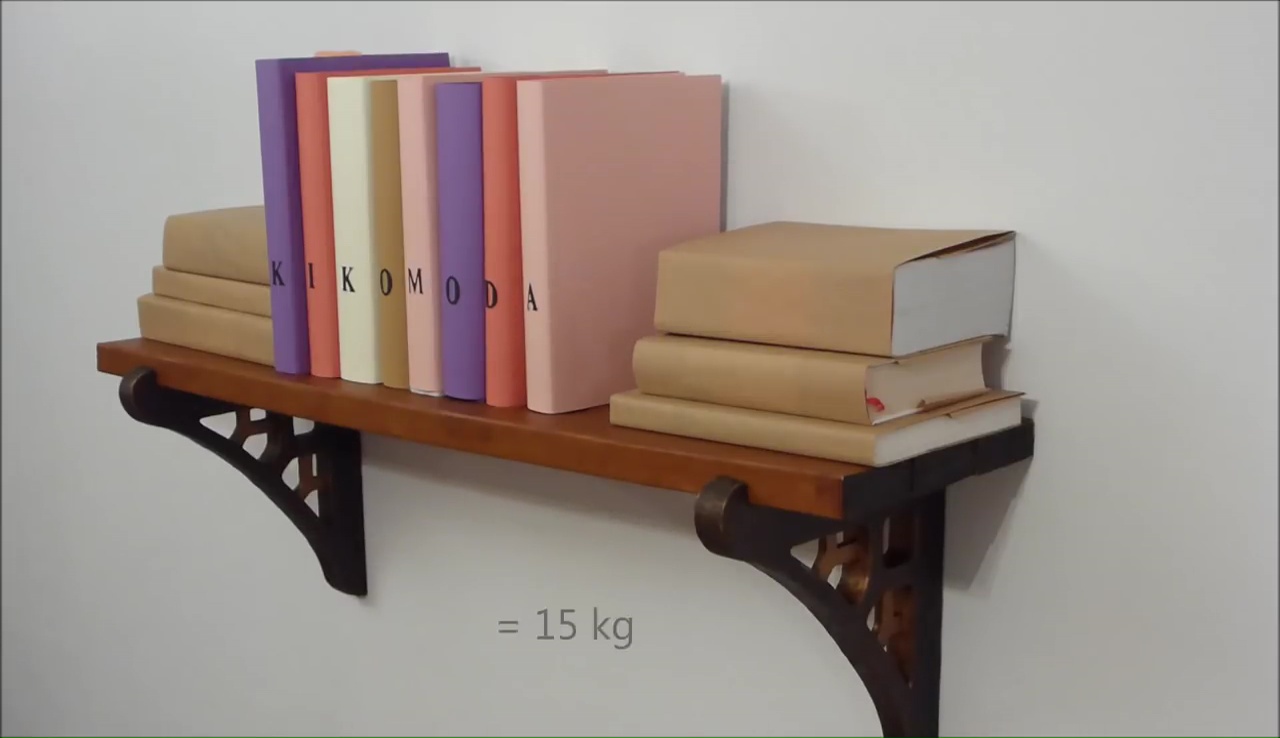
- Set the shelf pieces over the top and begin using your DIY shelf by putting your favorite books, flower vase, showpiece or any stuff you want to put on it.
Project Source :