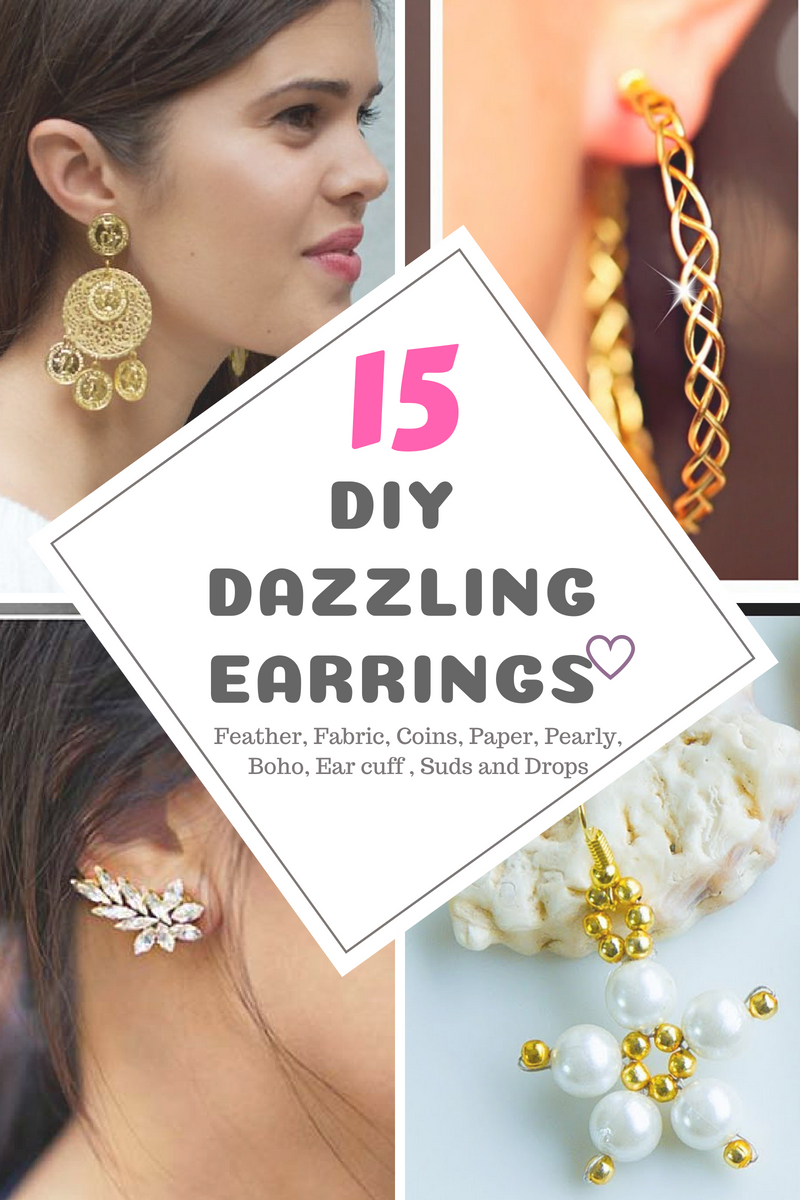
We all girls gone through with that phase of life while wearing new-new earrings became a style statement for us, especially, during our early college days. The unfortunate part is that the craze of trendy earrings never gone with the ages and the desire comes strong year after year!
That’s why, we all love to wear matching or new earring on every single occasion, but our pocket doesn’t accompany us every time, isn’t it? Thus, won’t that be great if you can craft your own earrings with some simple embellishment object! Hence, we have emerged this time with some extremely stylish DIY earring designs that will surely delight your mood whenever you wear them and go with any of your trendy attire. Let’s check out the making procedures below-
DIY Braided Earring
Supplies Needed:
To make this super chic earrings pattern, you will need
- A roll of copper wire
- A wire cutter
- Some colorful beads
- Measuring tape
- And any rounded object.
How to Craft:
- At first, cut 3 pieces out of a silver plated copper wire roll in approximately 11 inches length.
- Now take three wire pieces and start making braid carefully. This time make sure that you are leaving at least 1-inch wire at the starting point.
- Then, keep adding your preferable beads on each braid fold. Here you can see that the beads are inserted only on one side, you can do them on both sides if you want!
- Now, after reaching the end portion of your copper wire, leave the gap of 1 inch again as we did at the beginning.
- If you follow the steps perfectly, you will end up with an approximately 8-inch braided portion at the end of your task.
- Now, bring a measuring tape and find out the exact middle point of your wire-made braid.
- After finding it, take the wire cutter and cut the each string of your braid carefully exactly from that section. This way, you will get 2 wire-made braids with an equal length along with one-sided extra wire ends.
- Now, take that cutter again and close the dead-end part of each braid securely by bending the end loops one into another.
- Then, take one of your braids and straighten up those three excessive wire strings, which you have left at the starting point.
- After doing this, hold the middle wire and cross the rest two wire strings straightaway over each other tightly.
- Now, cut extra length parts from the middle wire as well as those two side-wire strings with the help of that wire cutter.
- Then, hold one of those side-strings with the cutter and start rolling it toward the centre.
- Once you have reached the central part, press the entire roll with the cutter and do the same with rest side wire. Don’t forget to press those two wire rolls firmly towards the braid section with a 90 degrees angle.
- Now, place the braid one a rounded object to give it a perfect shape of earring.
- Finally, you will have only one straight wire string on the top, just place a plug or cork at that portion and the crafting is finished completely.
- Now, repeat the whole process for the other earring and your pair of stylishly braided earring is all ready to wear!
DIY Paper Stud Earring
Supplies Needed:
To make this craft you will need
- A cardboard
- Some colorful scraper paper
- Some rubber cement glue
- A circle punch
- Some mod podge dimensional
- And two readymade earring posts with corks.
How to Craft:
- At first, glue up on the top surface of both cardboard and scraper paper with a thick layer.
- Now, let them dry for a few minutes under open air and then, stick them together firmly with a tight pressure.
- After that bring that ½ inch circle punch and cut out 2 precise circles from those scraper-cardboard joints and make sure that you are cutting them with nice and matching designs.
- Now, before sticking those back posts spread a layer of dimensional mod podge on the back of those circles and then spend it evenly with the help of a toothpick.
- Then, bring those earring posts and smoothen the end surface with a sandstone or scrubber, as that will help to stick it on the earrings more effortlessly.
- Leave that mod podge layer to dry for 30 to 40 minutes uninterruptedly and then, stick the earring backs exactly at the middle of the back of each circle.
- Let the posts stick there permanently for at least 1 hour then, turn the right side on, of your earrings and apply a layer dimensional mod podge on the top surface of your earrings to make them a little glossier.
- Once all the portions are dried properly, your paper stud earrings are all ready to flaunt on your ears!
DIY Perl Earring
Supplies Needed:
To make these classy earrings, you will need
- White Pearl pieces
- Some golden beads
- 2 earring hooks
- Tiger tail wire 2 feet
- Glue
- A wire cutter
- And rounded nose pliers
How to Craft:
- Firstly, cut out one long wire and hold its two end parts in your hand.
- Then, take 5-6 golden beads and insert them through one wire end.
- Then, hold the other end part and pass it through those beads straightaway.
- This way will be able to tie a knot and get a beaded circle in the middle of your wire.
- Now, take one end loop and insert one pearl through it along with a golden bead.
- After that, pass through the end part of that wire into one circle of your previously knotted bead circle. This way you will secure the pearl on that particular section.
- Now, hold another wire string, insert one pearl and one golden bead and do the same design with the similar way.
- This way, keep inserting pearl and golden beads and keep flipping the circle, every time you pass through the end part into a knot.
- After completing a perfect pearl flower with five petals, secure the end with some tight knots and go for the next design.
- Now, you have one pretty pearl-made flower at the centre and two hanging wire string through the below of that flower.
- Take one of those strings, and start inserting 6 golden beads on that side.
- After that, make a tight knot with that string and get a perfect beaded circle on that portion.
- Now, after finishing with a pretty beaded loop, cut out all the extra wire string from your craft and set a hook through that loop.
- Once you have done all the steps, repeat the process with another set of wire, and complete the set of your earrings proficiently.
Inspiring DIY Earrings
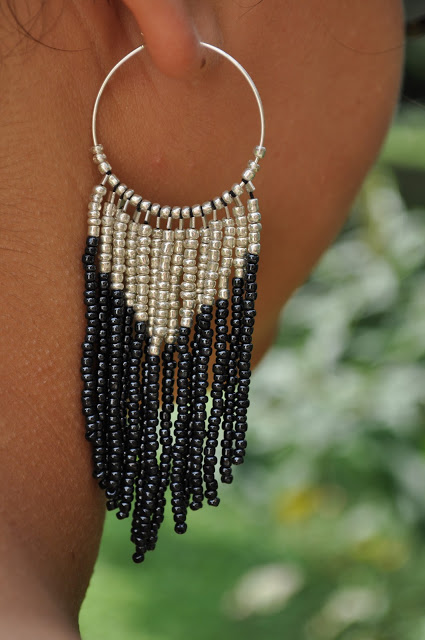
Dream catcher Earrings
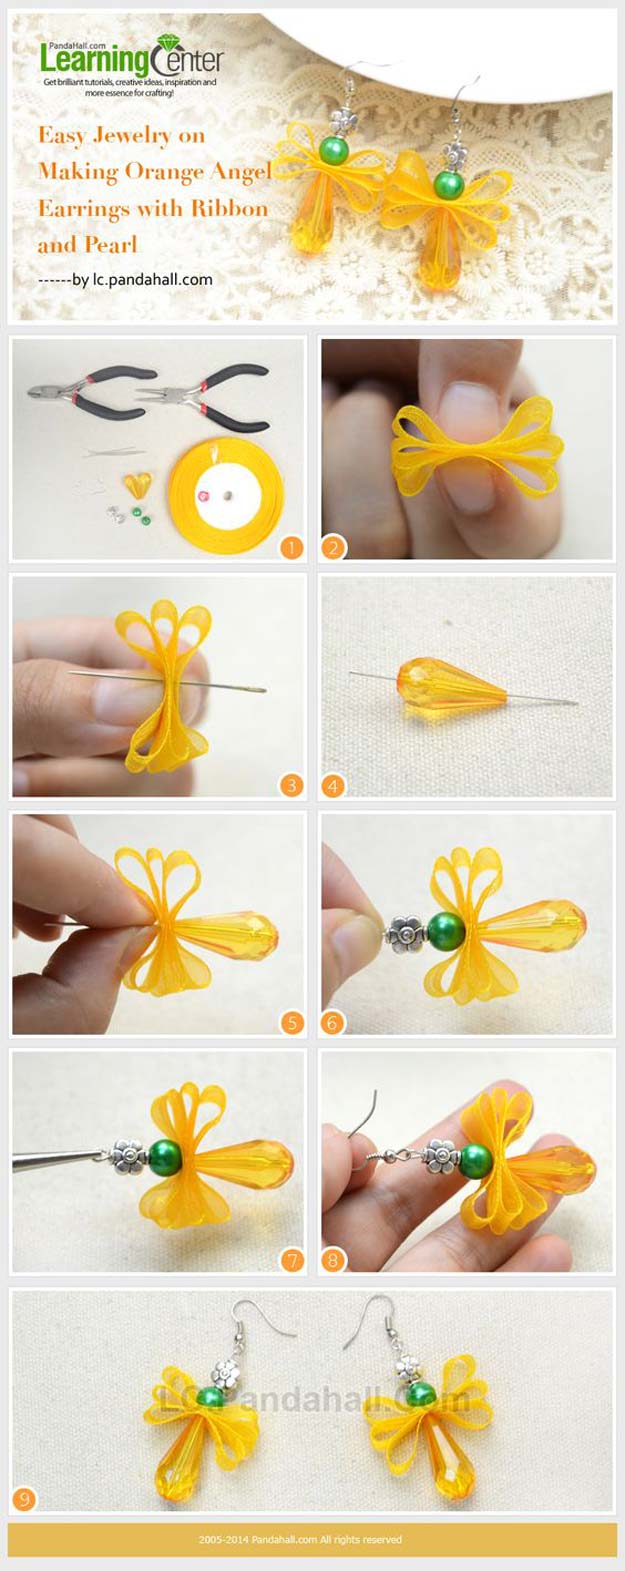
Orange angel ribbon pearl earring
DIY Easy Ear Drop

DIY Easy Ear Cuff
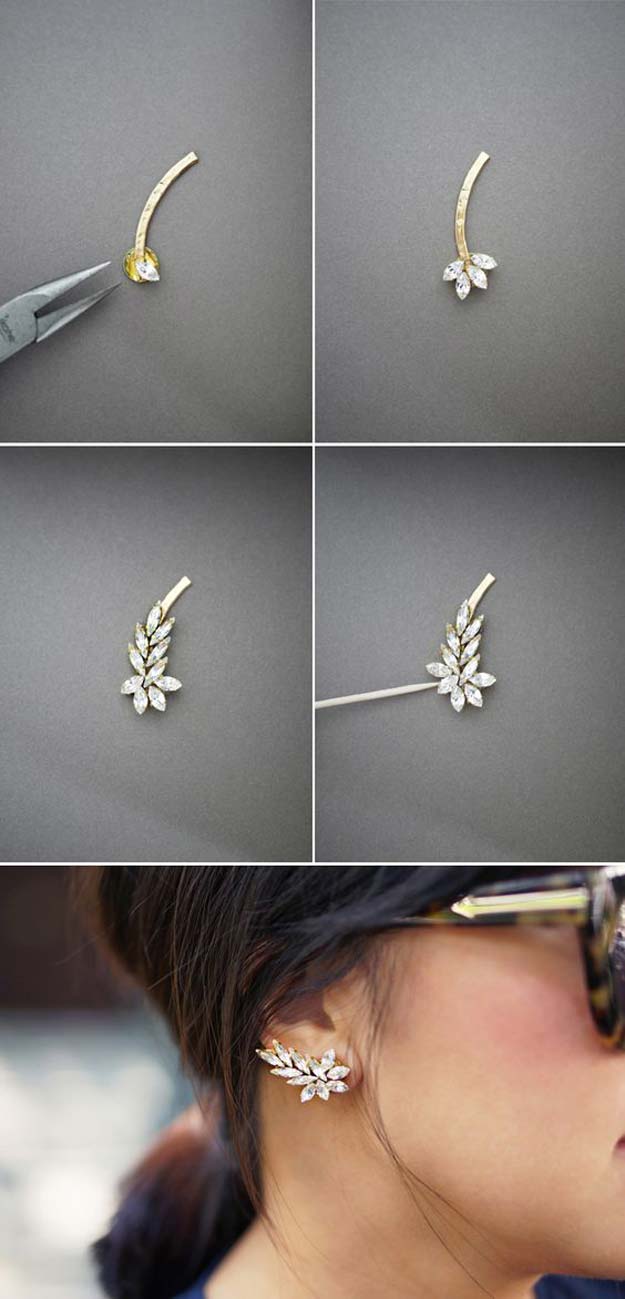
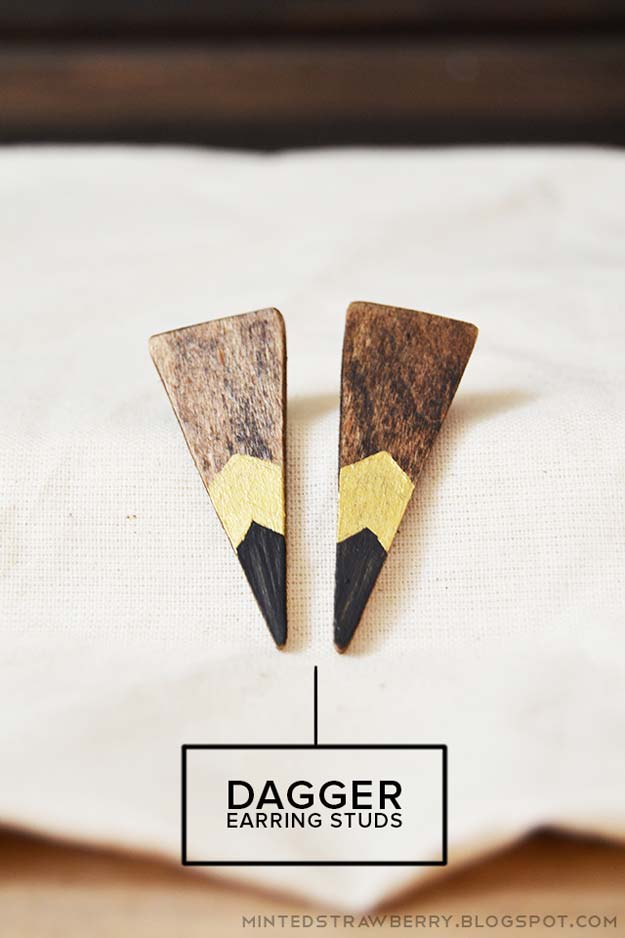
DIY Dagger Ear Studs
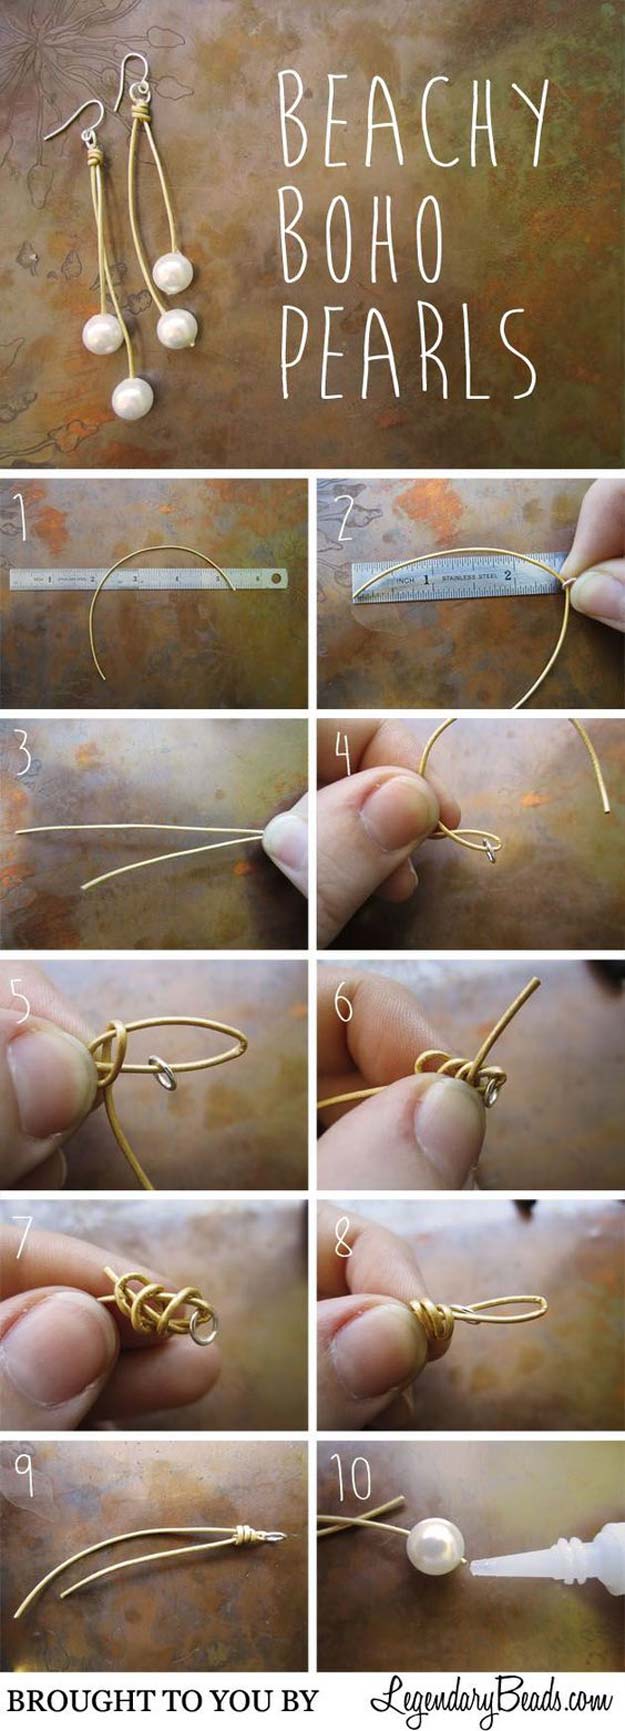
Beachy Boho Pearls Earrings
Coin Chandelier Earrings

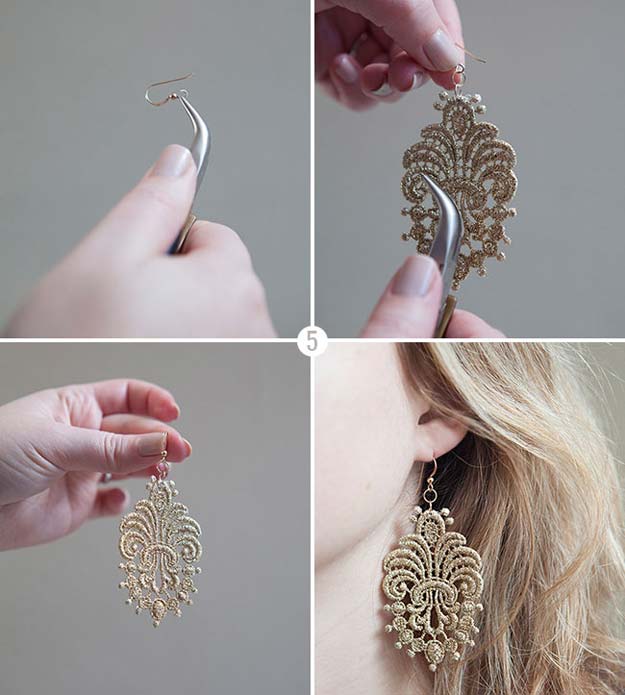
DIY Lace Earrings
greenweddingshoes
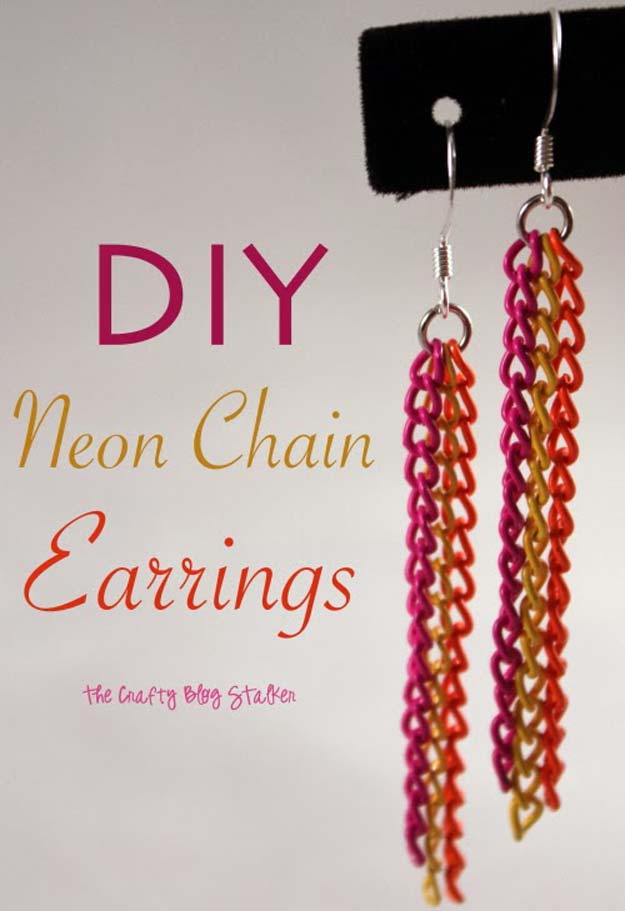
Neon Chain Earrings
Geo Drop Earrings

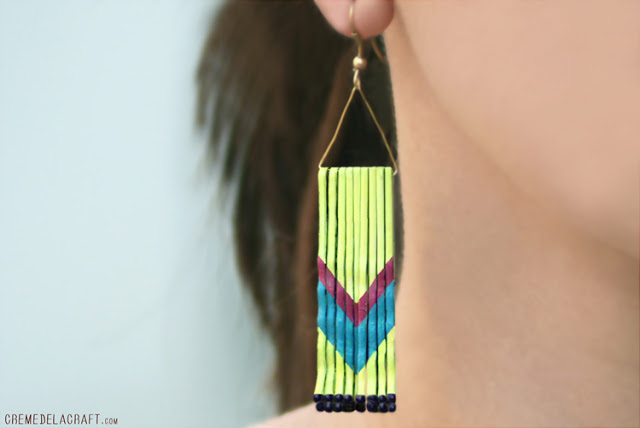
DIY Bobby Pin Chevron Earrings
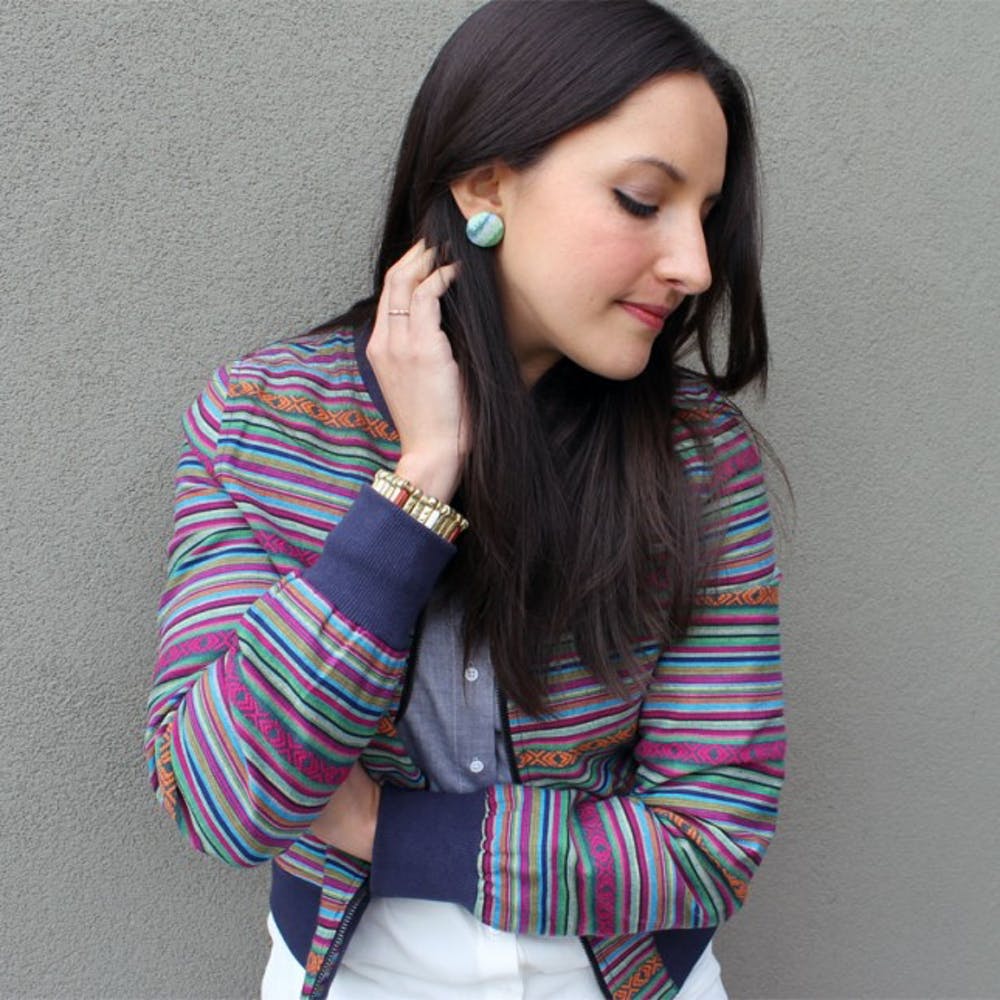
Cute Fabric Button Earrings
Pin it for later