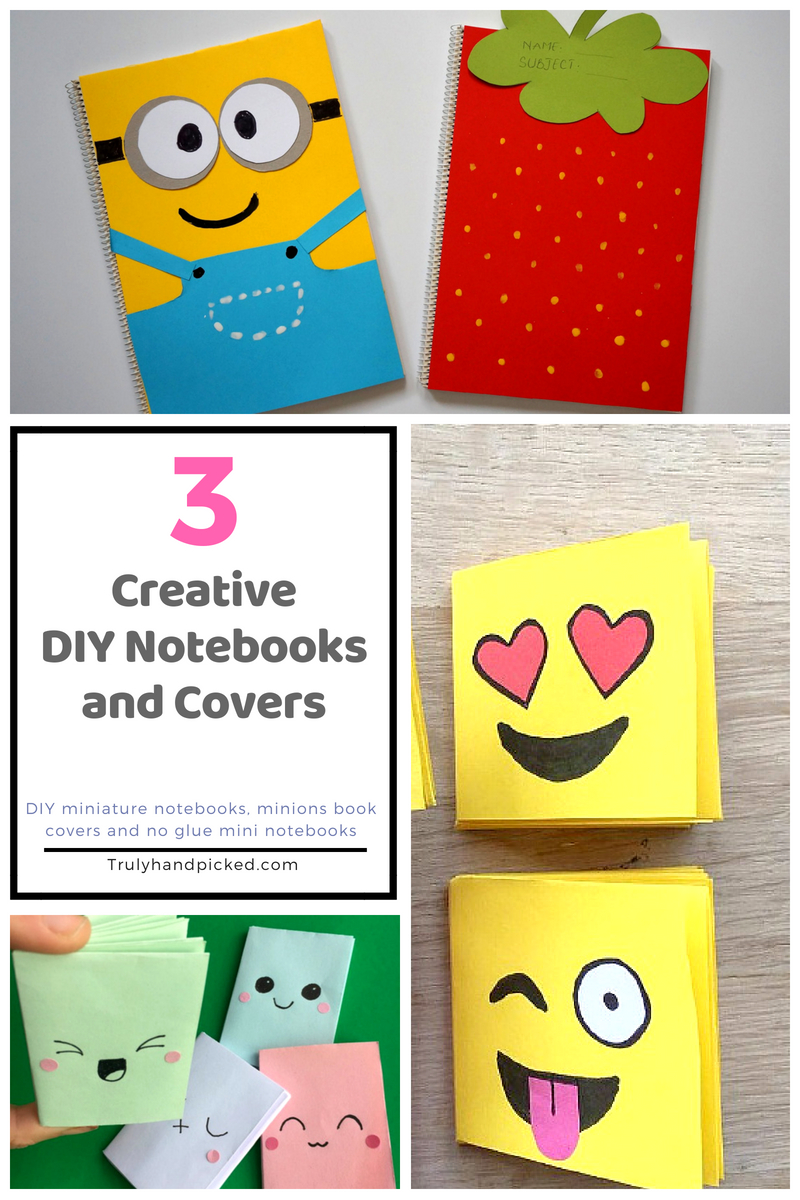
Miniature notebooks look really cute and they fulfill your crucial requirement of taking some small notes as well! Whenever we look back to our teenage memories, miniature notebook incorporated a large part of it, right?
Those secret keeper tiny diaries had served us well with all its blank pages and super chic shapes, but we usually get bored with these mini notebooks after a certain age and unfortunately, they took place in our trash can!
So, what if we tell you that you can use these tiny objects in your art crafts? Yes, actually you can d that with a few simple dashboard equipment. Cover them in a trendy way or turn your miniature notebook into any of your favorite cartoon characters. So, here we have emerged with some fresh ideas on this topic to instigate the little artist in you by decoration these tiny mini notebooks in an effortless way. Let’s check out the top 3 ideas on this attempt-
DIY Miniature Notebook
Supplies Needed:
To prepare this craft, you will need
- A foam sheet
- A scissor
- A pen or marker
- A ruler
- A hole cutter
- A template printed page
- A clipper clip
- 3 jump rings
- And some adornment components for decorating the miniature notebook cover, as in some paints, paper cutting, beads or stickers.
Methods:
- At first, make a perfect square shape onto the surface of foam sheet with the help of the ruler and a marker.
- Now, cut out two pieces from that sheet exactly with the shape of that square.
- After that take one square piece and make 3 equally separated holes onto one edge of that square with the help of that hole-cuter.
- Try to point 3 marks with a pen or pencil before applying the cutter on it to make the holes absolutely precise.
- Now, set the rest square piece below the first one and point out those holes with the marker.
- After that remove the first piece and make 3 holes on the remaining craft-sheet exactly on the pointed
- Now, these two squares are ready to use as a notebook cover, set them aside and go for the pages now.
- For creating pages of your notebook, you can cut out one long white page into several pieces in the shape of a perfect tiny square.
- Here we have printed out a template and cut them into precise square shape with the help of a sharp scissor.
- When you get enough pages for your mini notebook, set them properly with a clipper clip.
- Now, get perfect hole marks on the bunch of your white sheets and make 3 proper holes with that hole cutter as we did previously.
- Then, set those pages in between those two craft sheet-made covers and go to the final step.
- After doing all these steps properly, take two tools and one of those jump rings.
- Now all you need is open a portion of your jump ring by pulling it from the both sides with the help of those tools and insert it carefully through one hole.
- Finally, close the open mouth of each rich after inserting them through all three holes one by one, and your miniature notebook is ready to use.
- You can decorate your mini notebooks as per your choice now, like, in the shape of an Emoji or a fruit slice or any animal, it totally depends on our mood and selections!
DIY Minions Notebook Cover – Back to school supplies
Supplies Needed:
To prepare this type of back to school notebook cover, you will need,
- A preferable notebook surface, as in we are selecting here a yellowish notebook cover to give it a minion look.
- A cardboard
- A paper cup or any circled object
- A white sheet
- A scissor
- Some glue
- A pencil or marker
- A blues foam sheet
- And some black and white paint containers
Method:
- At first, cut out two big circles from your cardboard sheet and set them on the top of your notebook cover like two wide eyes of your minion.
- Now, cut out two comparatively small circles from your white paper sheet and set them in the center of your cardboard circles with the help of some glues.
- Then, bring the blue foam sheet and cut the top portion into the shape of a dungaree dress of the minion.
- Set the sheet at the bottom of the notebook and place two small stripes of that sheet in the middle of your notebook in the shape of two straps of your minion’s drapery.
- After that cut out the excess strap parts with a scissor and complete the minion face with a black marker pen.
- Like, draw two eye-balls the stand of his glass on the both sides of his eyes, draw a smiling mouth, two black buttons on the blue surface and the perfect dress designs of that minion with the help of that black and white paints.
- If you are wondering how to get desirable coloring surface on your notebook covers then, let us suggest you create it by your simple work board supplies.
- Such as set a coloring page over the top surface of your notebook cover and glue it perfectly.
- Now, cut the extra part out and decorate it as per your need, while the top surface is all dried, as in we are doing it with a paper-made leaf!
DIY Miniature Notebook – No glue
Supplies Needed:
To craft a no-glue or hassle-free miniature notebook in DIY process you will need-
- One sheet of paper in rectangular shape
- A scissor
- A ruler
- And some marker in different colors
Method:
- Firstly, fold the paper from the middle in rectangular order into a neat or crease-less way.
- After that fold the folded page again from the middle and of course in the neat or crease-less manner as well!
- Now, open up the entire folds and then, fold from the middle from the other direction.
- After folding them two-times Similarly, press the whole page firmly and wipe it out with our palm to make it absolutely crease-less.
- Now, you will get 16 perfect rectangles, if you do this job properly. After getting this, fold it again from the middle as you did for the very first time.
- Now, take a scissor and cut the folded edges half through on the folded lines, which mean you need to cut 3 lines in the first fold.
- Then, open of the entire folds and cut out the inside two little parts of your sheet with that scissor.
- After doing this properly, you will get a big open portion or hole in the middle part of your sheet.
- Now, lift the separated rectangles up to the center and fold them out exactly from the middle.
- Then, turn the backside up of your sheet and cover the inside hole by folding the sheet from top and bottom.
- Finally, flip the whole folded sheet for the one more time from the middle and open the center hole properly.
- Then, close the open portion by pushing the two sides of the sheet together and fold down carefully without getting any creases, as you can see in the video.
- Now, your no-glue miniature notebook is ready to use. All you need to do is just decorate the top surface with one or two marker pens!
Pin it for later