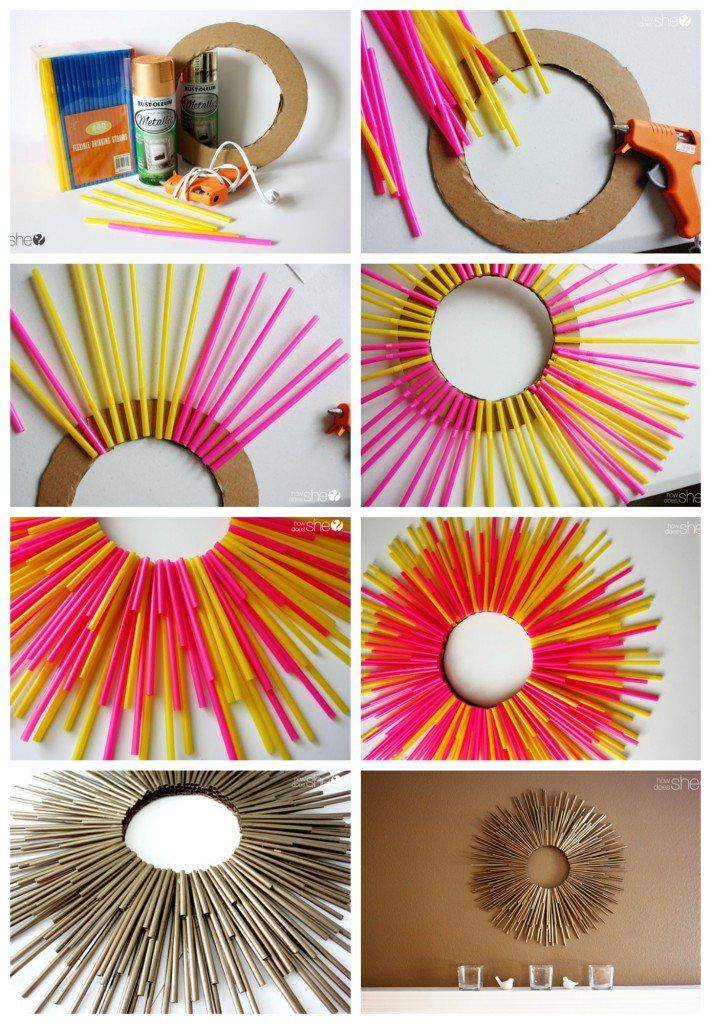
Here we are discussing again the DIY wall art items with some new and innovative ideas. Instead of discussing any more sides of such DIY products, let’s jump to the making procedure directly with some basic ingredients of art crafting. Let’s take a look at these items in step by step methods-
DIY Air Brush Wall Arts
Things You Need:
To craft such thing, you need an air marker sprayer with a spray gun, some colorful markers, some paints, paintbrushes, a few blank canvases, ruler, a pencil, some paper pieces to make some template, scissor, and some sellotape.
Methods:
- At first, take a canvas, set a circle template on it with some sellotape pieces and spray some pink and purple colors around the circle from the markers with the sprayer.
- Now, when you get a thick layer of contrasting colors around the edges of your circle template, take out the template, write down some nice or meaningful quote or just a simple word in the middle and your art piece is ready to use!
- For the next art item, take one 8×8 canvas, and spray marker colors on the canvas randomly to get a galaxy flaunt on it.
- Use pink, purple, blue, and dark purple colors to cover up the whole canvas.
- Then, make some tiny stars on the colored canvas with white paint. To make stars, just dip a paintbrush inside the white paint and flick the brush over the canvas.
- Here you can use a template to get a precise shape on the canvas, then, color outside parts of the template with black color and once the colors are dried out properly, hang it on your wall.
- For the next item, take one 8×10 canvas and make a colorful background with spraying some colors. Here we are using again blue, purple and pink marker colors to spray.
- Then, using a ruler and pencil and draw some skyscraper sculptures on the lower surface of the canvas.
- Color up the sculpture with black paint and you can add two or three bird shapes too, on the top section to make the art piece more dynamic to resemble.
DIY Simple Wall Art
Painted Canvas Simple and Easy Wall Art
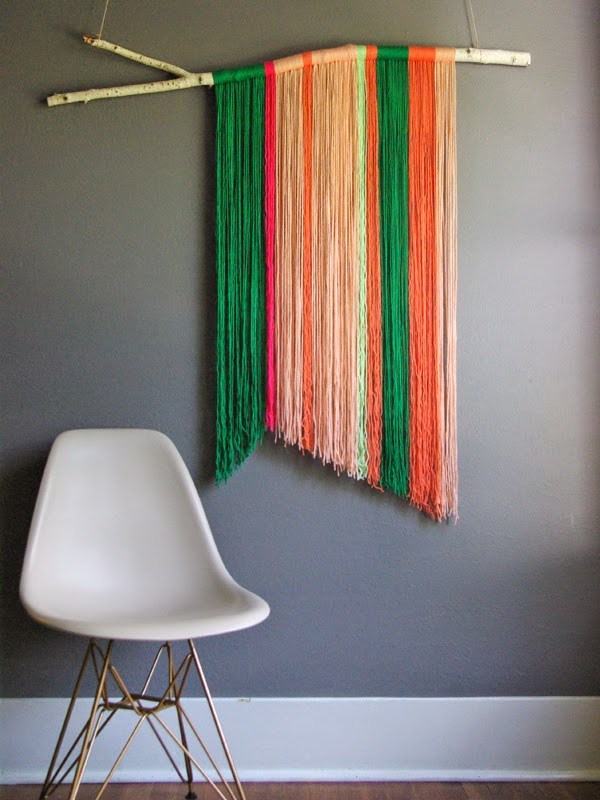
Easy Yarn Wall hanging Art
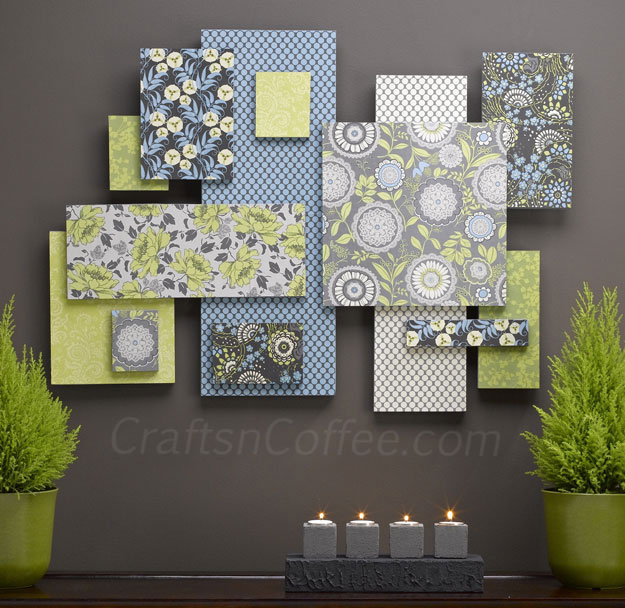
Easy Texture Overlapped Collage Wall Art
DIY Peeled Wall Decor Art
Classic and Easy Wall Decor DIY Art
Easy and Cheap Wall Art with Feather Duster
Framed Book Pages

Related: DIY Photoframe Ideas for Wall Decors..
Simple Hanging Fabric Wall Art
Also check for DIY Newspaper Wall Hangings.
Easy Folded Paper Wall Art
how about Orange

Rel: Rainbow birthday party wall decor and party ideas
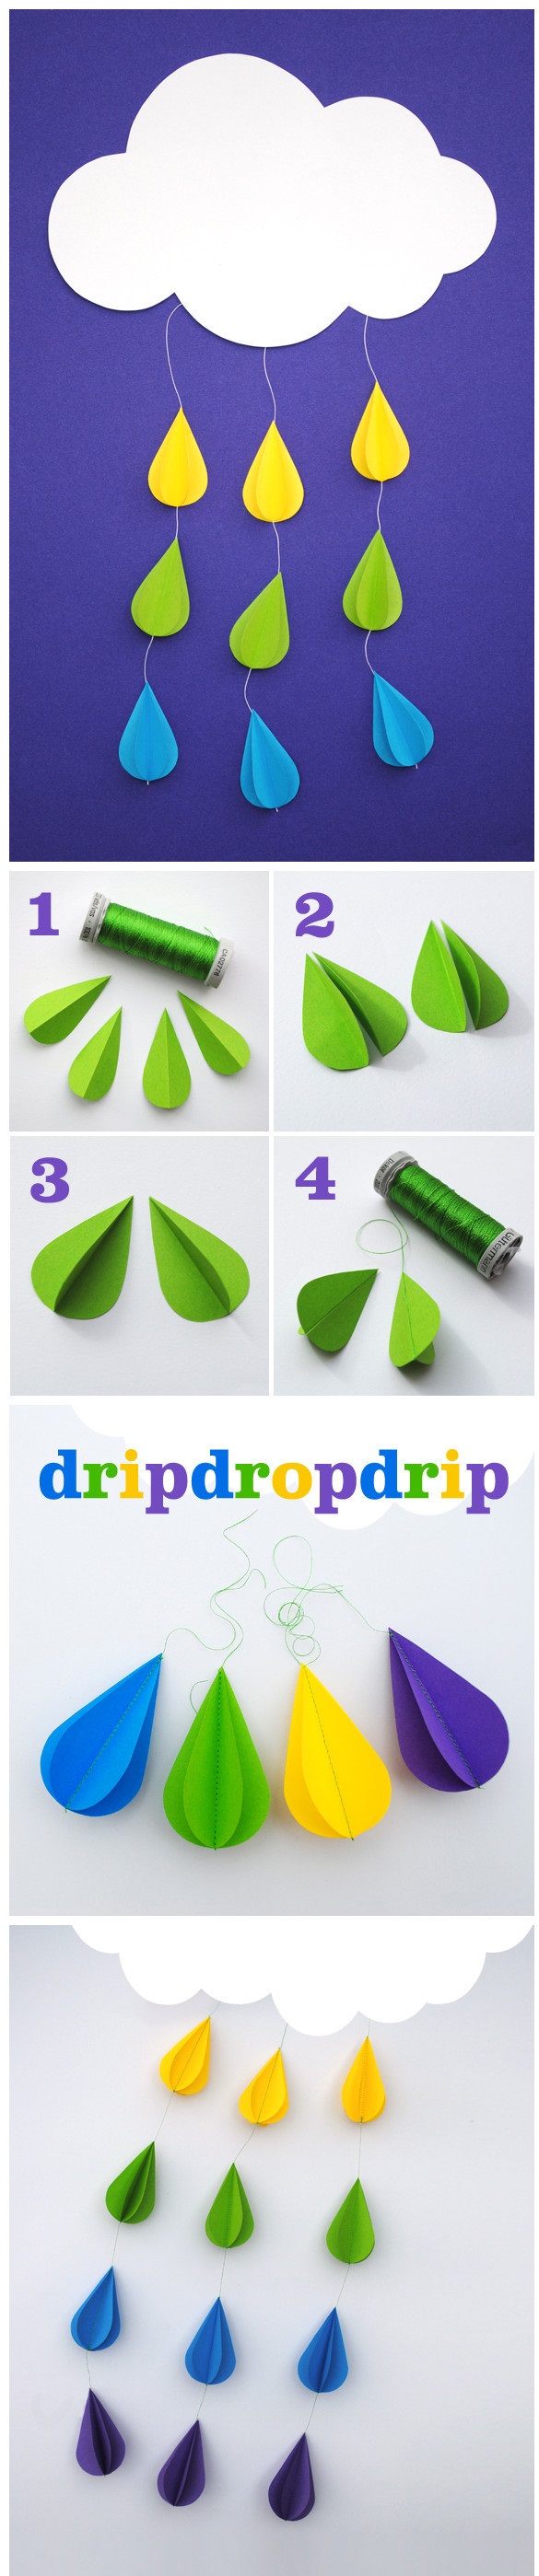
Paper Clouds and Colorful Rain Drip Drop Drip Wall Art
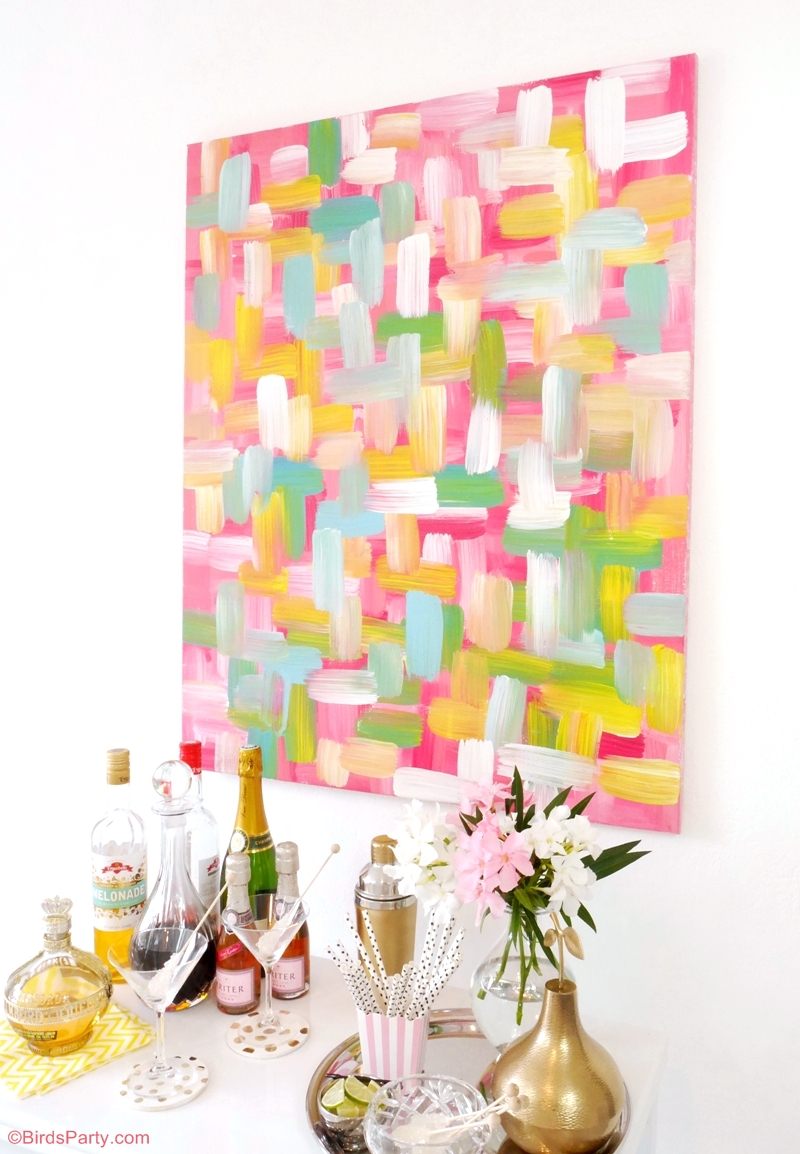
DIY Creative Colors Painted Wall Art

Easy and Cheap Corks Wall Art
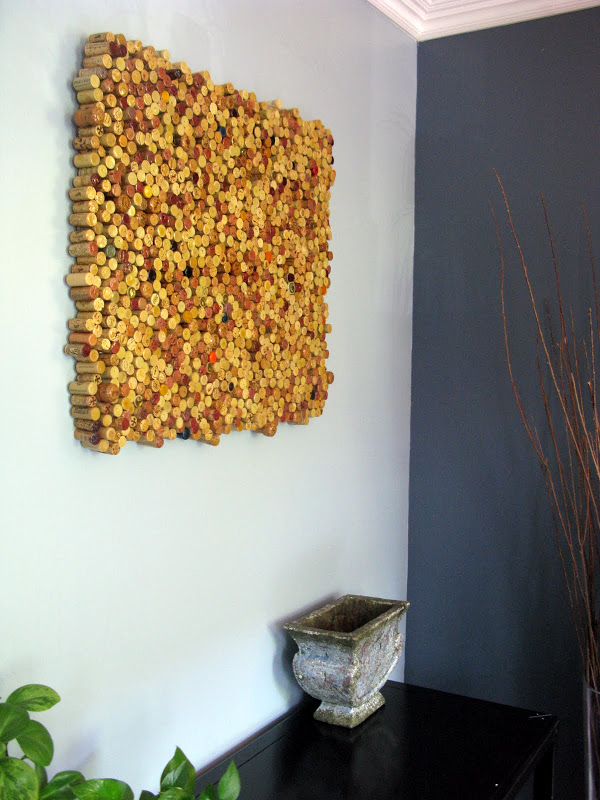
Also check for wine cork craft ideas.
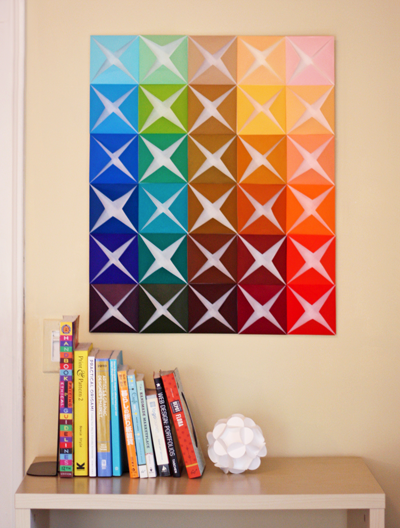
DIY Pixel Canvas Painting Wall Art
![]()
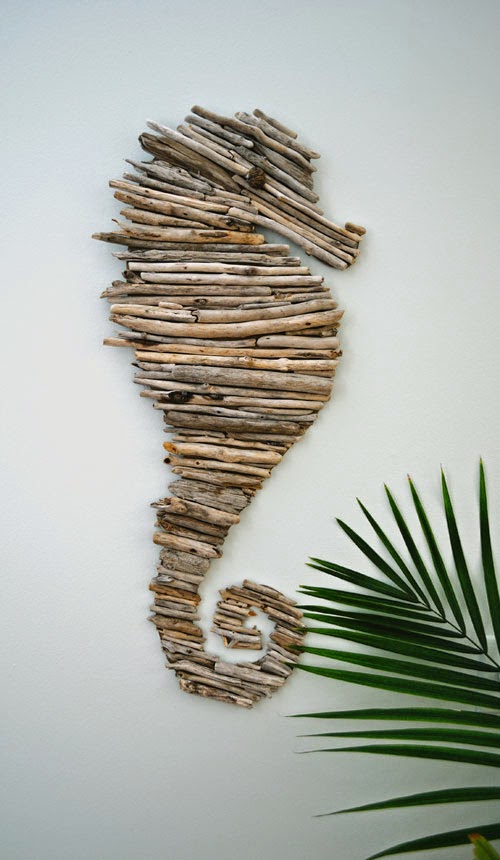
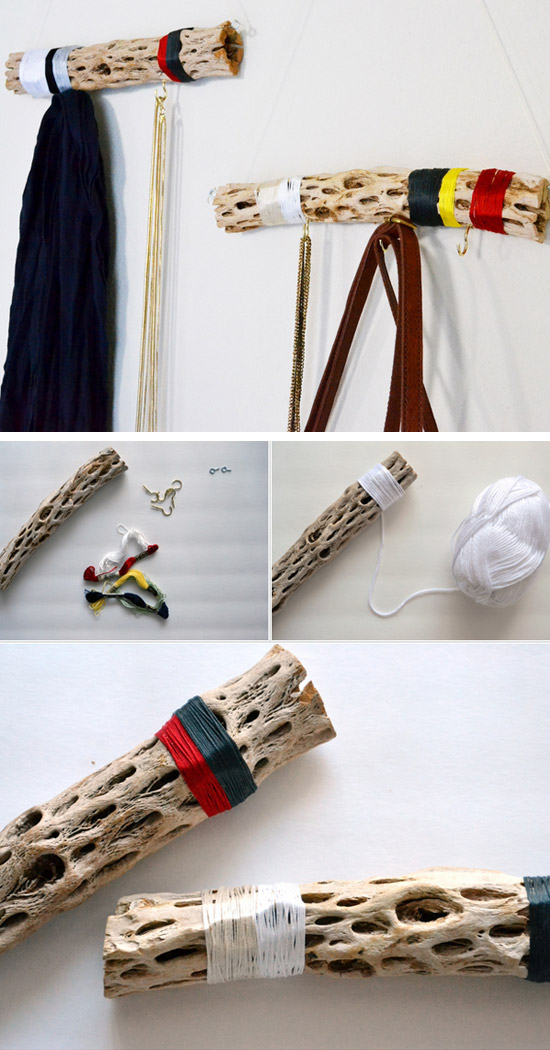
Step by step procedure for driftwood seahorse
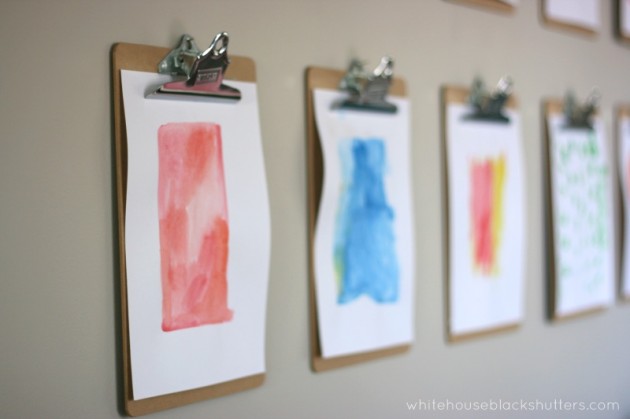
Easy Clipboard Plating Simple Wall Art
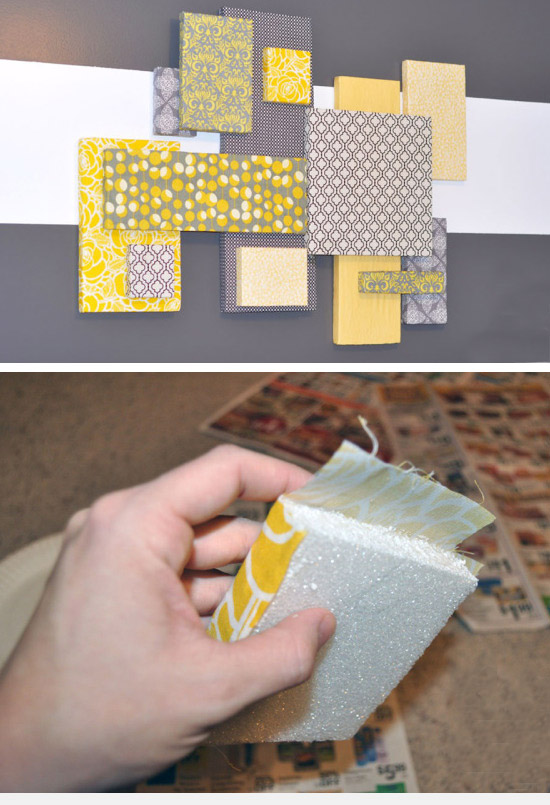
Easy Fabric and Foam Wall Art
crafts coffee
DIY Creative Wall Art
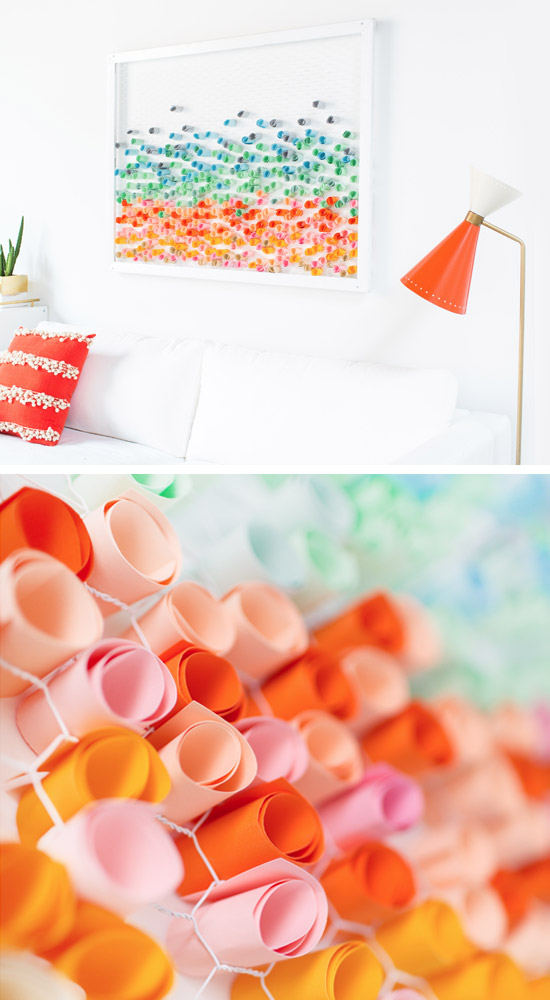
Rolled Paper Chicken Grid Wall Art
How Make Artistic Driftwood Wall Hanger
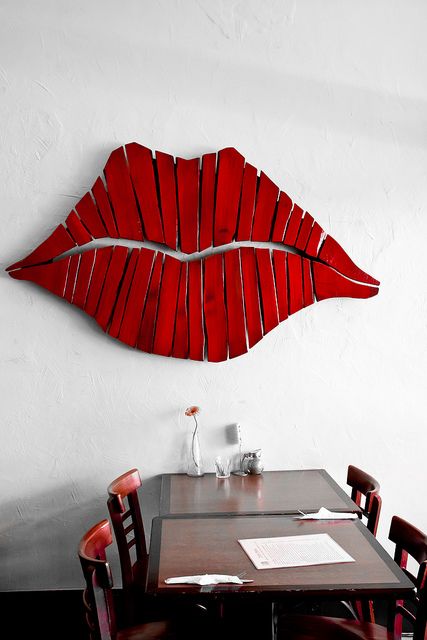
Red Painted Wood Strips
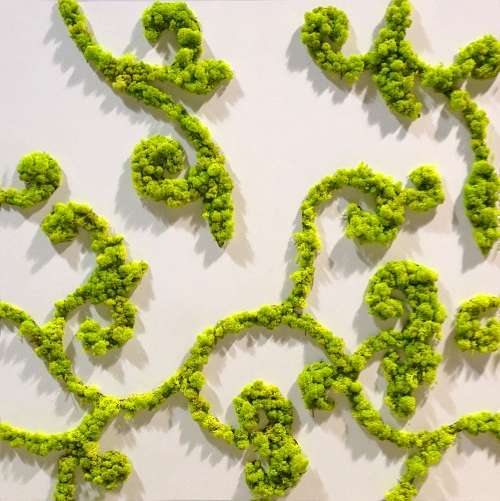
Moss Wall Art Living Decor
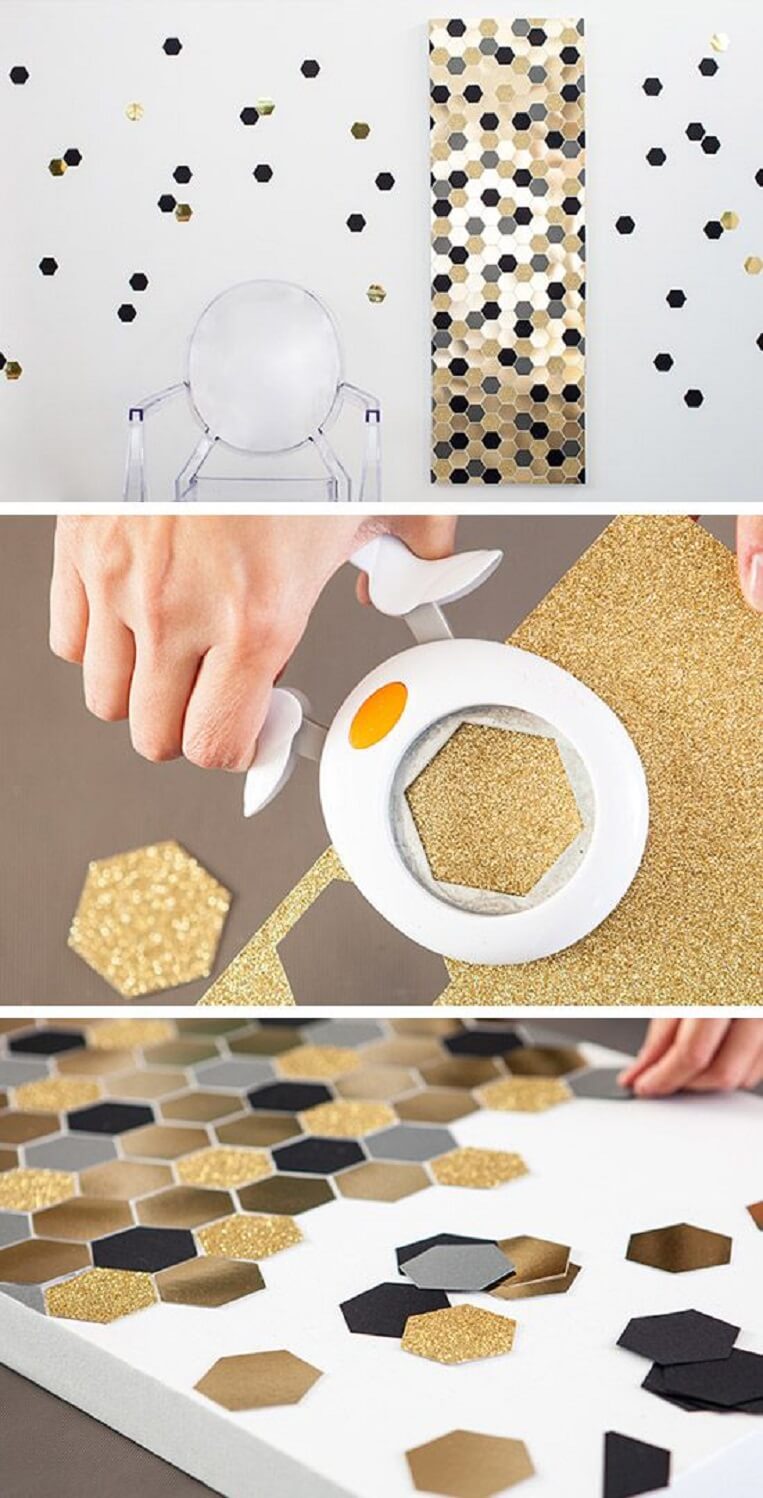
DIY Glittering Hexagon/ Honeycomb Wall Art
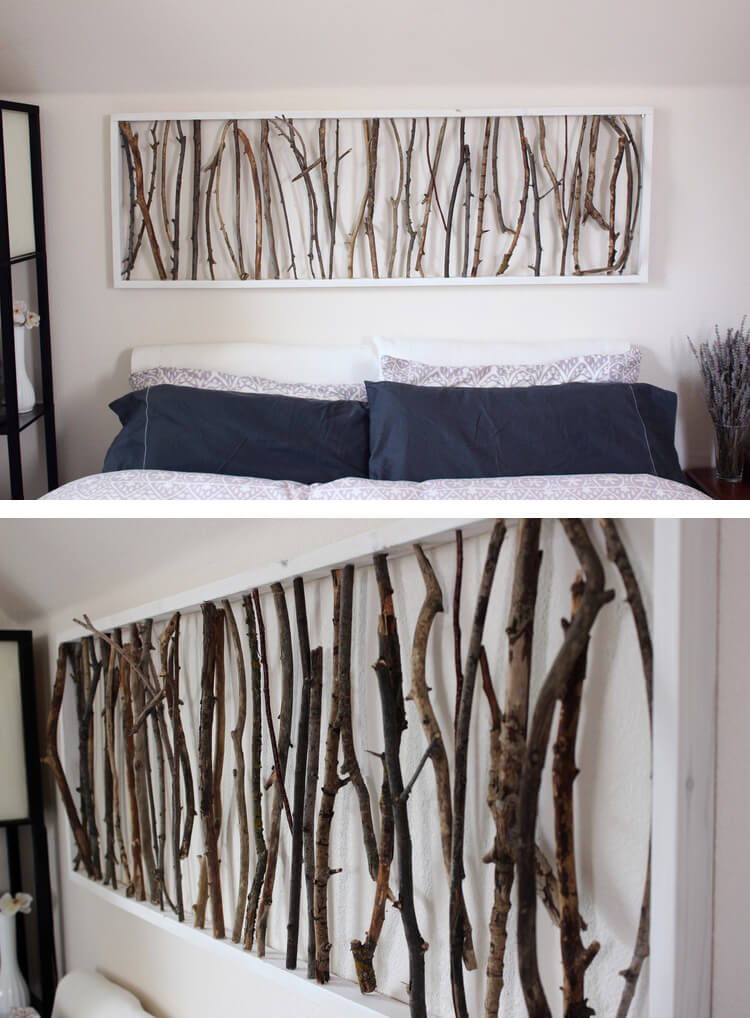
Unique Framed Twigs Wall Art
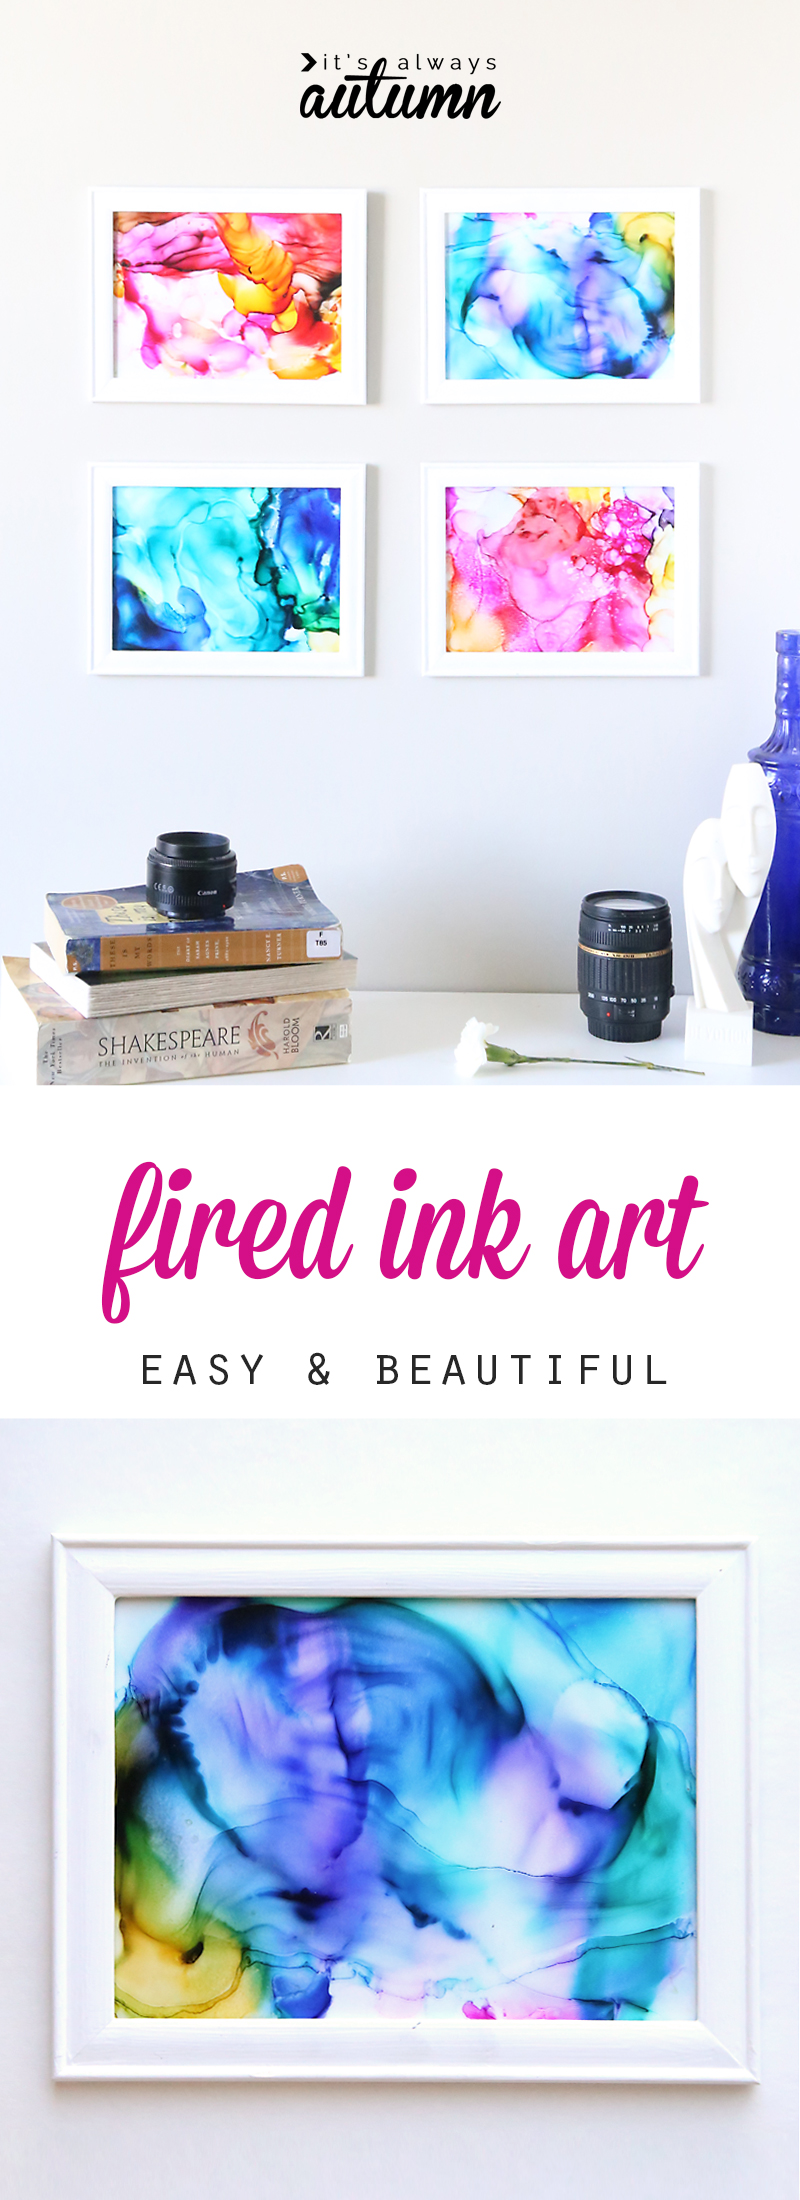
Creative and Easy Fired Ink Wall Art for Kids
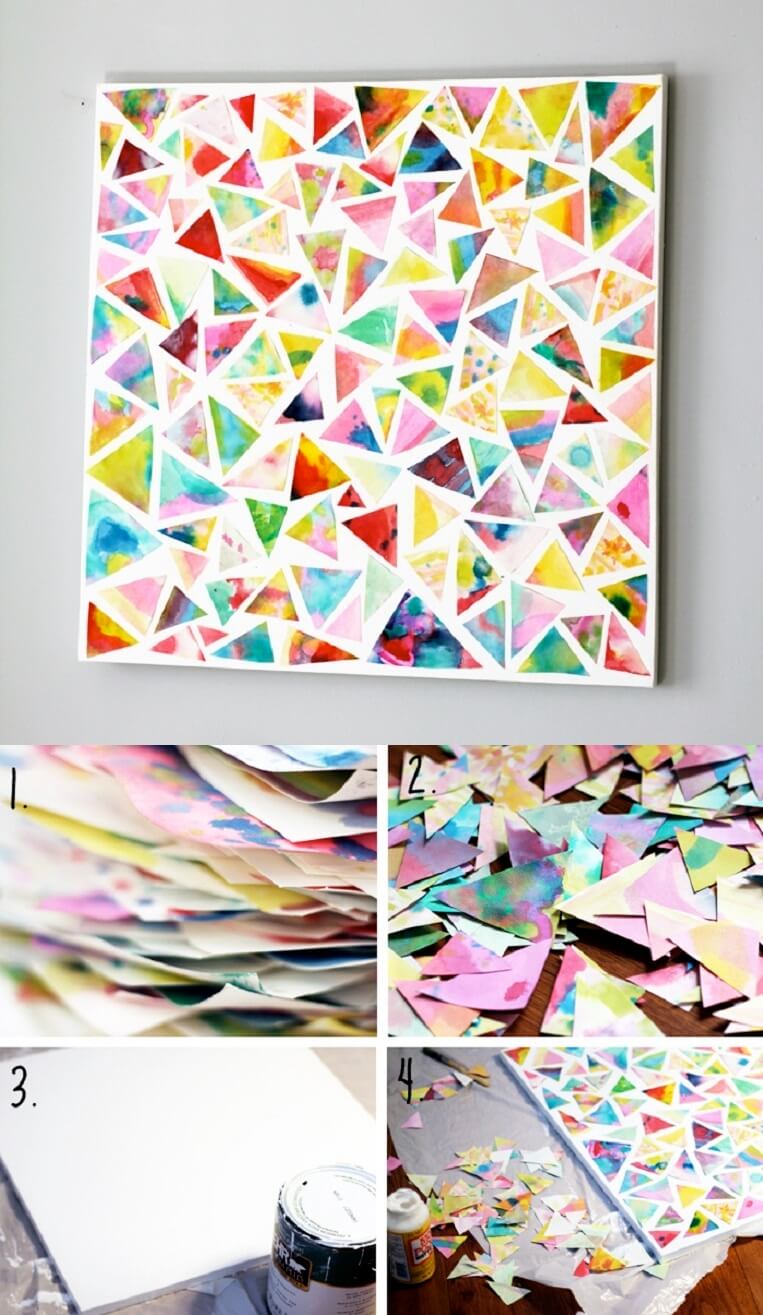
Creative Watercolor Collage DIY Wall Art
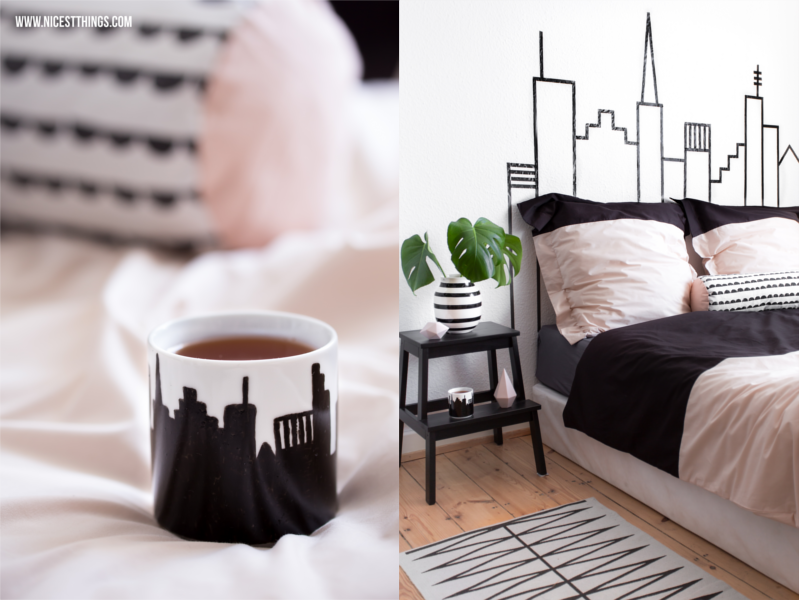
DIY Skyline Washi Tape Wall Art
nicestthings
Rel: DIY Washi Tape Craft ideas.
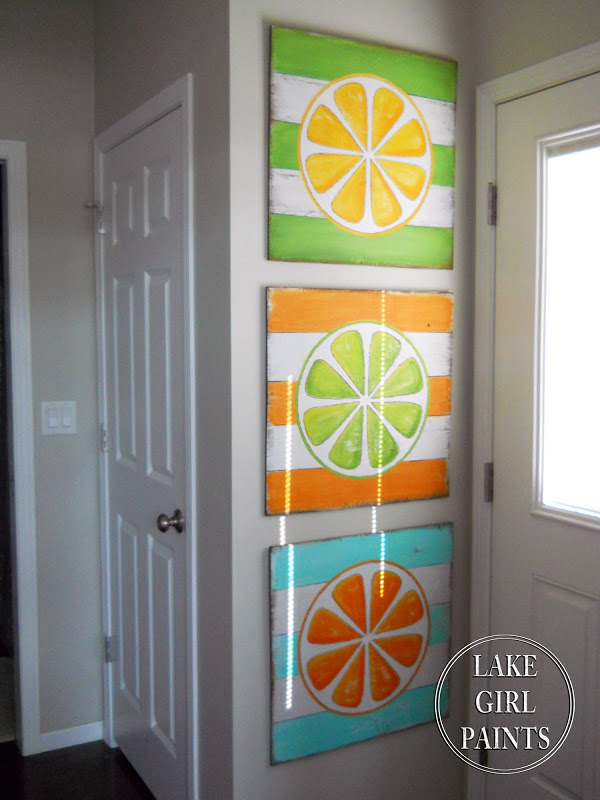
Bright and Citrus Wall Art
Step by Step Wall Art
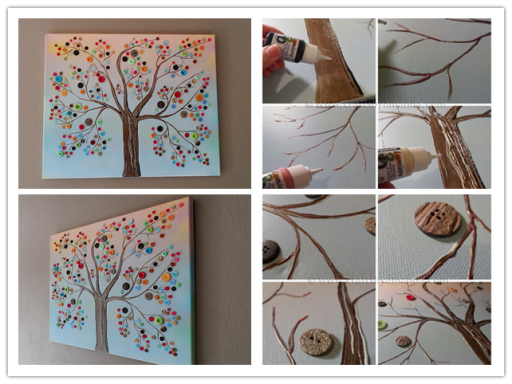
DIY Step by Step Button Tree Wall Art
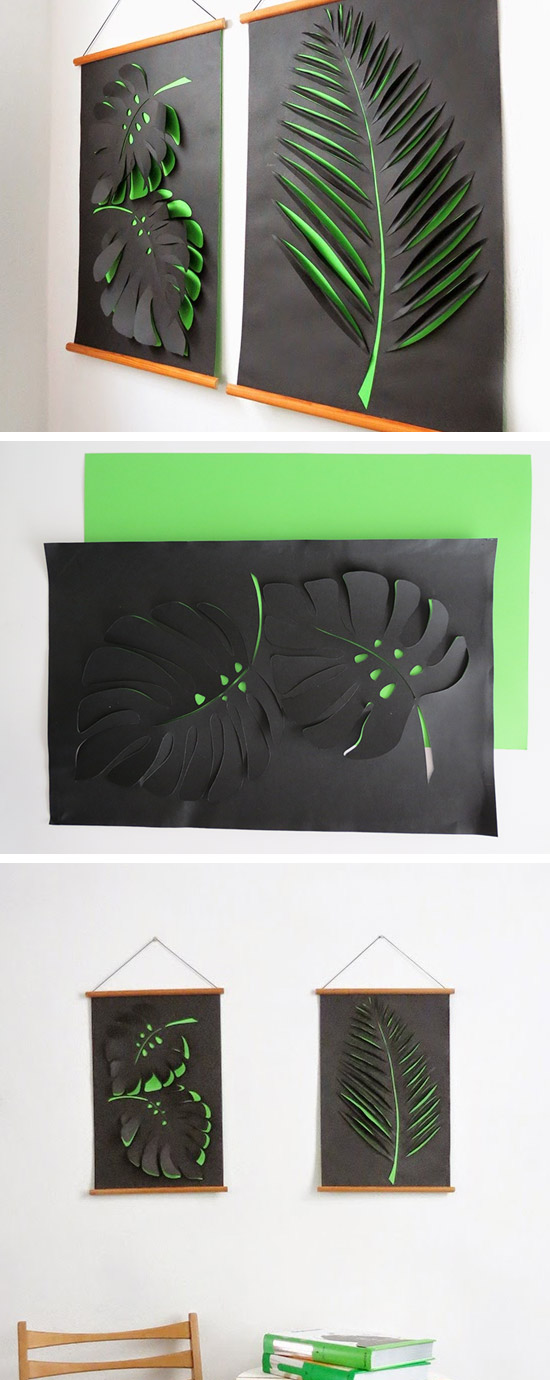
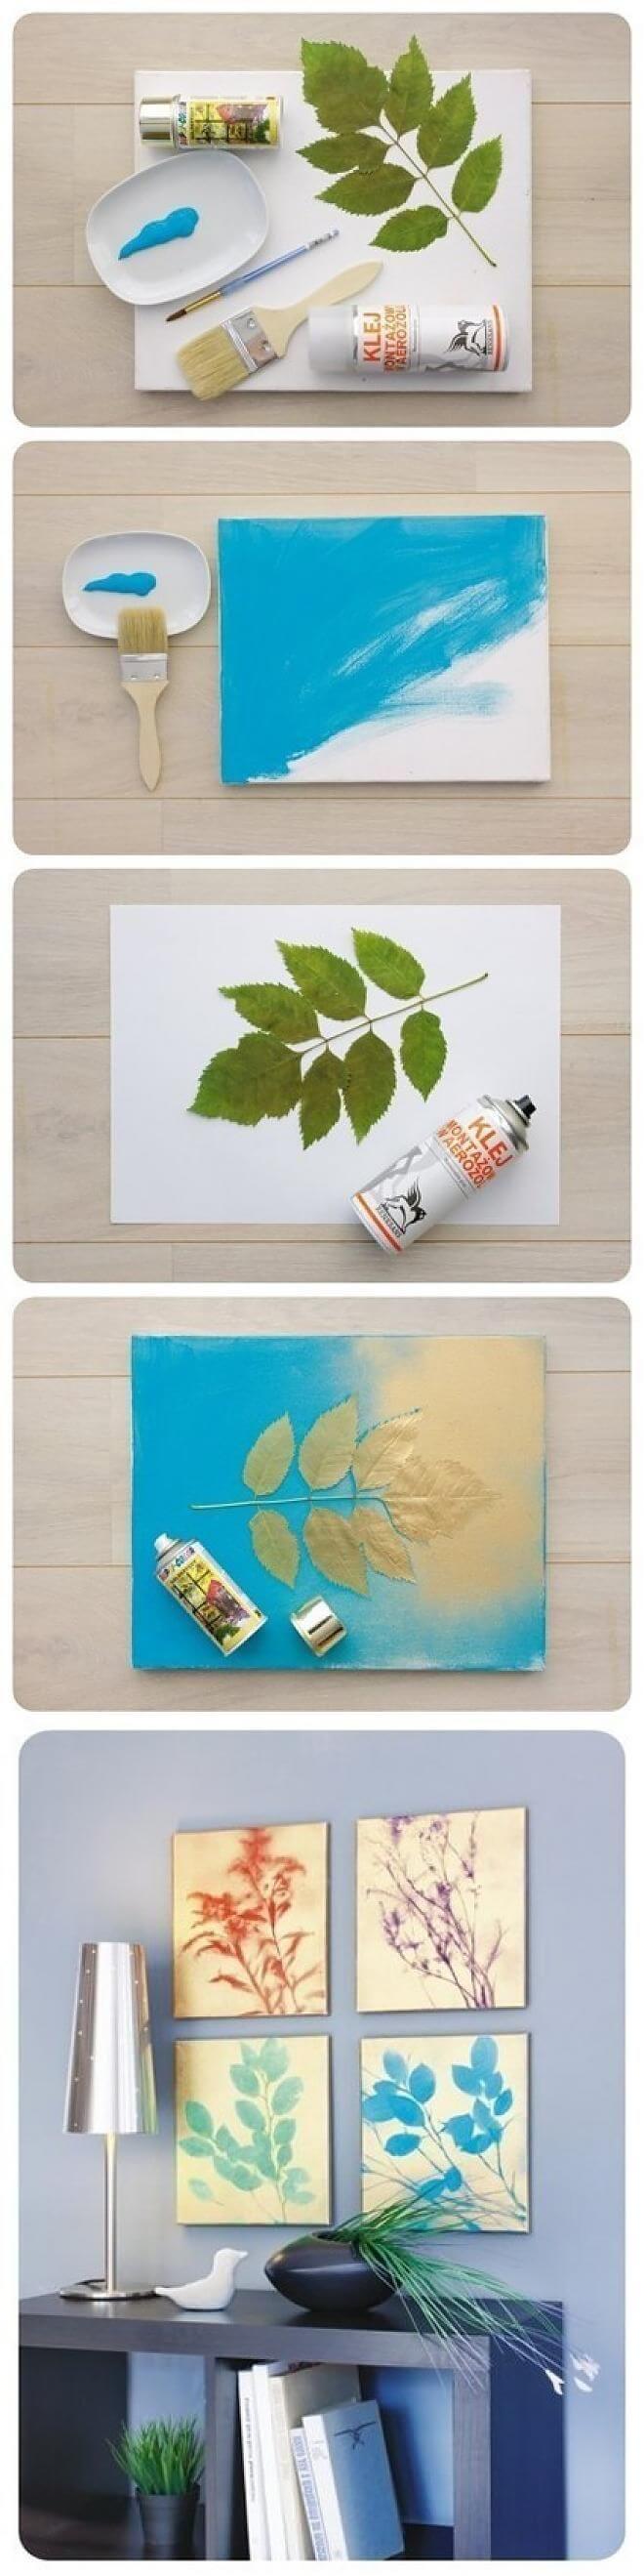
Step by Step Spray Paint Plants Leaves Wall Art DIY
DIY Tutorial for Wall Art Canvas Geometric Painting

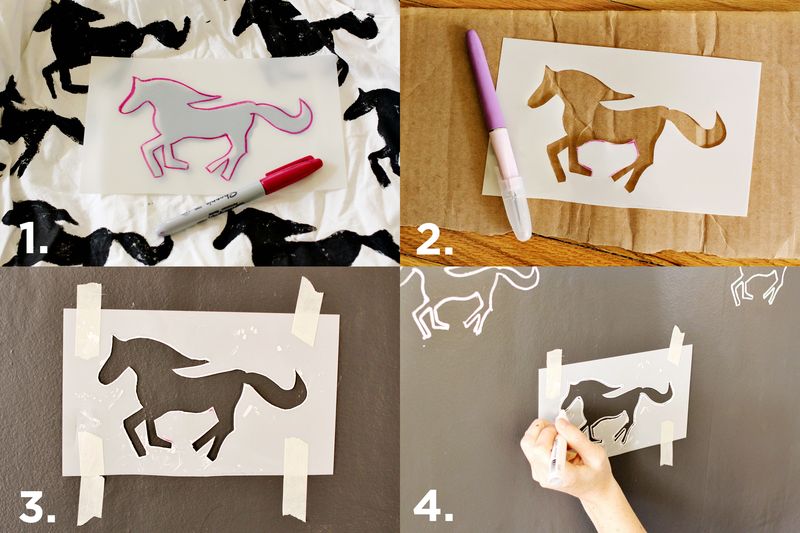
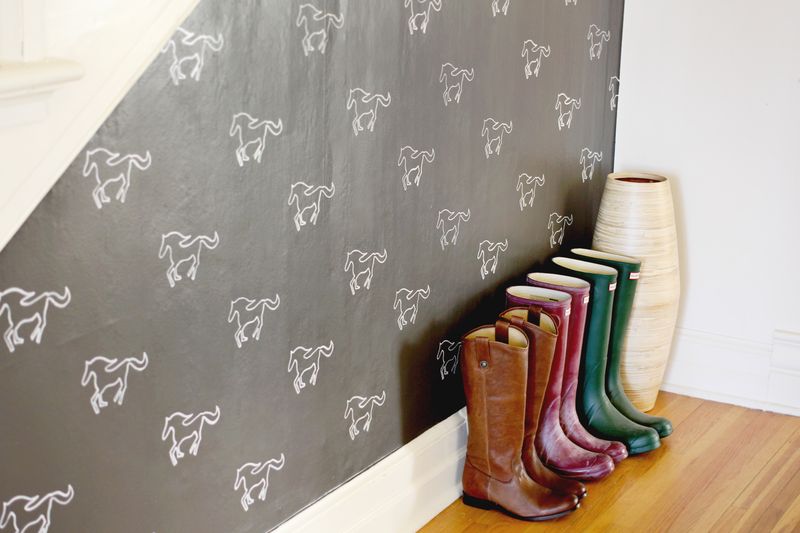
DIY Stenciled Wall Art Tutotrial
Butterfly Wall Art for Bedroom

DIY Step by Step Wall Decor Art
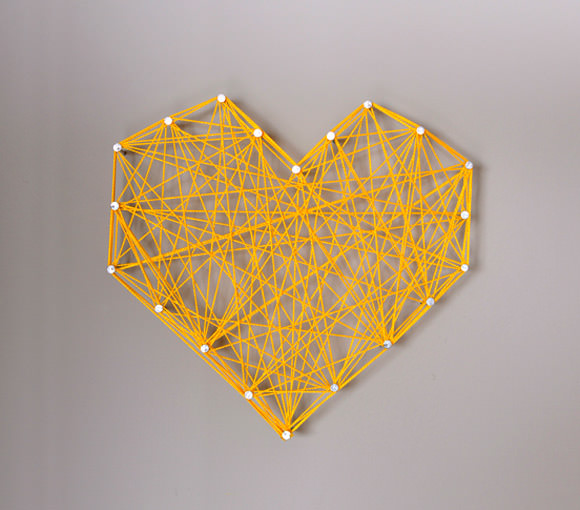
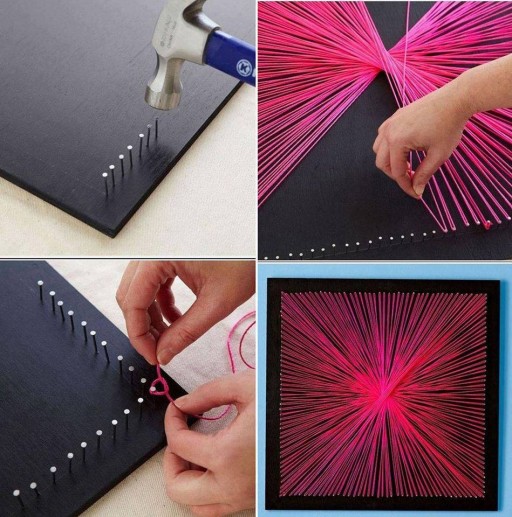
Yet Another Tutorial for Nails and String Wall Art
Rel: DIY Pendant String Lights and Yarn Lanterns
DIY Step by Step Nail n String Wall Art
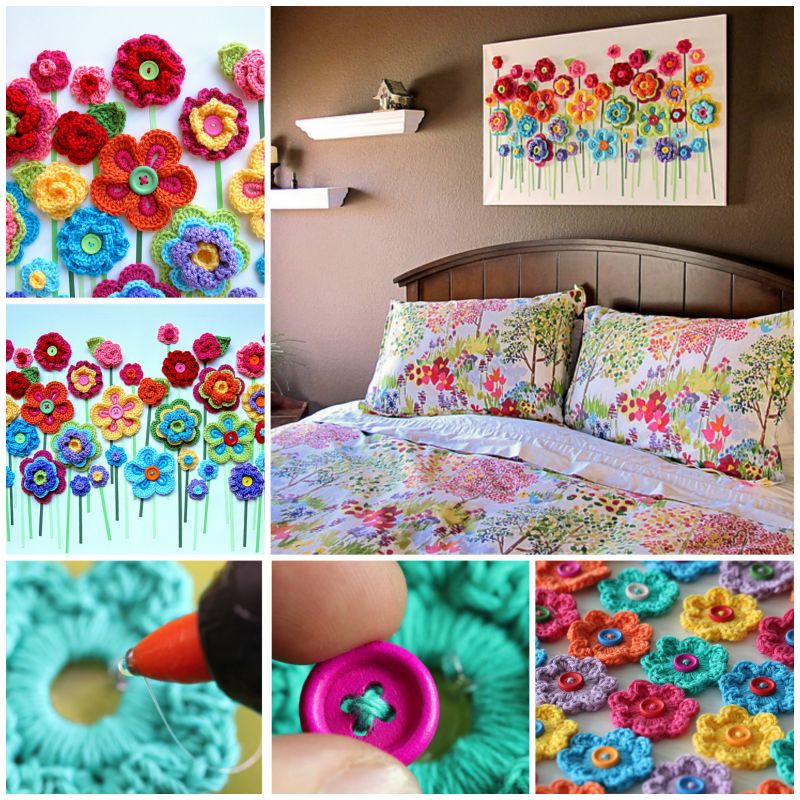
DIY Button Flower Wall Art
DIY Wall Art Ideas
5 Simple yet Modish Wall Art Ideas:
Things You Need:
For the first Project:
To craft these types of wall arts, you will only need drawing paper and watercolor along with a paintbrush.
For the Second Project:
To make this special type of wall art set, you will need three canvases, some masking tape, acrylic paints, paintbrushes, glue, glitters, and some drawing sheets.
For the Third Project:
To make this black bird project, you need a square wooden frame, some dry branches, hot glue gun, some paints, paintbrushes, clothing clip, and a piece of cardboard.
For the Fourth Project:
For the next project, which is a citric mix, you will need printer paper, drawing paper, CDs, watercolor, pencil, paintbrushes, and some glue.
For the Fifth Project:
For the last or final project, you will require a blank canvas, a paper cup, scissor, glue, a piece of paper, color spray, paintbrush, acrylic paint, a piece of mesh ribbon and some coffee granules.
Methods:
- For the first project, take the drawing sheet in a specific shape, and do a small circle on a side of the sheet with a vibrant color like red or scarlet paint.
- Now all you need is just paint one thumb with your desirable color and place your thumb impression around the circle.
- When this you will get a giant size flower on the white surface of drawing sheet, your unique wall art is all ready to hang!
- At first, set some masking tape pieces over the canvases and color the rest places with pink and gray color paints.
- When the colors are dry out totally, take out the tapes gently and set any desirable alphabet on each piece of canvas!
- You can make these alphabets by the drawing sheets and set them with glue.
- Now, spread a layer of glue on the alphabets and cover it up with glitters.
- After flicking out the excess glitters from the canvas on an extra sheet, let the whole thing dry and your canvas is ready to use as a super chic wall decoration!
- For the blackbird wall art, take the wooden frame and paint it up from entire
- Let the frame dry and in this gap color the dry branches with white paint.
- When both the items are soaked up properly, set the branches diagonally inside the frame.
- After that, take a cardboard piece, draw a bird shape on it and cut it out from the piece.
- Color the bird piece with black paint and set the clothing clip on the back of that cardboard piece.
- You can color the clip with white paint before attaching it behind the bird and then set it on the branches.
- For the citric mix wall art, make several circle shapes on both the drawing sheet and printing paper using the CD as the template.
- Color some of the circles with different colors, and rest one only edgewise or through the border line with same types of colors.
- Here, leave one circle uncolored, in which, you need to draw a cross symbol to divide the circle into 4 equal pieces.
- Now, color the each section with four different shades and cut all the circles out of the sheets. Fold and cut out this circle in a triangle shape to get four different colored petals or pulps at the end of your course.
- Take the colorful circles, fold it twice from the middle and cut the folder paper in the shape like a nice triangle petal.
- This way you will get 8 pieces of coloring petal from each color. Now place a set of 8 pieces colorful sheet on every single white circle, which you have emphasized with particular paint.
- When all the process with done perfectly, you will get some paper-made citrus slices in your hand!
- Take those four different colored paper pieces and set them on one remaining circle.
- Finally, set all the paper-made citrus slices on a canvas and your unique citrus mix wall art is all ready to hang on your wall.
- For the coffee wall art, take the canvas and color it up with a nice coat of yellow acrylic paint.
- When the color coat is all dried up, cut out the paper cup from the middle and set it in the middle of the lower section of your canvas.
- Now, take the paper piece and draw an image of a coffee granule on the paper.
- Cut out the idle section of that granule and set the piece of paper on the yellow surface of your canvas.
- After that, spray some colors over the paper and you will get a perfect replica of a coffee granule on your
- Make the coffee granules as they are pouring in inside the cup and make a pouch of reach coffee by using that mesh ribbon piece along with some coffee granules as you can see in the video above.
DIY Melted Crayon Canvas Art
Things You Need:
To craft this crayon melted abstract color burst, you will need a blank canvas, some crayon color, hair dryer and a plastic knife that’s it!
Methods:
- At the initial stage, put all the crayons inside a container full of hot water to remove the wrappers.
- When all the wrappers are removed naturally, take out the crayon colors from that container and begin your crafting process.
- Now, place the canvas, put a crayon color over it and turn on your hair dryer over it. Don’t forget to hold the crayon with a knife; otherwise, it will be blown away by the hair dryer’s flow!
- Then, start moving around the crayon piece as soon as it starts melting, and do the same process with several crayon colors by placing them different places on the canvas.
- Pick colors, which go great with each other and keep adding colors as much as you can on your canvas.
- When all the colors are added, keep the hair dryer on, until the entire canvas look a bit soaked.
- Make sure that you are doing this to the edges of your canvas and then hang it up on your wall as an attractive room décor in an abstract design.
