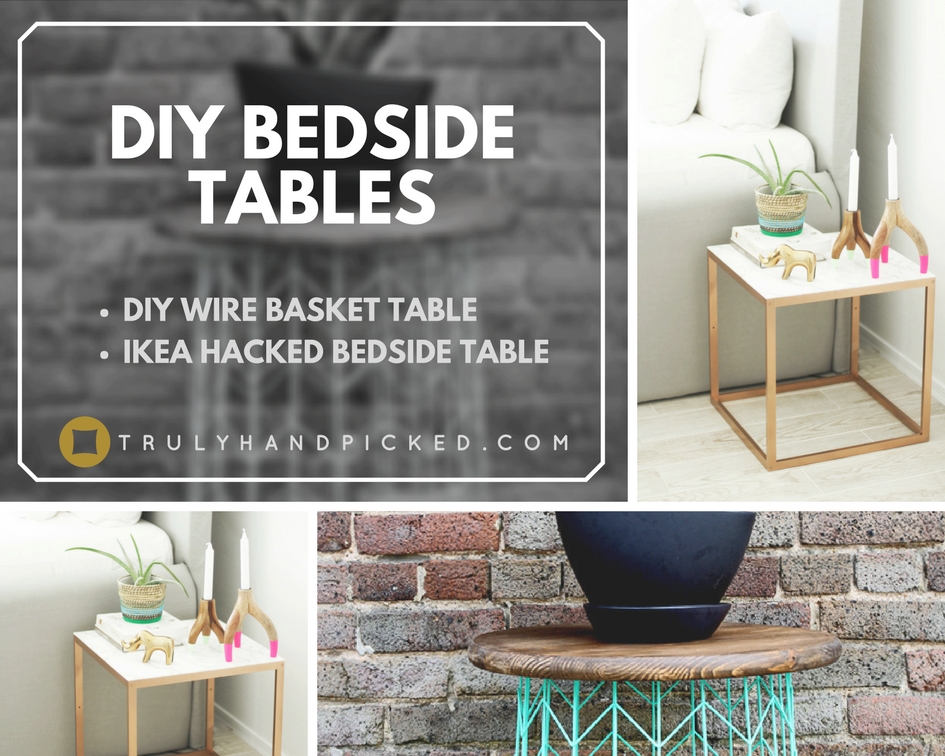
DIY Wire Basket Night stand – Bedside Table:
Making crafts from wire basket is another simple yet cool way, which is easy-to-the-pocket as well! As these wire baskets are easily accessible from any goods store and look really thick when turn into any DIY craft because of their amazing flaunt. One of the most wonderful parts of using a wire basket for a bedside table is that it claims very few products to reach the final form! Let’s check out the crafting procedure bellow-
Materials You Need:
To build such table, you need a wire basket, a piece of soft clothing, a piece of wood in a circle shape, one paint spray, and some kind strong glue.
How to Build:
- Firstly, place your wire basket on the outside laid on a newspaper or a piece of cardboard and spray the paint on it.
- Make sure that you spray the paint everywhere of the basket with a really thick coat and then, let it dry for the next few hours in an open air area!
- Now, place the wooden piece on the floor, spread a layer of glue and carefully set the top part of your basket over the layer by placing the upside down.
- Let the setup dry put appropriately and when it’s done, your simple yet modish wire basket nightstand is all ready to use as the bedside table of your room!
DIy Ikea Hack for Bed Side Table:
IKEA is a Swedish furniture store that is known with this acronym or abbreviation that has made numerous designed furnishings in affordable rates and the hack is one of the brilliant attempts of this manufacturer, for sure! If you can turn an IKEA hack into your bedside table then, it could provide you a stylish yet expensive decor look to your room within your low-budget! Thus, using these hacks of IKEA to make DIY furniture has become the new trend of this era. Let’s check out one easy process of such DIY project in this article below-
Materials You Need:
To build such table, you will need an IKEA PS 20×12 initiative heck, spray painting in copper color, marble contact paper, a pencil, a ruler a scissor, white paint for undercoat, a measuring tape, a paintbrush, clear coat spray, Allen key, some glue along with a few screws and a drill.
How to Build:
- At the initial stage, bring all the pieces of you IKEA table and set them the structure of a side table using the required screws and Allen key.
- Then, set the top surface properly and you will a get a perfect cube shaped table at the end of your process.
- Now, take the top again, grab your brush and start painting the wooden structure with a nice wood stain.
- Once you finished the painting process, leave it to dry for overnight after just one coat.
- After that, bring the copper spray it over the dried white paint coat after the coat was all dried out completely!
- We will recommend you to have proper protection before applying this color spray with your own hand.
- Cover the entire structure with two coats and then leave it to dry thoroughly before jumping to the next step.
- Now, once the copper coats are dry, cover the whole thing with a clear spray and let this coat soak again perfectly.
- After that, grab a measuring tape and measure take the measurement of the table top with that tape.
- Now, roll out your marble contact paper and cut out a piece from the whole sheet according to that measurement.
- Mark the required shape with a marker along with a ruler and make sure that you come out 1 cm excess along the straight edges of the square, which will help you to set the paper onto the top of your table.
- Cut 4 small cubes from each corner, take out the attaching paper from the sticky marble contact paper and carefully attach it to the top of the table’s top.
- Be certain that you don’t leave any air bubbles inside the marble paper while sticking it in and it would be great if you can stick the paper by rubbing it with the ruler!
- Now, stick down the excess part on the below side of your table’s top and set some hard float or protecting things onto the bottom of the table
- Finally, set or put on the top and your IKEA heck bedside table is all ready to use or hold your daily things in an organized way!
Pin it for later