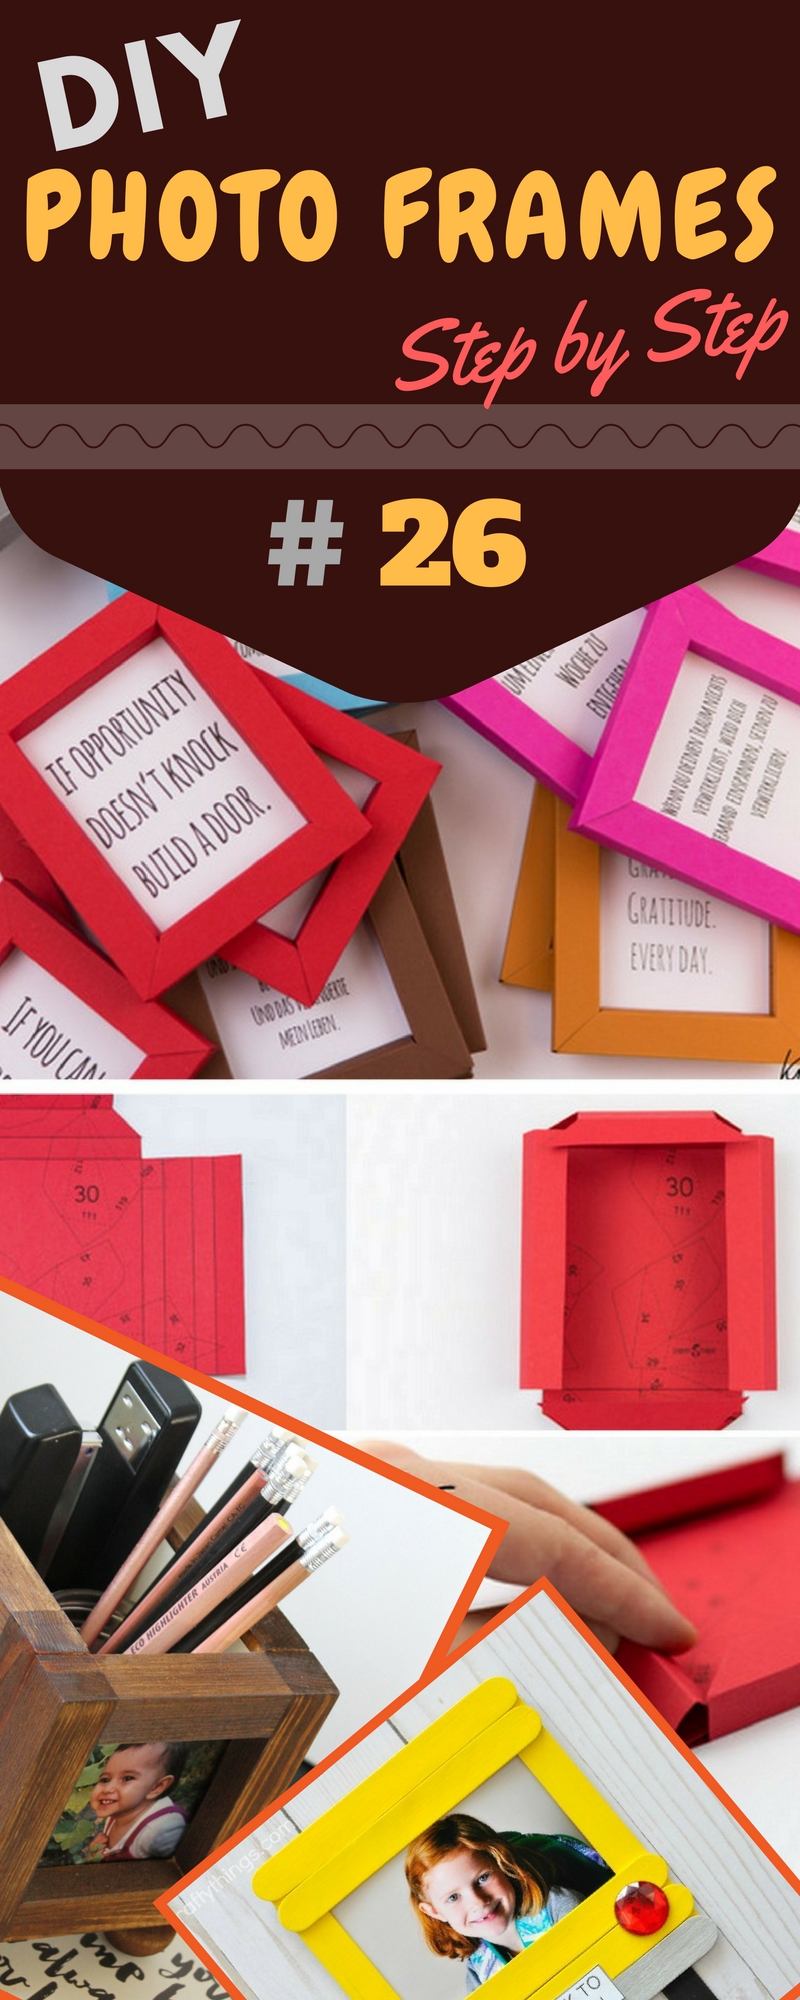
Picture frames are that one type of element which we often try to craft in our primary DIY process. You know the best part of crafting a nice photo frame is that it doesn’t claim any expensive components to be made, and you can actually craft it from any household products from your reach! We must concur that a picture wouldn’t look better until it adorns by a pleasant photo frame. Hence, you should try your hand at crafting a photo frame not for applying the DIY process, but for decorating your captured memory in an artistic manner, too. Today, we came up with some crafting ideas of different types of photo frames from various products. Let’s take a look at the making procedure below-
DIY Cardboard Picture Frame
Making cardboard photo frame is the simplest way to apply your hand on photo frame crafting. Cardboard pieces are easy to access, come low-price or sometimes without costly and the most wonderful part is that it is highly adaptable to transform any shape you desire! All you just need is that apply some chic designs or color combinations on your cardboard piece along with a nice shape, to make the frame absolutely flawless from each aspect.
Supplies Needed:
To make a pretty cardboard frame, you will need a white drawing sheet, pencil or black marker, ruler, scissor, cardboard piece, glue gun, glue, paintbrush and some design or decorative papers.
How to Craft:
- At first, take a desirable print of frame on the drawing sheet and cut the templates out of the sheet.
- Then, trace the template onto the cardboard and cut the shape out with your scissor.
- Now, glue the cardboard frame on one piece of decorative paper after spreading the glue with a paintbrush.
- After placing the cardboard on the decorative paper, fold each side of the paper and cut the corners away from the piece.
- Then, brush a layer of glue on the cardboard frame and set the folded decorative paper tightly.
- After that, set the ruler crosswise on the frame and create a symbol of ‘X’ on that part to cut it out from the middle.
- After cutting the ‘X’ shape out, wide up the X and glue it up with the edges of your frame.
- If you found any corner is staying out of your frame, cut that part away and then, glue it up securely.
- Now, the front portion of your frame is totally ready set on and you just require crafting an ideal base for your frame to keep standing the photo faultlessly.
- For that, take a clear template of your already crafted frame on another piece of cardboard and then, cut it out from the base. Set it on the decorative part of the frame, leave a thin space to slide in the photo inside it and finally set a strong portion on the back as a stand of your frame.
- Once you have done all the process perfectly, you will end up with a wonderful frame for your captured recall.
Inspiring DIY Photo frames
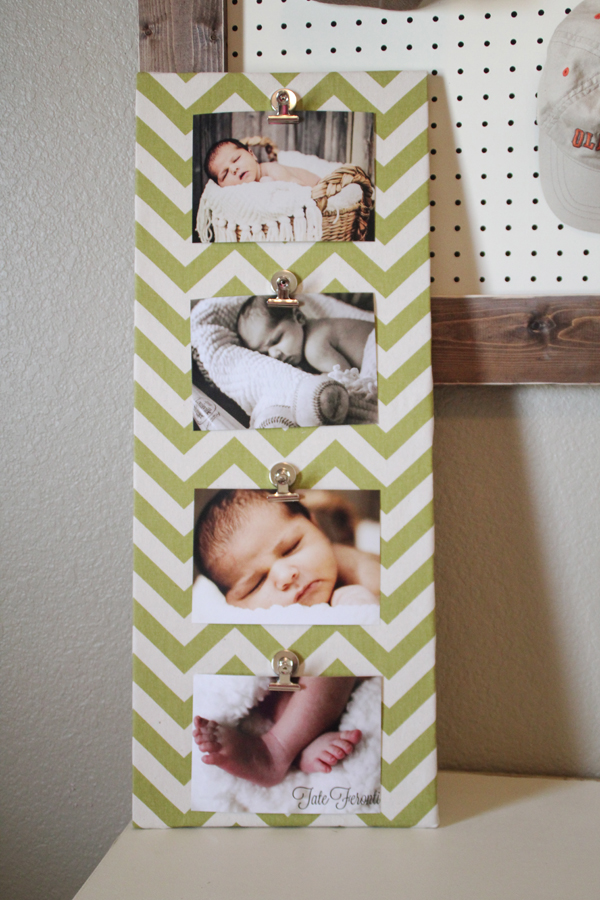
Chevron Fabric Picture frame
Also give try on burlap crafts
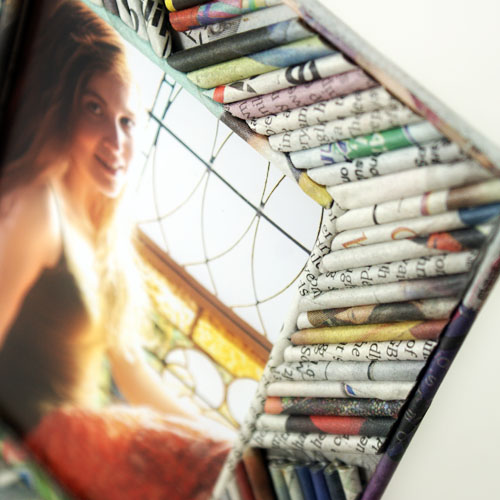
DIY Picture frame from old newspapers
Scrap fabric into picture frame
mimimommy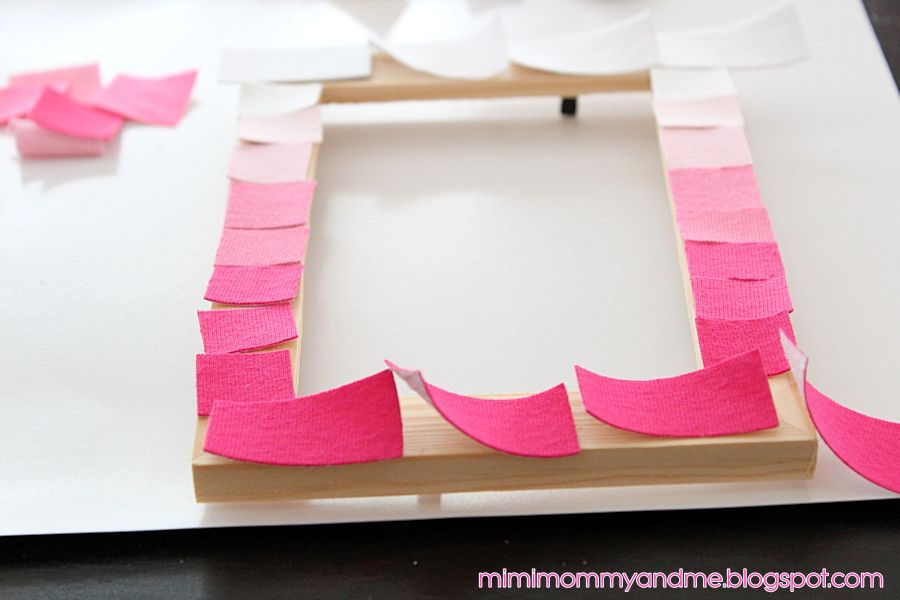
Also check for diy photo frame crafts.
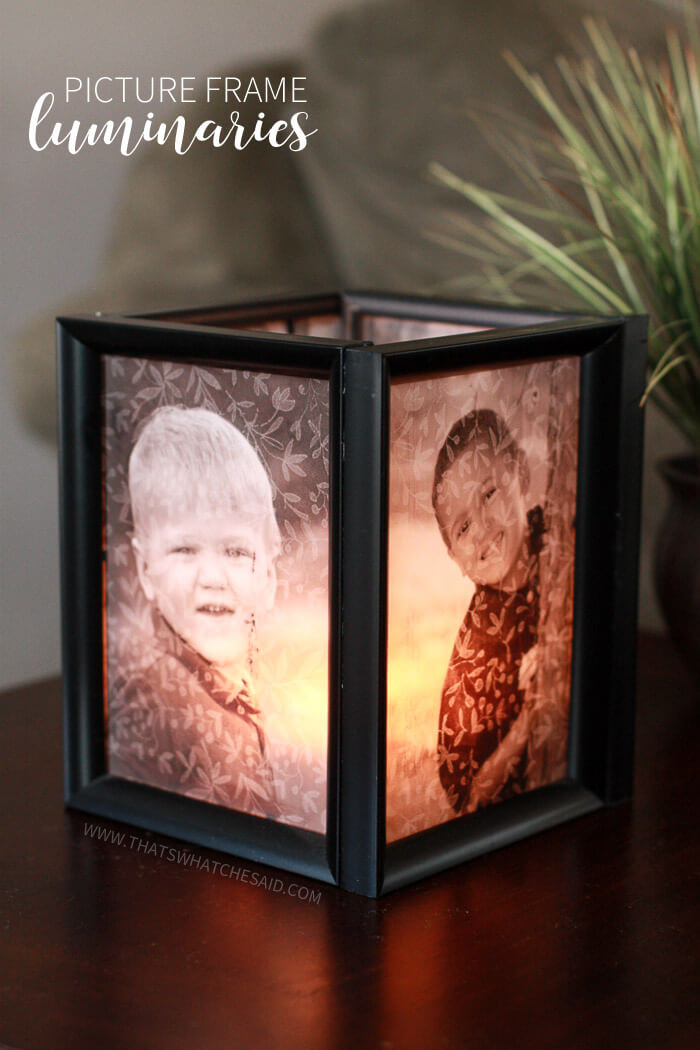
DIY Luminaries: Photo frames
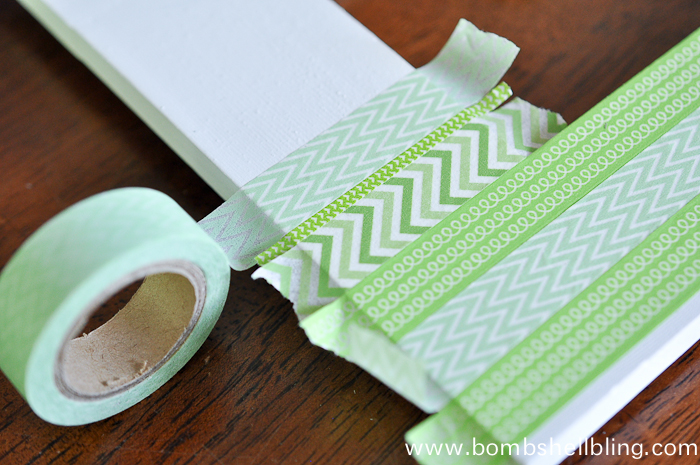
DIY Washi Tape Picture Frames
Old Style Wooden picture frames
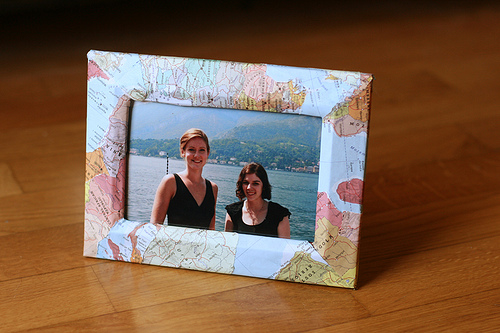
Turning Maps in to memories: DIY Picture frames
DIY Photo frames with Paper
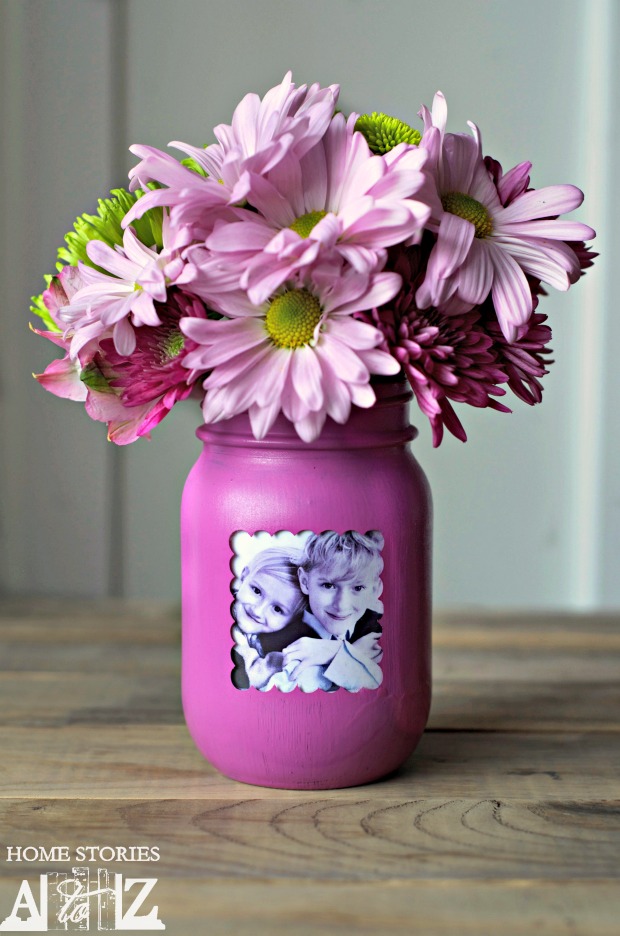
Picture frame in mason jars

Easy to Make Photo Frames with Popsicle Sticks and Washi Tape
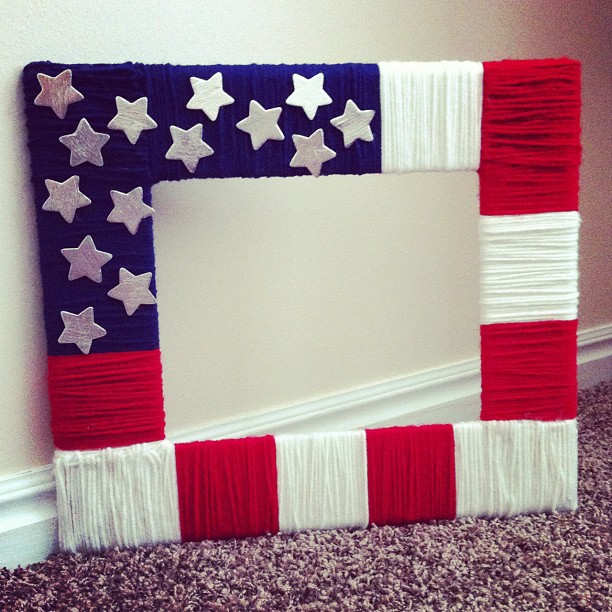
July fourth flag, Yarn Picture frame
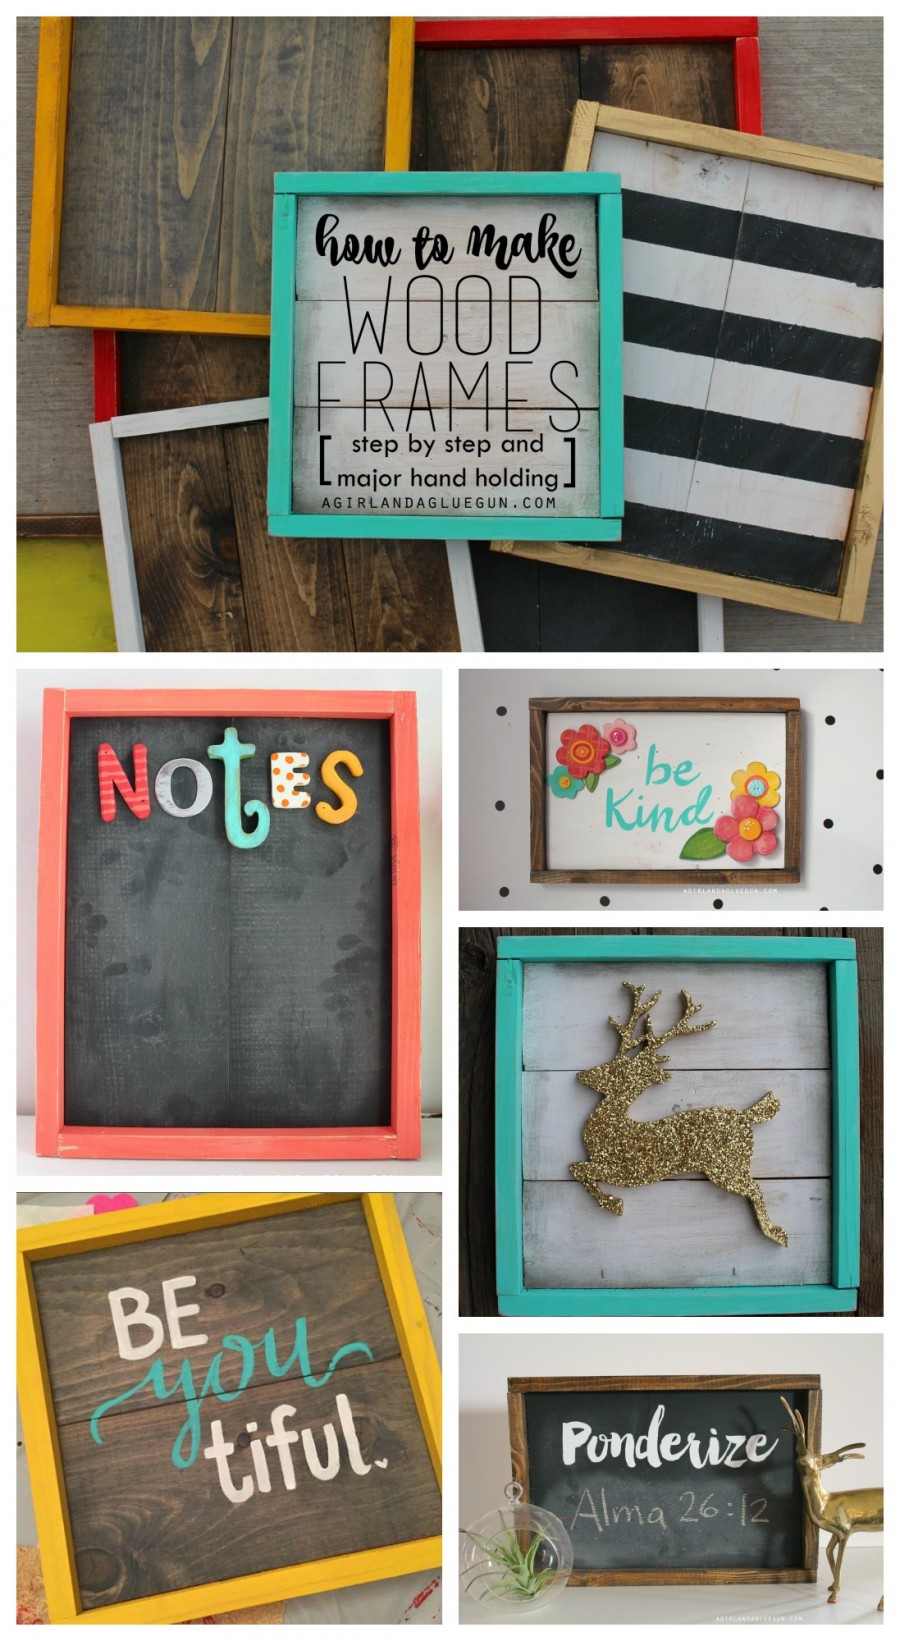
DIY Wooden Frame for Pictures and Notes
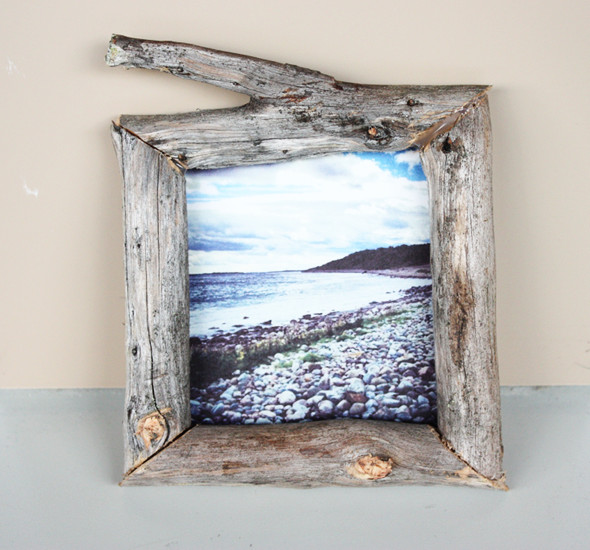
How to Make Rustic Wooden Sticks Photo Frame
morning creativity
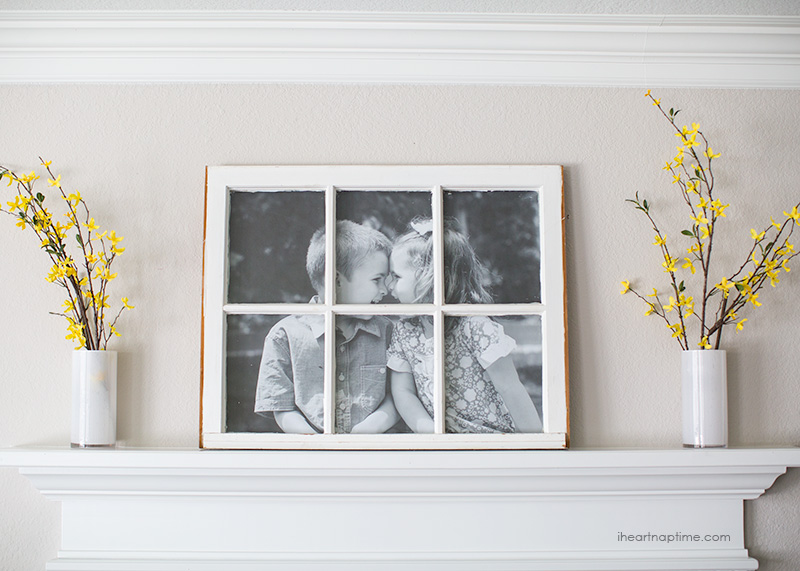
Window Frame Turned Into Picture Frame
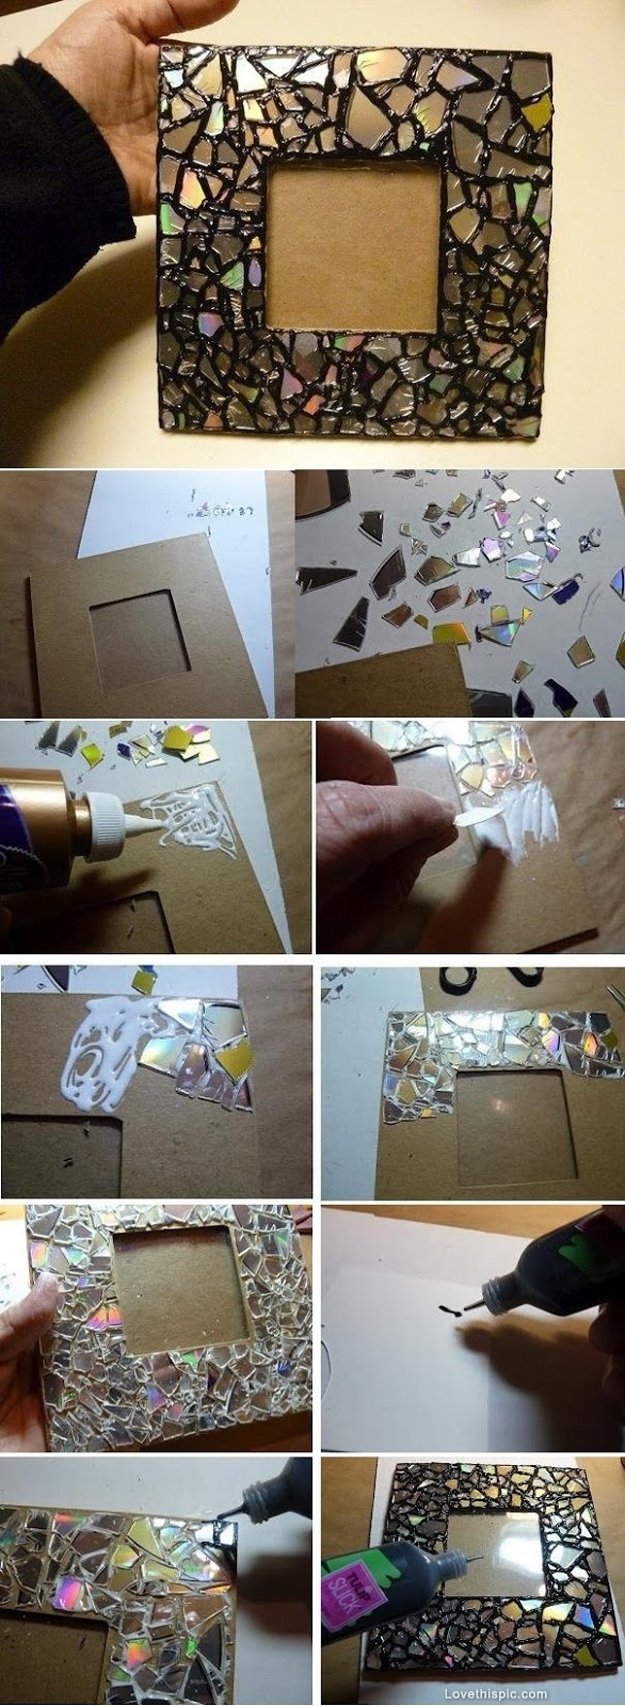
Tutorial: Old Cds Turned into Glittering Mosaic Photo Frame
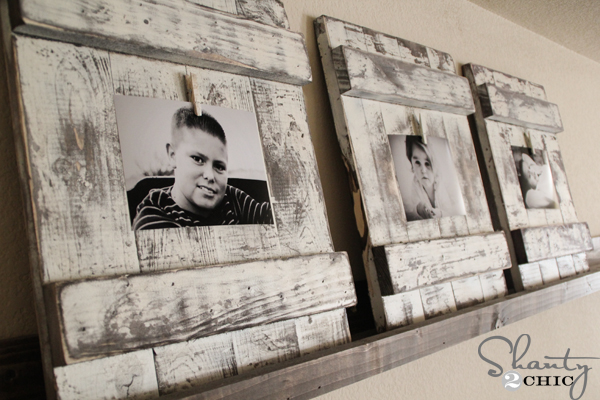
White Scrap Wood Turned Into Farmhouse Photo Frame
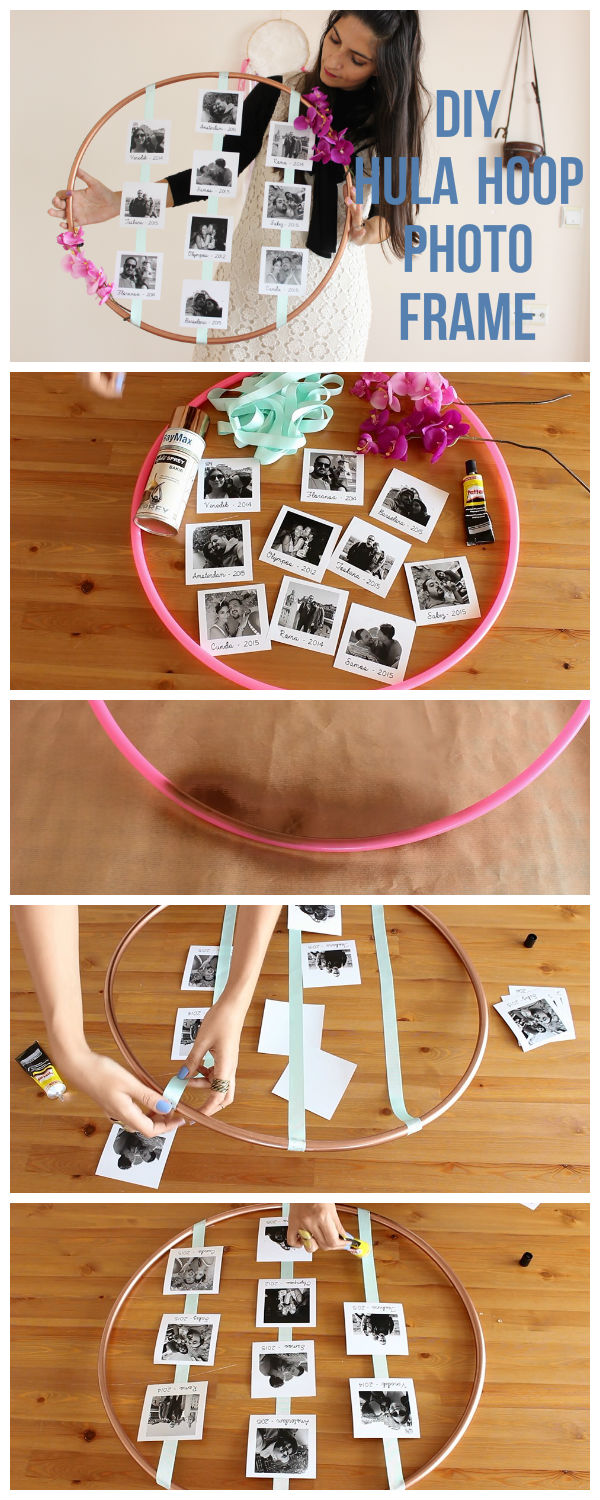
How to Upcycle Old Hula Hoop into Photo Frame
Tarz (other Lang)
How to Make Rustic Wall Hanging Photo Frame
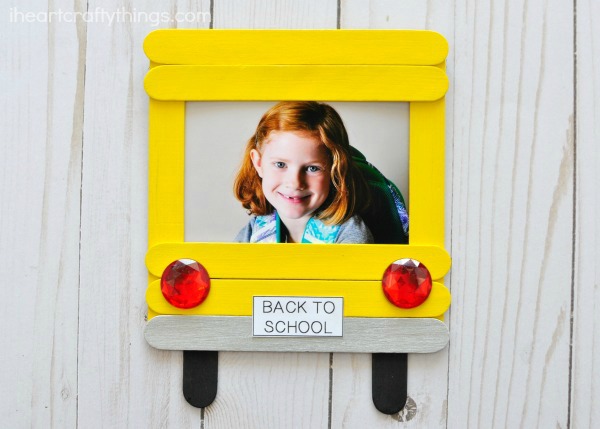
DIY Back to School Photo Frame
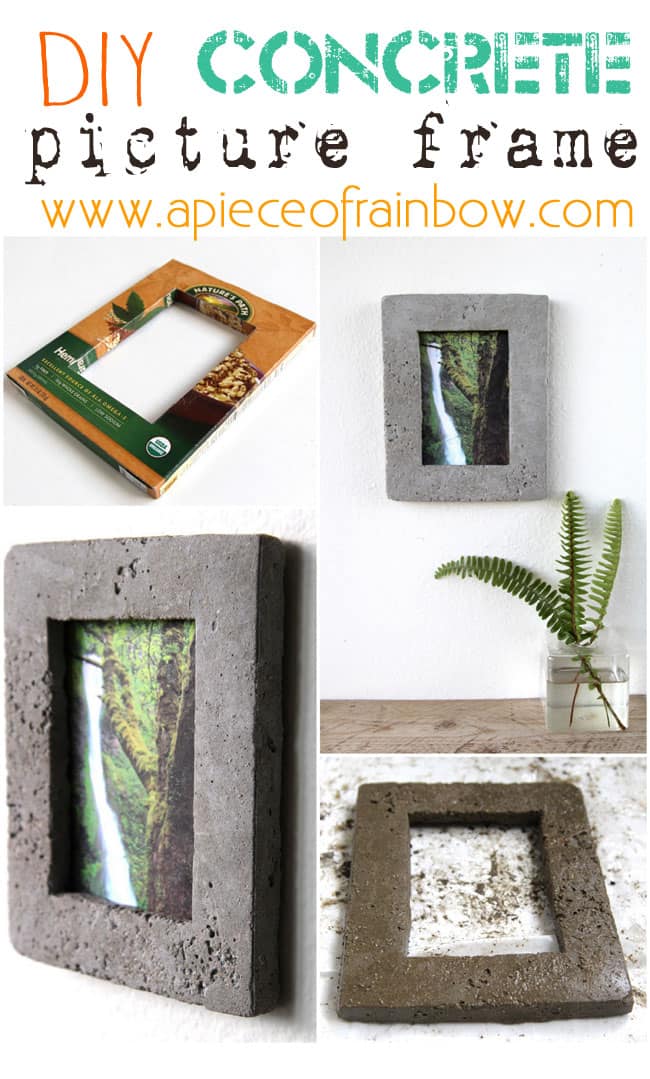
Making Concrete Photo Frame
DIY Burlap Photo Frame

Yet Another Paper Photo Frame with Step by Step Folding

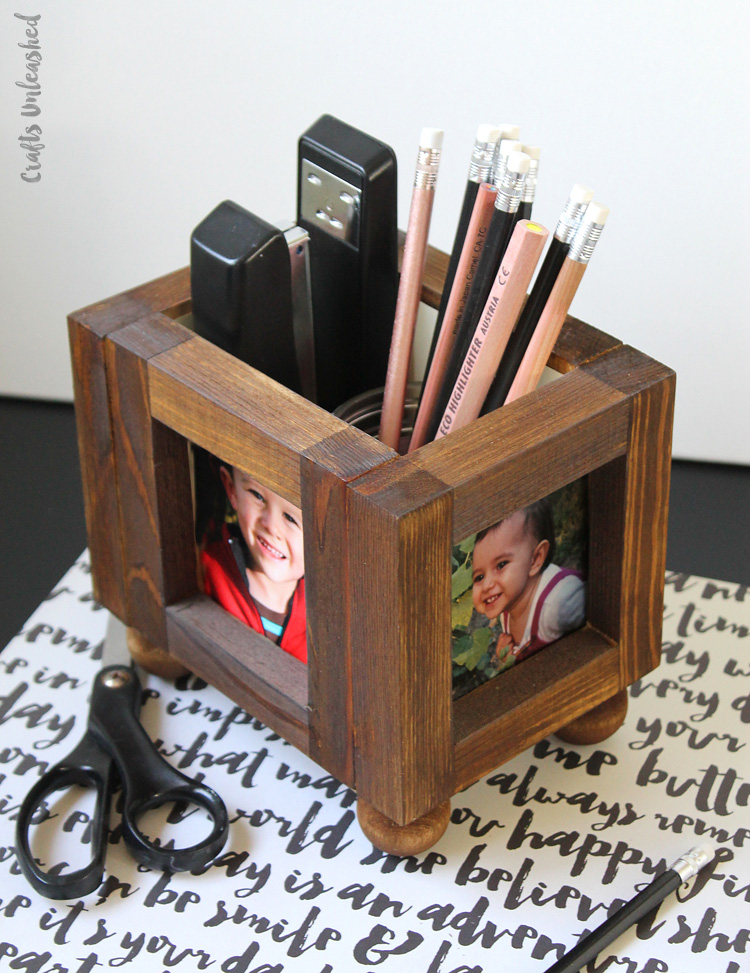
DIY Wooden Photo Frame Desk Organizer
DIY Creative Picture Frames
Cardboard photo frames may resemble easy to craft but they are definitely not the durable one, isn’t it! Thus, some of us avoid this element to decorate their memorable reminiscence and prefer some other type of sturdy basics like wood or plaster. Here we are showing you how you can turn a boring photo frame into a creative picture frame in an effortless way with some truly plain components. Take a look at the making procedure below-
Supplies Needed:
To make this type of floral photo frame, you will need a wooden frame, hot glue gun, and some decorative elements like plastic flowers, buttons, paper cuttings, etc.
How to Craft:
- At the initial stage, separate the two parts of a photo frame and take the front part to being your adornments.
- A wooden frame would do better in this type of experiments, however, and then take your desirable decorative object along with the hot glue gun.
- Here we are using some chic plastic flowers at the first attempt. At the start, pluck some of the artificial flowers from the bunch with contrasting colors, and set them near your frame just to be sure that those flowers would look good on your frame!
- Now, cut off the head stem from each flower and set those flowers on two corners of that frame with the help glue gun.
- Make certain that you are arranging them similar way on both corners and apply one flower after another while gluing them on your wooden frame.
- If you want then you can cover up the whole frame with flowers instead of decorating it only on two corners!
- Once, the flowers are dried out entirely, set the rest part of that frame with it and place your wanted picture in it.
- You can apply the same process, on some various types of colorful buttons as well as the plastic flowers!
- Cover the entire frame with crystal stones is another astonishing way to have a decorative photo frame. For the detailed processing, check out the mentioned video above.
- People, who love to use fabrics for their crafting, could also utilize fabric piece to cover their simple photo frame and turn it into a real eye-catchy photo holder.
- Layering photo frames with tapes are even easier to get a creative picture frame. All you just need is some designed wash tapes, to set them over your wooden frame, and your dull framework could instantly turn into an interesting piece to hold the favorite captured memory of your life!
DIY How to Make an Easy Paper Photo Frame
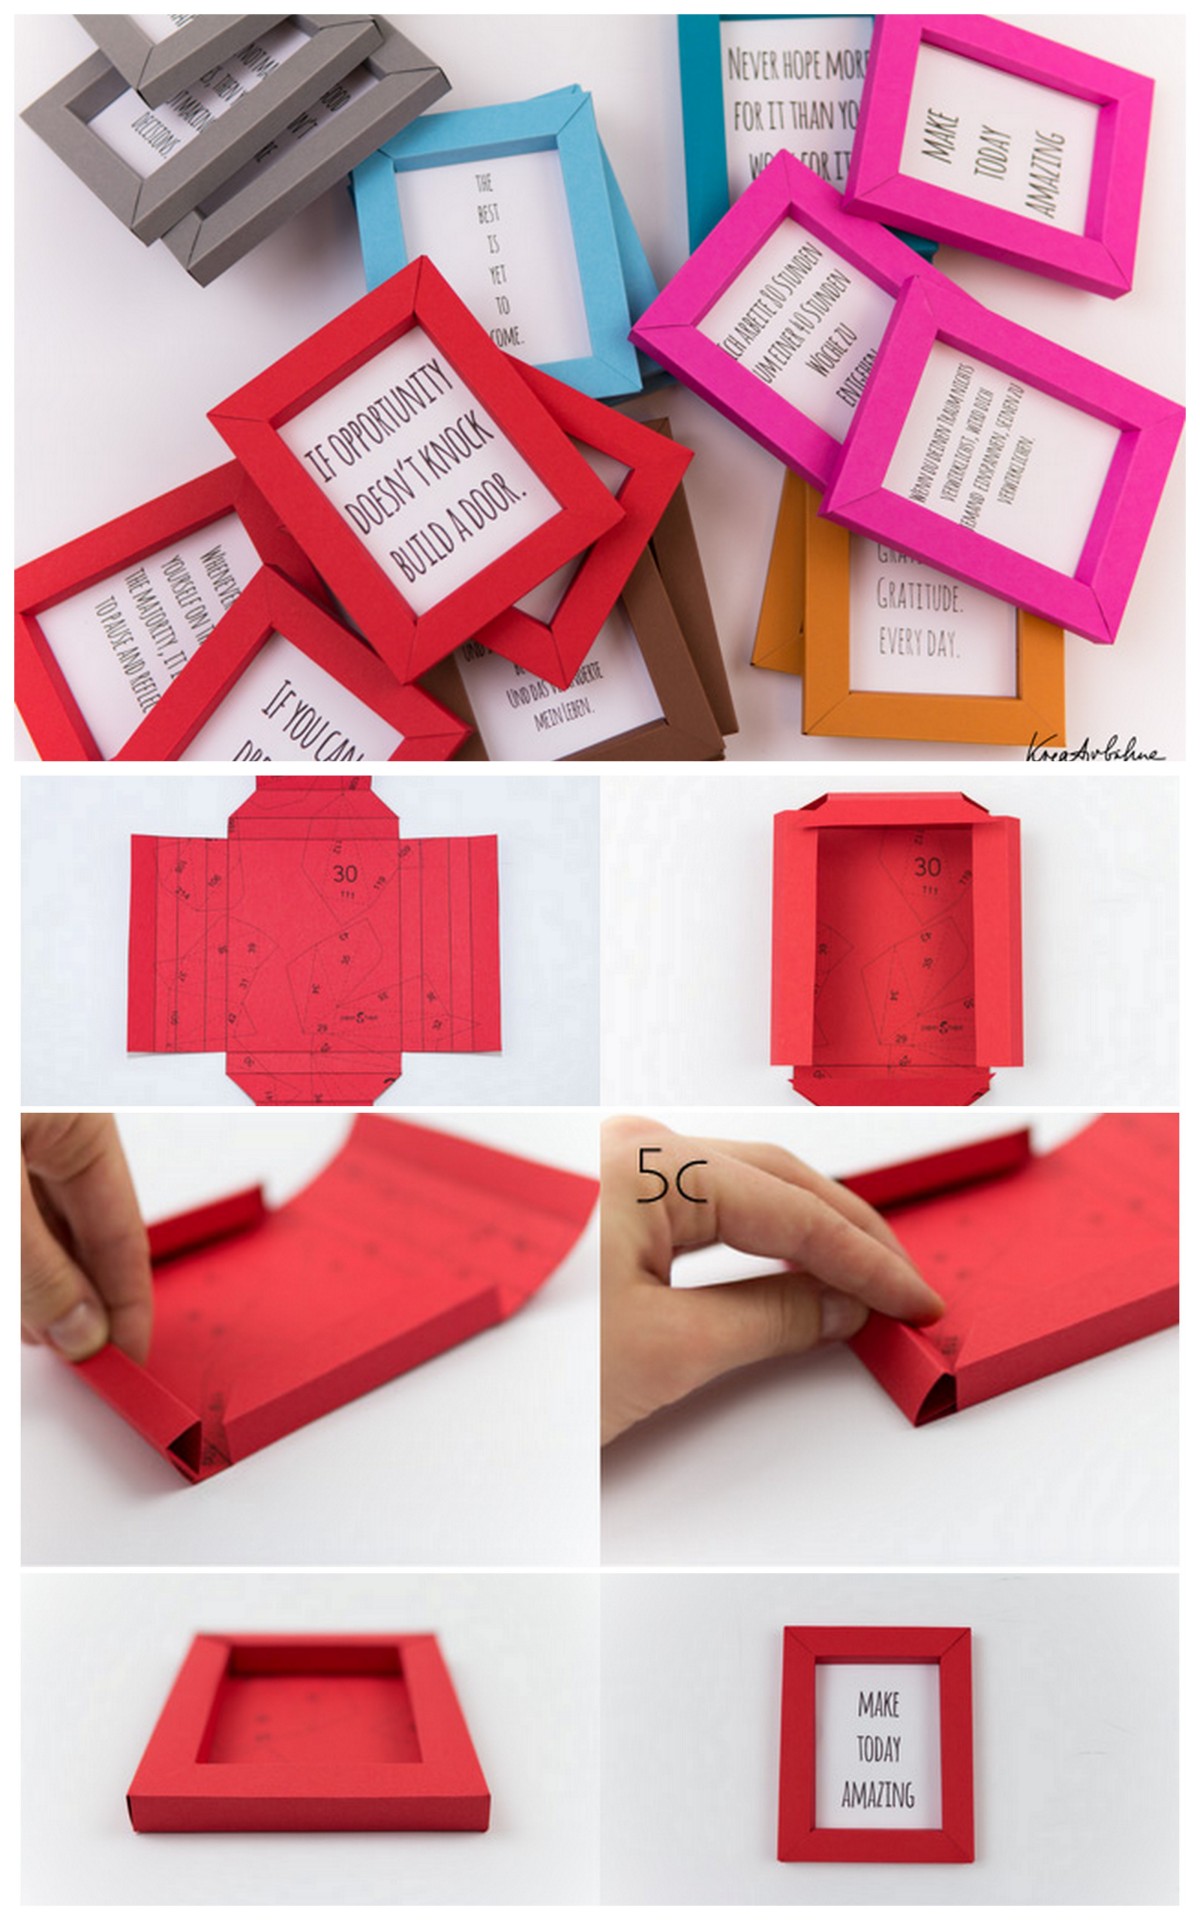
Displaying our captured memory in a creative way has become a trend of this era and creative people are definitely the masters of this job! It is hard to find a home, where no picture is exhibiting in your personal gallery walls, and you can choose any probable product to craft a modish photo frame. This time we are showing the use of papers to craft a personal photo frame. Crafting photo frame with paper is one of the childish attempts of these days, where you can craft a nice photo frame from various unique objects! But, today, we are demonstrating you how to craft a modish photo frame by using some mere pieces of paper in an artistic way, let’s check out the procedure below-
Supplies Needed:
To make a simple paper made photo frame you will need, a piece of paper, pencil, scissor, ruler, glue and one blunt object like folding bone or butter knife.
How to Craft:
- At the primary stage, draw a rectangle shape with the measurement of 27×24 cm size with the help of your ruler and pencil.
- Now, on the every angle of your rectangle, measure 4 segments starting from the corner as you can see in the video.
- Then, when you have all 4 angles with marks, connect them with the pencil marks as you can see in the video above.
- After that, cut the main rectangle out of the paper with a sharp scissor and cut out 4 squares from the sheet.
- Then, draw a trapezium on one side of the paper with the measurement of 1.5 cm and repeat this process with the rest three sides as well.
- After that, cut away all the trapeziums out of the paper, and you will get a perfect shape of paper, where the four corners are taken away, as you can find the in the video above.
- Then, take the folding bone and slide stiffly along the lines on each side of your paper.
- Now, you can easily fold the paper on the backside of your paper to insert one folded edge into another.
- While, one angle is done, repeat the process with the other part and add a little glue to stick the folded parts securely.
- When the folds are dried out perfectly, frame your photo inside this paper photo frame and enjoy the recall of your confined memory in this simplest way!
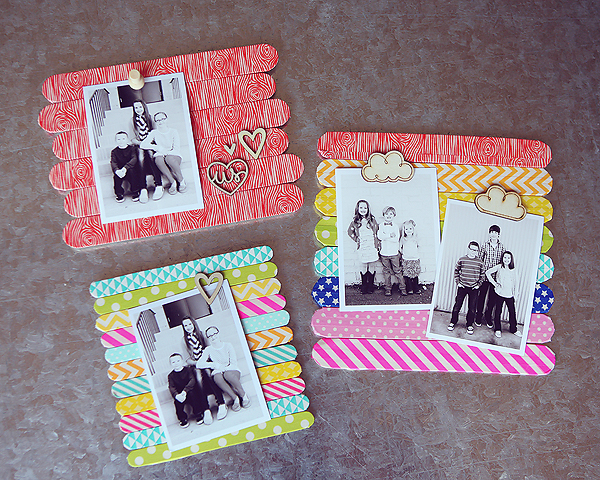
DIY Popsicle Photo Frames
Popsicle sticks are one remarkable object that often uses to craft several DIY crafting products, and making photo frames using this element is one of the commonest attempts of this element!
You know the best part of using ice crème sticks to craft a frame is that you don’t need any other basic supplies to build the base of your frame.
Once you have got some colorful Popsicle sticks in your hand! Let’s check out two different types of designs of photo frame using this single component. Check it out below-
Supplies Needed:
To make the first Popsicle stick frame you will need, 9 ice cream sticks, 1 piece of foam sheet, one pencil or pen, a photo, hot glue, scissor and some decoration elements like beads, zari, threads, etc.
For the second type of frame you need, 10 ice cream sticks, 4 tiny Popsicle sticks, one piece of foam sheet, glue, and a photo along with a scissor again.
How to Craft:
- Firstly, take a medium sized piece of foam sheet and set two ice cream sticks on it to take the precise measurement of them.
- Now, take a perfect shape of those sticks’ size and cut away the extra parts from that sheet with a very sharp scissor.
- Then, spread some hot glue on the foam sheet and set Popsicle sticks on that sheet as you take the measurement previously. Just set one extra stick edgewise in the middle of those two reclined sticks.
- When the sticks are dried out completely, set the wanted photo in it to take an exact size of the border lines of your frame. Check out the video for a clear processing.
- However, place two ice cream sticks lengthwise on the front side of your base, and set again two sticks similar way on the backside of that pedestal.
- This way, you will get a thin space inside those standing sticks to insert your photo smoothly.
- Now, set one ice cream stick on the top of your frame and one stick on the bottom to emphasize your photo properly.
- Finally, attach some beads on the top layer of Popsicle stick and insert your photo when all the part and soaked thoroughly.
- To craft the second frame, make the base similar way as you did for the previous frame on the surface of the foam We will recommend you to use different colors to coat the sticks to get a completely different type of frame at the end of your course.
- Now, set 7 pieces of stick edgeways with the hot glue and give the set flaunt of pointed shape as a fence as you can see in the video above.
- Then, set a square of sticks on the front side of the fence-shaped stick gathering by using those tiny sticks, as you are highlighting your photo with these four sticks.
- When all the parts are soaked properly, set the frame on the premade base of your photo frame with hot glue, and insert your photo after a few minutes to let it dry properly.
DIY Modeling Clay Picture Frame
Clay border photo frame has the best rustic view for your gallery wall and the most applauding part is that it doesn’t need any extra effort to be crafted! Have you ever seen modeling clay made picture frame at any of your friends or relatives’ houses?
They may demonstrate intricate but in reality, this type of frame are even easier to craft than many other DIY picture frames! If you don’t believe us then, just watch out this simple yet super classy clay frame that we are referring in our discussion below-
Supplies Needed:
To make this photo frame, you will need some air drying clay, a wooden frame, some gouaches, paints, a small bowl, paint brush and a scissor.
How to Craft:
- Begin your crafting by taking the clay out of the package and make two clay rolls of 50 cm long.
- Flush clay is so malleable that you can make those rolls with a few minutes from that clay. Make sure that rolls are equally thick with the approximate measurement of a half-inch size.
- However, after making those rolls, joint both rolls to make kind of braid by twisting them together.
- Now, set the clay braid on the wooden frame and make a diagonal cut to join the corners very smoothly.
- You can use some clay slick to glue the braid parts securely on the frame base. The base part of this type of clay is that it doesn’t need any oven or hot circumstance to dry and simply soaked in the open air!
- Use your hand to make the braid surface smooth and nicer before jumping to the next step.
- After that, take a small piece of clay to make a ball and flatten it with the pressure of your fingers.
- Now, use a gouache to make the cut on the flatten clay piece to make some petal shapes.
- Set a tinier ball at the centre of your clay-made flower and make some design on the petals if your want.
- Use a gouache again to make the designs and press the centre of the tiny ball too.
- Make a leaf from a small piece of clay by following the process you can find in the video and craft several flowers and leaves in the same way.
- Now, use the previously made clay slick and attach those flowers and leaves on the corners of your braid placed frame.
- When all the parts are dried out completely, color the whole clay objects with your desirable paints before setting any photo inside your frame.
Mentionable here that, it is better if you can set the whole thing separately from the wooden frame, and then, color the structure! This way, your frame would stay away from any kind of unwanted spots of paints or touch of clay.
Sharing is Caring