
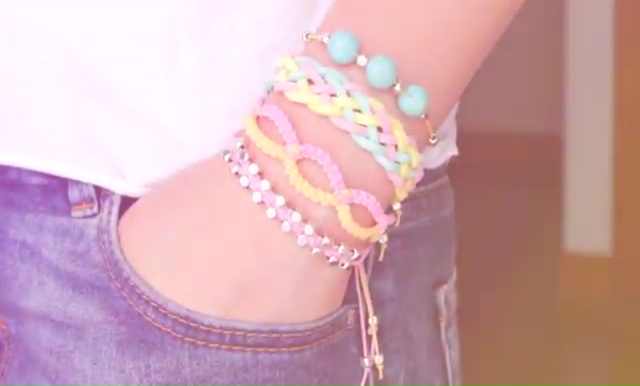
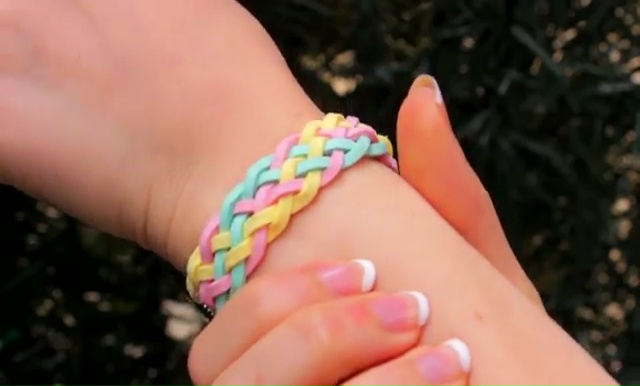
Bracelets are wonderful objects, especially for the contemporary girls, who love to wear such things on every single event. Thus, gifting these things on special occasions will be one of best ideas we have got, isn’t it! It has been observed that these kinds of friendship bracelets are one of the favorite materials of girls when it’s come to the matter of modern ornaments. Consequently, we have already mentioned some easy designs on this issue in our previous DIY bracelets article, and today, we are presenting again 4 beautiful patterns of friendship bracelets which you can craft on your own capability with some easy domestic components in DIY process. Check out these step by step procedures to make this item-
DIY Stackable Friendship Bracelet
How to make Bracelet Step by Step:


First Bracelet:
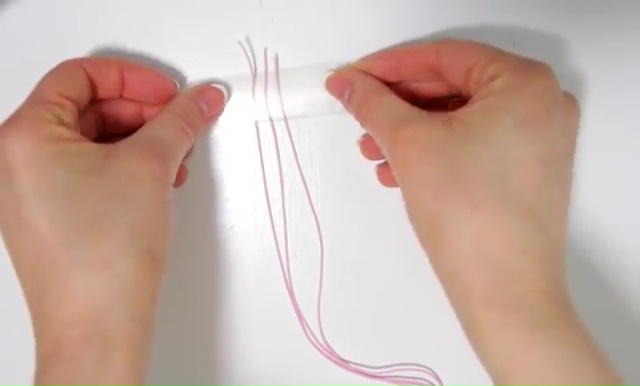
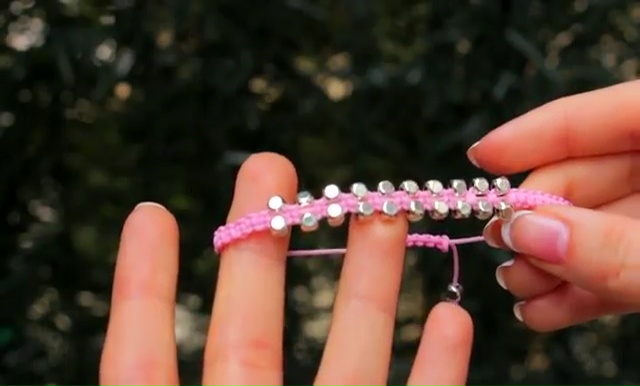
- To make this bracelet you need only any sort of colorful cords and some glittery beads.
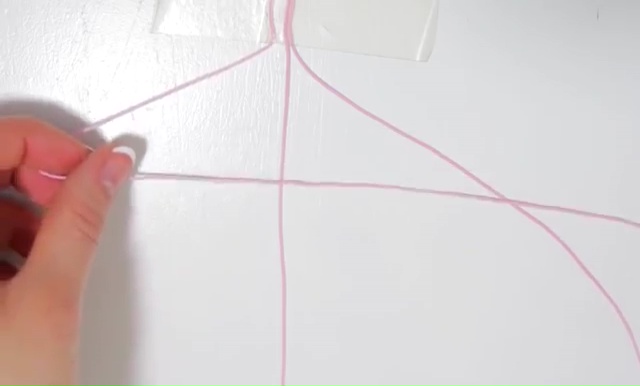
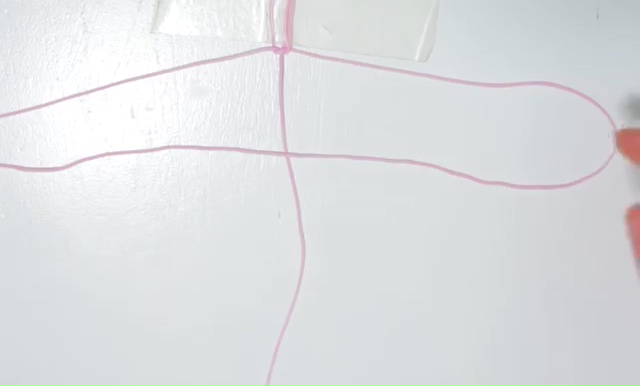
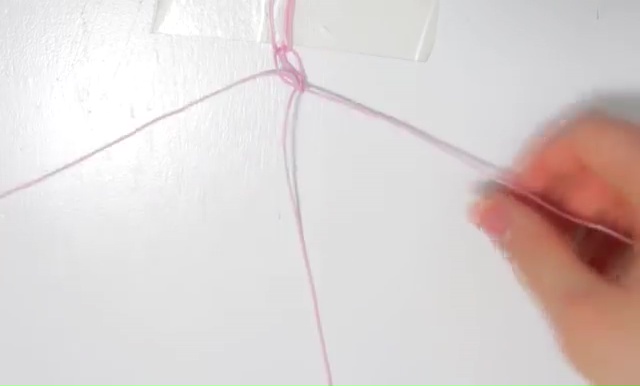
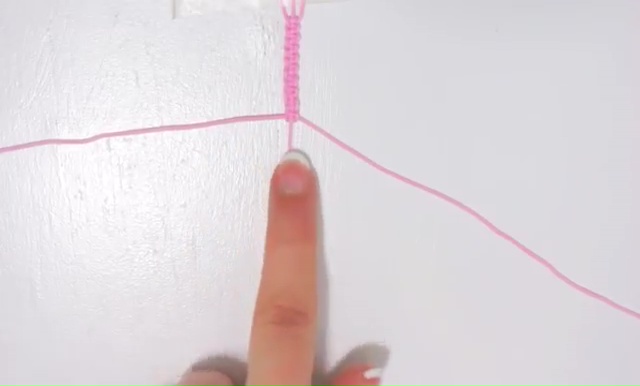
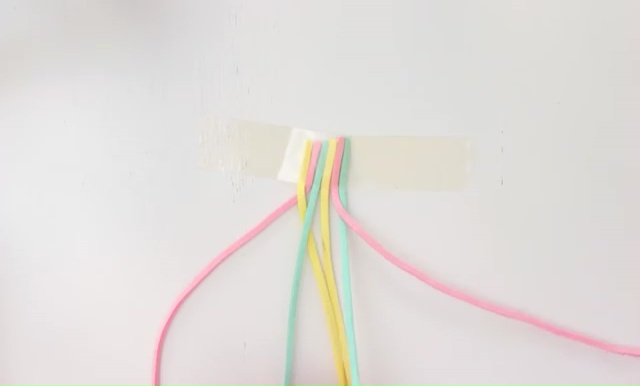
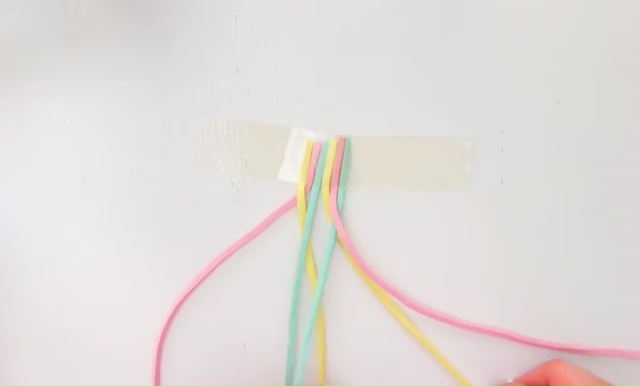
- At first, take 3 strings of your cord with same length and tape them up on a place together.
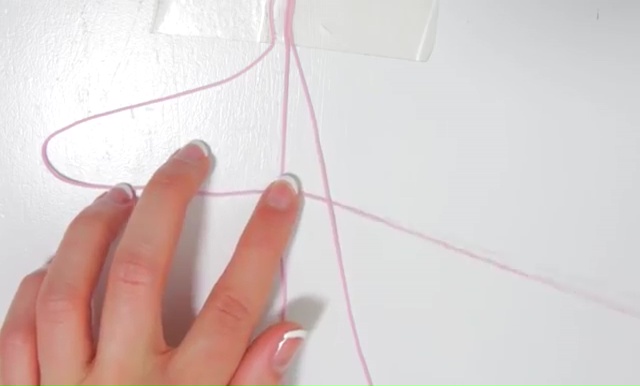
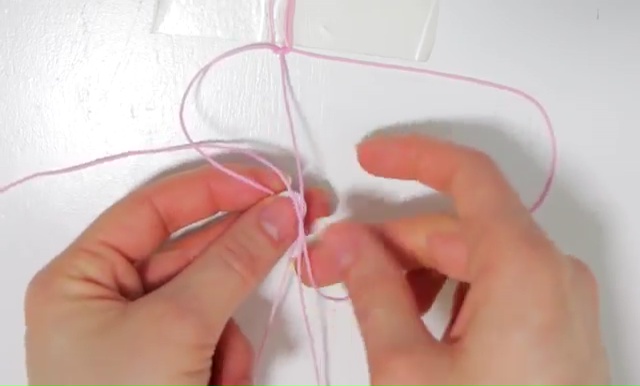
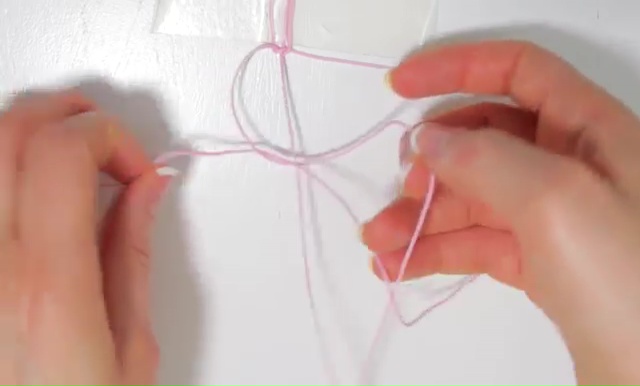
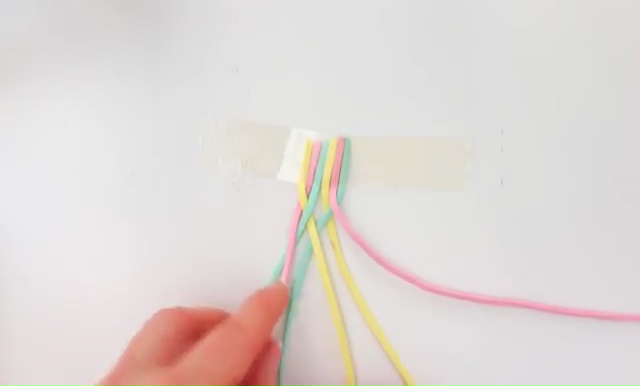
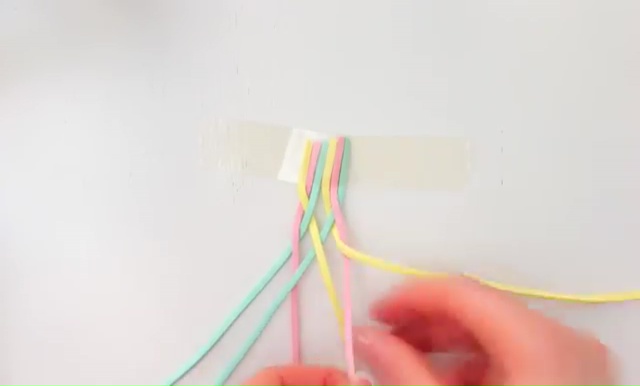
- Then, separate them with a gap of 3 inches, now take the left string, bend it like a 4 shape place it over the centre; then take the right cord, take it near the centre cord, now pass the bottom of the cord into the loop you did with the left and centre cord.
- After tightening the knot, do the same process in reverse ways, like take the right cord first, bend it over the centre cord in a 4 shape, now take the left cord and pass it through the loop, and again tighten the knot carefully.
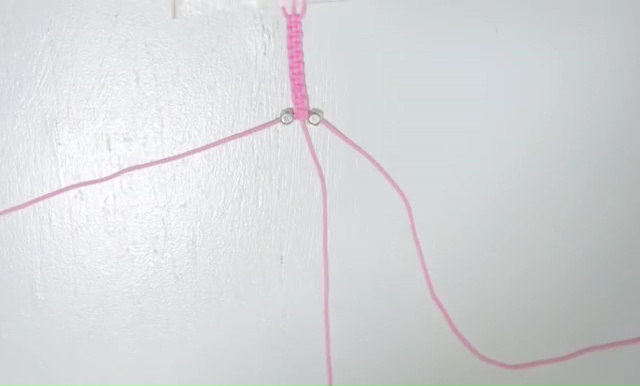
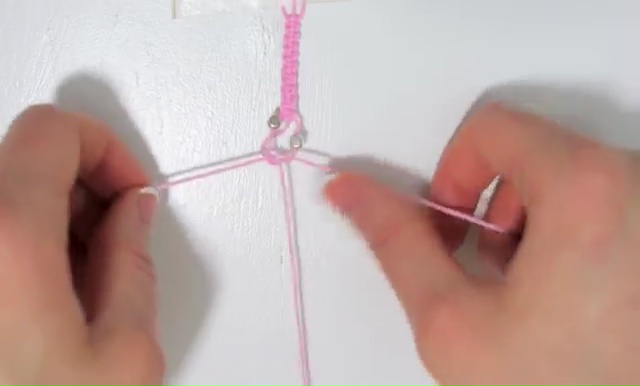
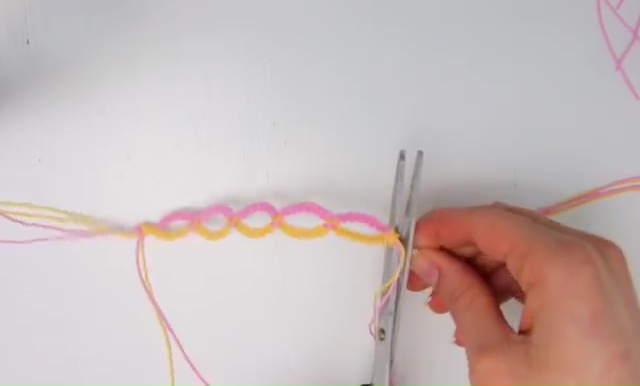
- Make this type of knots for a while, after getting a minimum length of knotted design, take two beads, insert one through the left cord and one through the right cord, now, make a double of square knots.
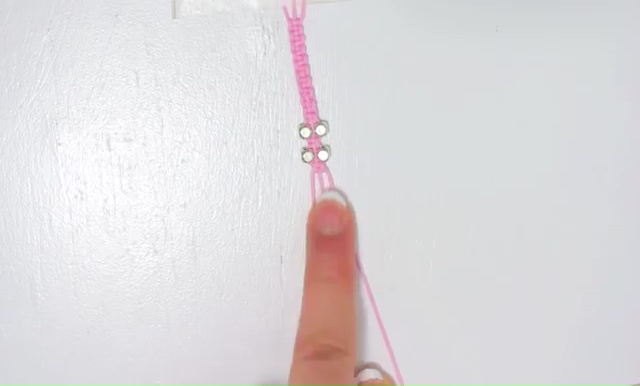
- Then take more two beads and do the same process again, keep repeating this procedure for many times as you want.
- After making some super square knots with your glittery beads, jump to the previous design again and do complete the bracelet perfectly.
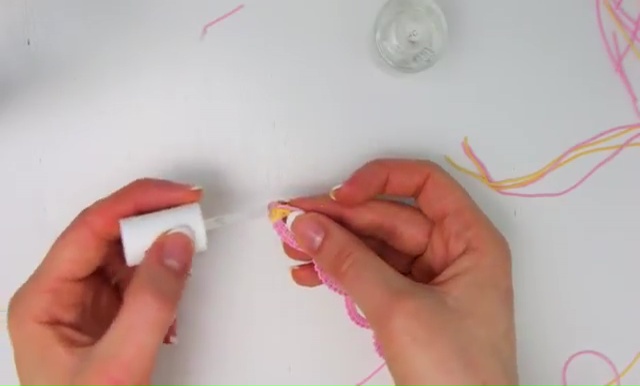
- Now, cut the side cords away with a scissor and secure the last cord by spreading some clear polish.
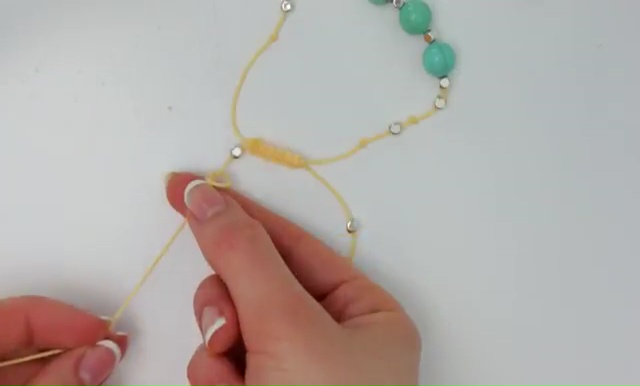
- To make the back part, tape down two rest cords by assembling them; take a piece of string to make square knots at this portion as well. After embroidering the knotted designs for a while, insert two beads at both the ends and secure them with two knots. That’s it; your pretty bracelet is all ready to wear at any of occasions!
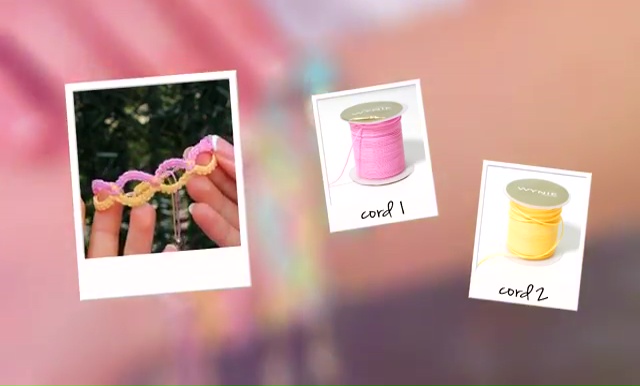
Second Friendship Bracelet:
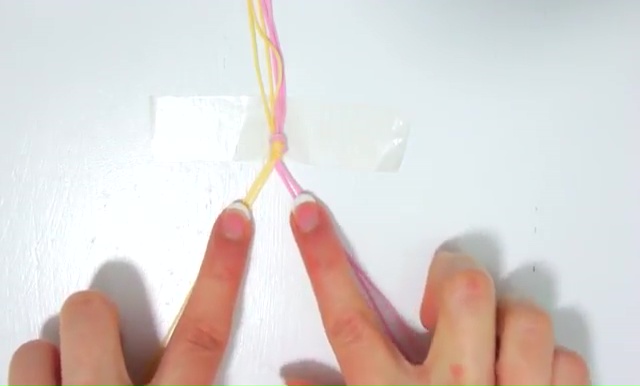
- To make the second one you need, cords with two different shades, we choose yellow and pink strings.
- Take 3 pieces of a cord of each color in equal measurement and make a tight knot at the starting point.
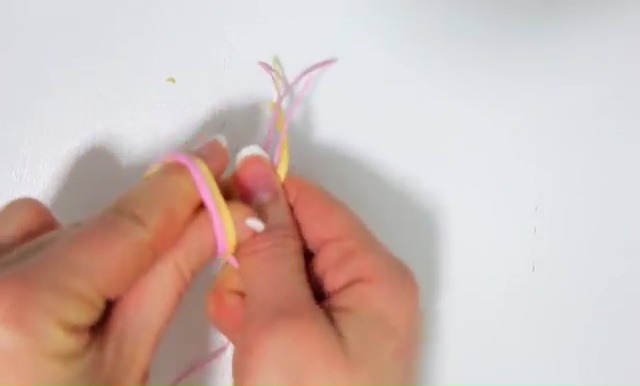
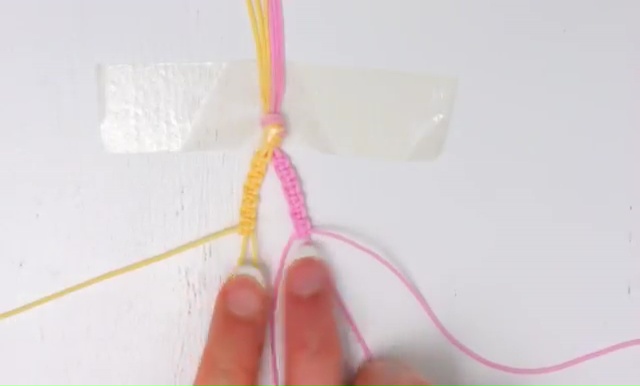
- Then, tape it to a table, separate the two colors equally and make some square knot on each side.
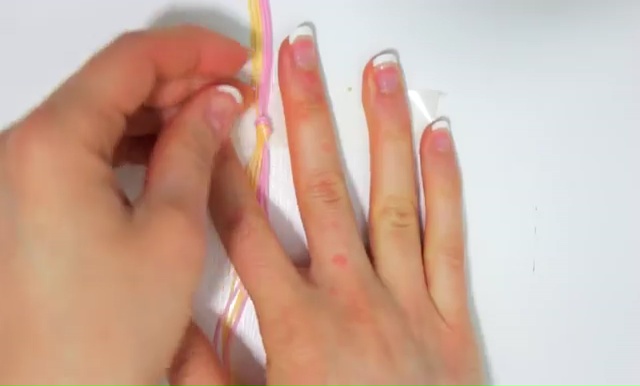
- After that make gathered square knot at once and for that you need to keep two cords on the left, two on the right and two at the centre, then, bend the left portion, hold the centre part and pass the right part inside the loop, tighten the knot by pressing it up. You can make one more knot there to secure the design well.
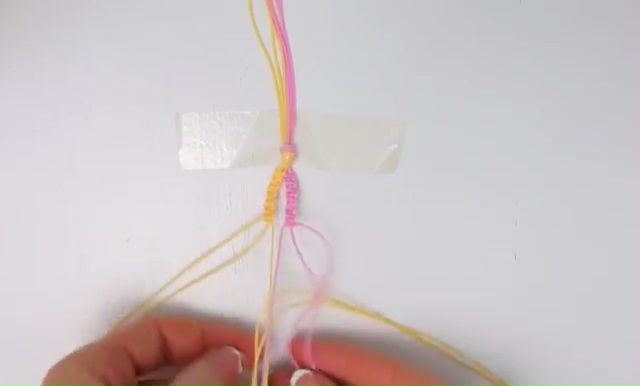
- Then, separate two colors again and start to sew them to make two different square knot designs.
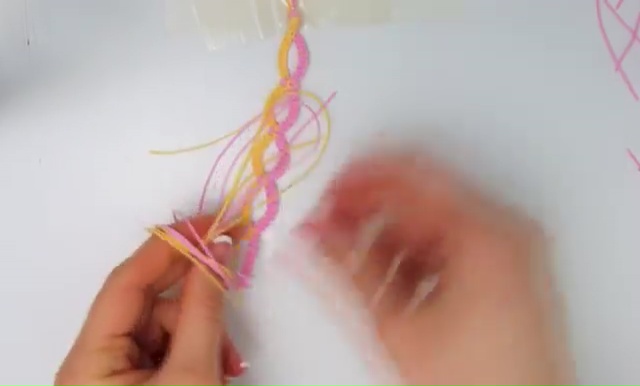
- After a while, when you get the proper dimension, gather them again as you did in previous time and then again craft in different square knots. By repeating the whole process methodically, you will get a nice wavy cord bracelet at the end.
- Now, make a tight knot at the end, keep one pink cord and one yellow cord on both sides, cut away the rest cords from the bracelet and secure them with some nail polish.
- Finally, make the same conclusion as you did the first one by designing some square knots at the back part, décor them with two beads on both sides and this super cool bracelet is all ready to use!
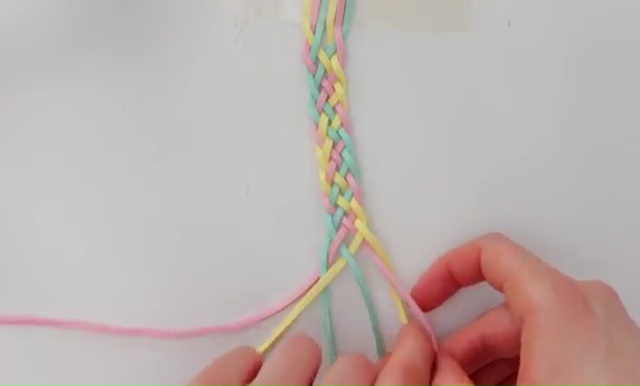
Third Bracelet:
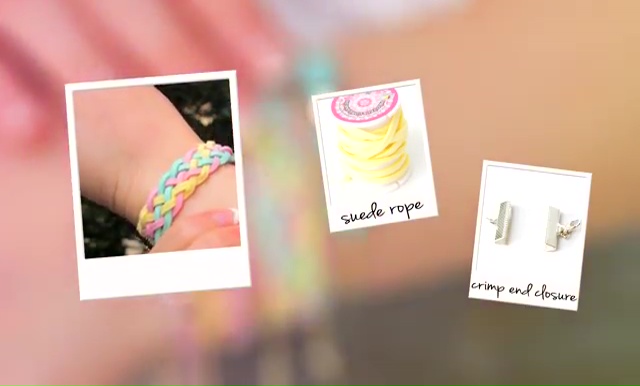
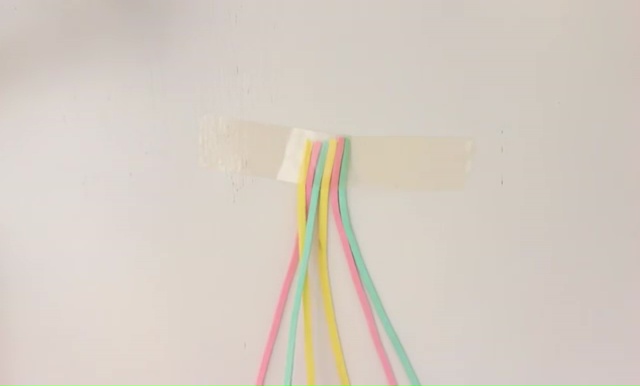
- For the third one, you need suede rope in three different colors, crimp, and closure.
- At the initial stage, take two pieces of rope from each color and tape them up on a table.
- Now, give each piece a distance of 1 inch from each other, then, take the extreme left one and cross it over the next one, after that, take the very next cord and proceed over the second cord. After doing the first step, go to the extreme right part, this time, take the second cord from the last and cross it over the last one and then, take the last one and pass it on the middle one.
- Finally, close the middle two cords with each other, now repeat the same process over and over again until you reach the bottom of your cords.
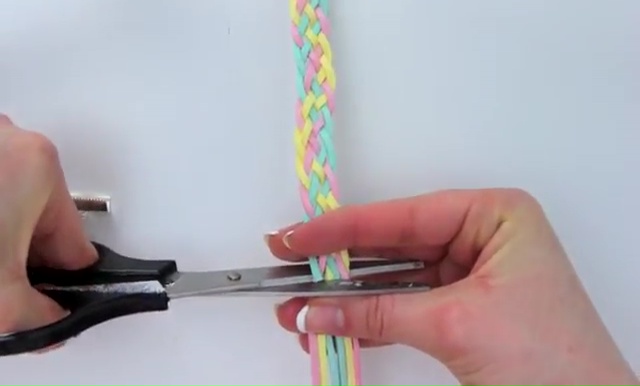
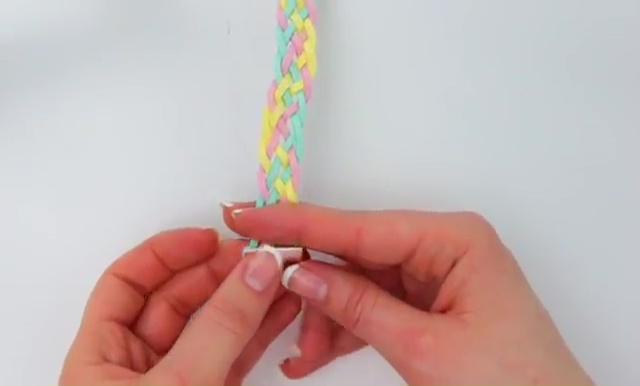
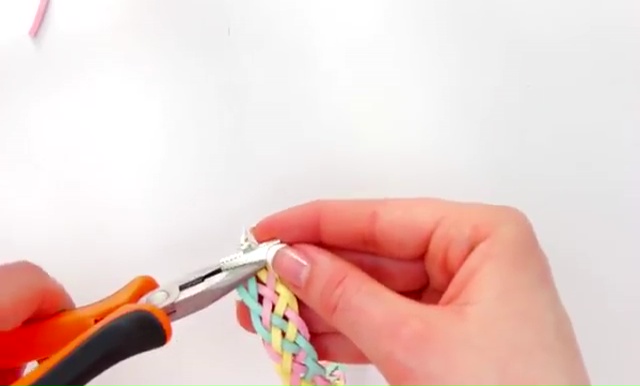
- When you are done with the designing, cut away the excess parts from the both sides and attach crimp and closure on those sides, press them forcefully to secure the end panels and it ready to wear with a pretty chain!
Last One:
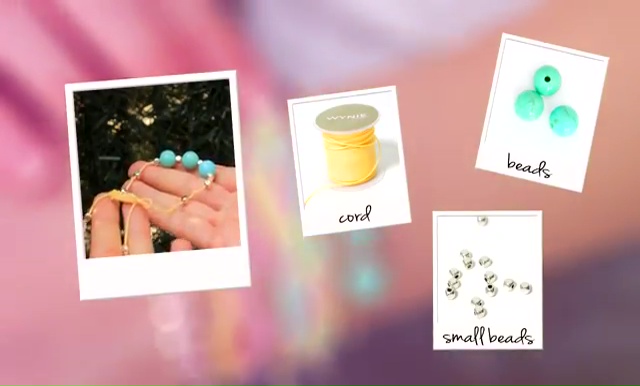
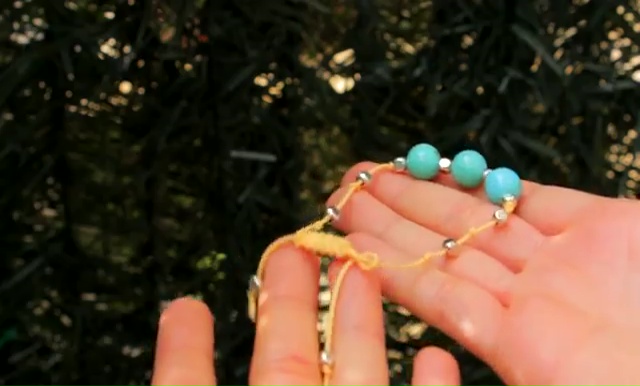
- For the last one you need, cord with a pretty shade, three huge beads along with some small beads.
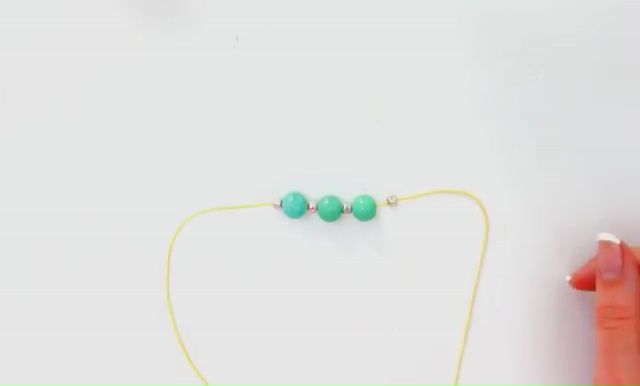
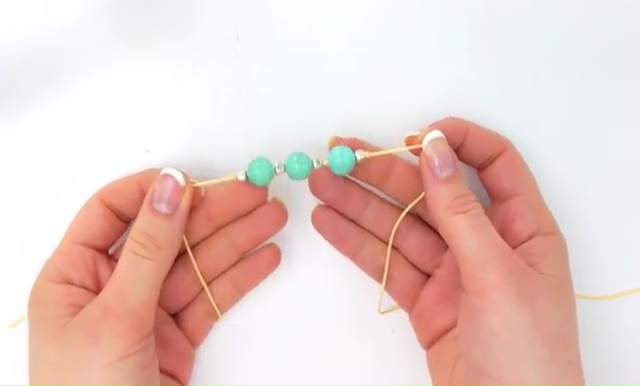
- At first, take a piece of cord, insert a small bead, then insert a big bead into the cord and repeat this process for 3 more times.
- After getting a proper design with these beads, make two knots on both the sides to secure the last beads.
- If you want to add some more beads then try to make some more knots as well at the end of every small bead.
- Finally, craft the back part with the square knot design as we did with the first two bracelets and it’s completely ready to use.
