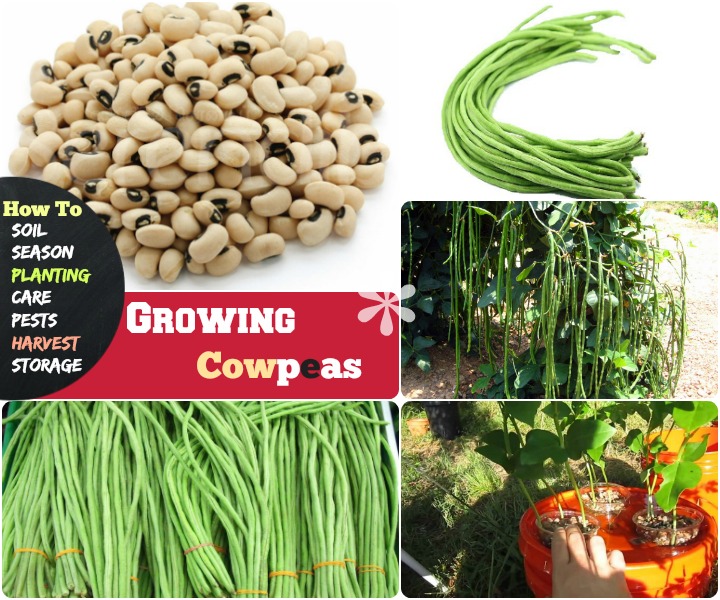
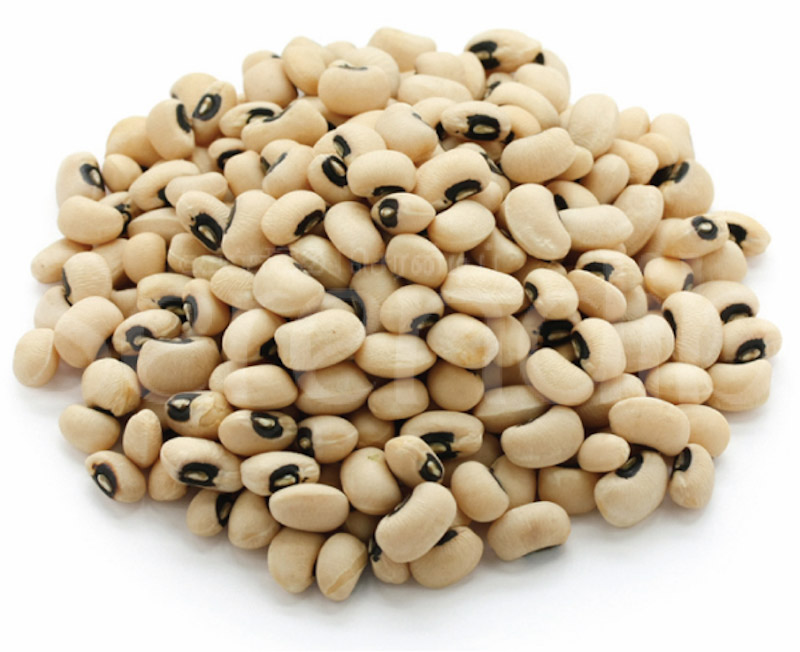
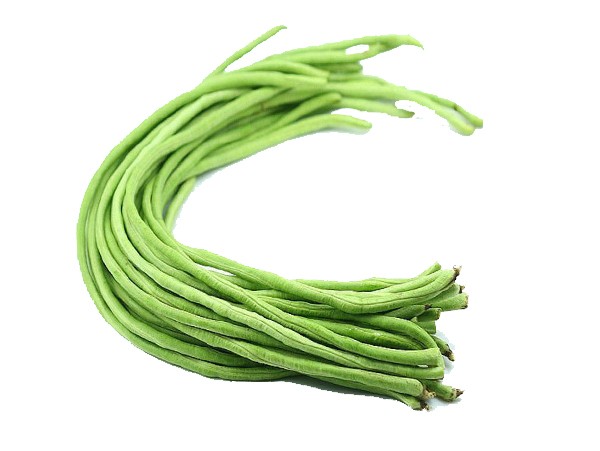
Cowpea is one highly nutrient vegetable that produces edible pods along with tasty seeds, which are used to cook in several scrumptious dishes. Cowpea plant belongs to the pea family and originally came from the tropical climate. Cultivating cowpea is basically simple that claims low maintenance and normal circumstance to develop. Thus, many gardeners love to grow this green veggie in their own garden area or little indoor space. If you are also thinking about cultivating cowpeas in your backyard then, let’s check out the right procedure first to get the healthiest cowpeas in your hand at the end of your course, take a look-
Growing Cowpeas:
1. Soil
- Cowpeas demand well-drained soil with a little acidic quality.
- The pH level is a significant element to the perfect acidic balance of your soil; so, always be certain about the exact pH level of your soil, which must be in between 6.0 to 7.0, though, it could survive in soil with the pH level 5.5 in some climate!
- This vegetable grows at its best when the soil is sandy and rich with compost manure.
- Cowpeas do well when the soil contains high nitrogen or suppress nitrogen fixation for the roots.
- This vegetable plant is a medium feeder which claims medium fertility to the full nourishment.
- It may require low fertilizer but make sure that the soil is rich in organic matter for the adequate growth of your crops.
- Keep the temperature of your soil around 65 ̊ F throughout the whole growing session, and don’t let the temperature down, especially during the germination period.
- Cowpea seeds may rot in cold or wet soil; so, make sure that your soil could get enough warmth and sunlight to the germination.

Cowpeas sowing season and growing from seeds – cowpea season guide.
2. Season
- Cowpea is a crop of warm-season, thus, try to start your plantation in late spring or early summer season, so then the seeds could get adequate heat to grow.
- Seeds or plants of cowpeas couldn’t stand against frost or cool climate, so, never start your sowing process during the fall or frost season.
- If you want a fast germination then try to keep the temperature above the average hotness of 65 ̊ F.
- Remember that the cool or colder temperature not only slow the germination and growth of your plants but, at the same time, rot your seeds or growing plants from their root.
Guide: How to grow cowpeas- Cowpeas crop growing guide from IOWA state university.
 3. Planting
- Cowpea plants can’t bear the transplantation process, so sow the seeds directly in your selected garden space. You can choose a raised garden bed instead to cultivate the plants with equal facility as a garden area a well!
- To start the planting process, choose the place where you need to sow the seeds and fill that area with the require amount of fertilized soil with loamy sands and sandy soil in equal percentages.
- Make sure that you have mixed enough composted organic manure to your soil before starting the sowing
- Now, plant your cowpeas seeds 1 to 1.5 inches deep into the soil and 2 to 4 inches apart from each other.
- Generally, cowpeas plant in the bounty of number thus you need to plant then in several rows. Leave at least 30 to 36 ̎ space in-between two row to provide each plant adequate space to grow to the fullest!
- After planting the seeds spread a thin layer of composted soil from the top of your seeds and water them heavily.
- Then next step is to wait for the germination which may occur within 8 to 10 day after the plantation.
- Provide 70 to 80 ̊ F temperature to your seeds, if you want to speed up the germination period.
- Make sure that the planting place is getting full sunlight a day and the drainage system is working appropriately or not!
- After the germination, you need to start the seedling process for providing each plant some more room to grow to the utmost. Try to separate each germinated plant 3 to 4 ̎ apart from each other, in this process.
- Now, after accomplishing the whole planting process precisely, you just need to take appropriate care of your plants and protect them from troubleshooting issues.
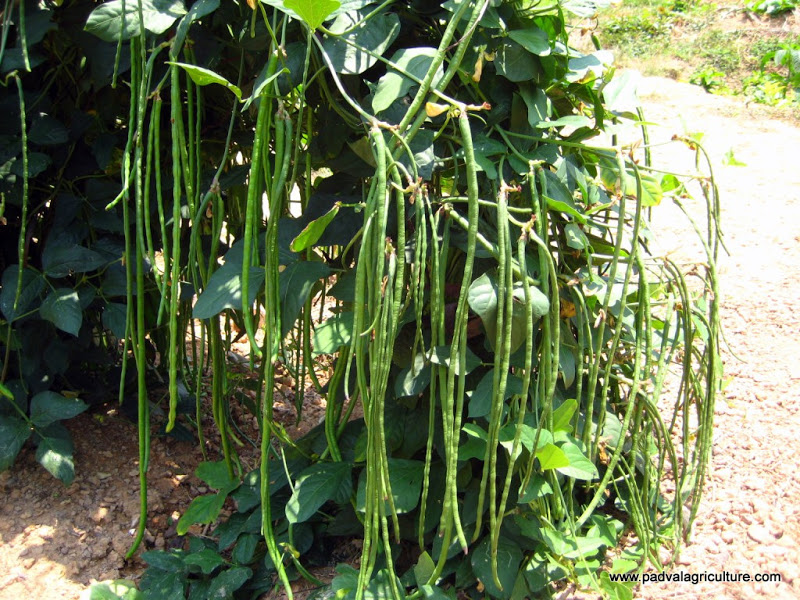
Growing cowpeas on riceland before and after rice, how it can be done ? As cowpeas enrich the soil and it also breask the pest + disease cycle and adds income. A complete guide on cowpea crop as a human food.
Video: How to grow cowpea
4. Care
- Mulching is the initial stage of taking care of your cowpea plant, as it will hold the heat for a long while to the base of your plants, and facilitate the growth of plants hugely.
- Fertilize the soil with those fertilizers which are rich in nitrogen content like fish emulsions.
- Water frequently and try not to allow the surface of your soil dry for a single moment. However, watering frequently doesn’t mean to make your soil soggy or soaked, so be certain the supplying water is draining well.
- Weeds are a very common trouble to the growth of cowpeas, so clear the weeds whenever you see anything like this near the planting land.
- Mulching will help you in this endeavor too, especially the hay type mulch. Use black plastic to mulch the base soil if you want to clutch the warmth for an extended period.
- Provide stalking system to the plants, once they reach the height of 6-inch tall, particularly the pole beans, which claims a proper support for climbing.
- You can apply a side dressing of compost or fertilizer about half way during their growing session.
- Don’t let the leaves wet whenever you would water your plants, or this would instigate the fungal or bacterial disease of cowpeas more efficiently!
- Once the cowpea pods will start to grow and developing into the wider form, you can prune or cut out the extra stems from the plants to give the crops some more space to grow.
- Finally, you just need to get proper protection from any kind of typical pests and diseases from every probable way.
 How cowpea helps to prevent and suppress weed growth, adds profit to pocket – cowpea plant guide from USDA.
5. Pests and Diseases
Every single phase of this plant lures plenty of insects, worms, wilts and various fungal or bacterial diseases. Cowpea plants come with very attractive crops along with juicy or tasty stems and leaves, which seem mouthwatering to the number of bugs, and insects. Consequently, it is quite hard to protect them from such troubles.
Cowpea aphids, pea aphids, armyworms, corn earworm, Mexican bean beetles, etc. are some common insects which could attack and damage your cowpeas crops massively. Fusarium wilts, charcoal rot, Cercospora leaf spot, brown rust, brown blotch, bacterial blight, asochyta blight, etc. are some common diseases which often infect the cowpeas along with its whole plants and destroy the crop entirely.
Aphids or small insects could be protected by the silver colored plastic mulching or a strong jet of water. You can use organic pesticide sprays to get rid of any kind of insects in a more easy way, though some gardeners disagree to apply any type of chemicals on their crops in any circumstance. Thus, it will be better if you can protect your plant from any other ways instead of applying pesticide liquids. On the other hand, providing adequate warm weather and supplying a good drainage system are two simple ways to stay away from any kind of fungal or bacterial diseases. Always use non-hybrid and rot-free fresh seeds for the plantation to avoid any kind of such troubles in future. Try to use fungicide products on the already infected place, if you want to protect the rest part of your plant effortlessly.
Cowpeas Harvest and Storages:
6.Harvest
- Cowpeas are fast growing vegetables which need 60 to 90 day to reach the perfect harvesting stage.
- Though the exact harvesting period depends on the variety of cowpeas that you choose to plant, yet the foremost varieties get ready to eat or cook 60 days of germination.
- When you see the cap of pods seems loose and the pods resemble enough wide by consisting a healthy form, then start your harvesting process immediately.
- Remember that, if you don’t harvest them at the right stage, the pods may start cracking or splitting with the seeds and turn into a tasteless form at the end!
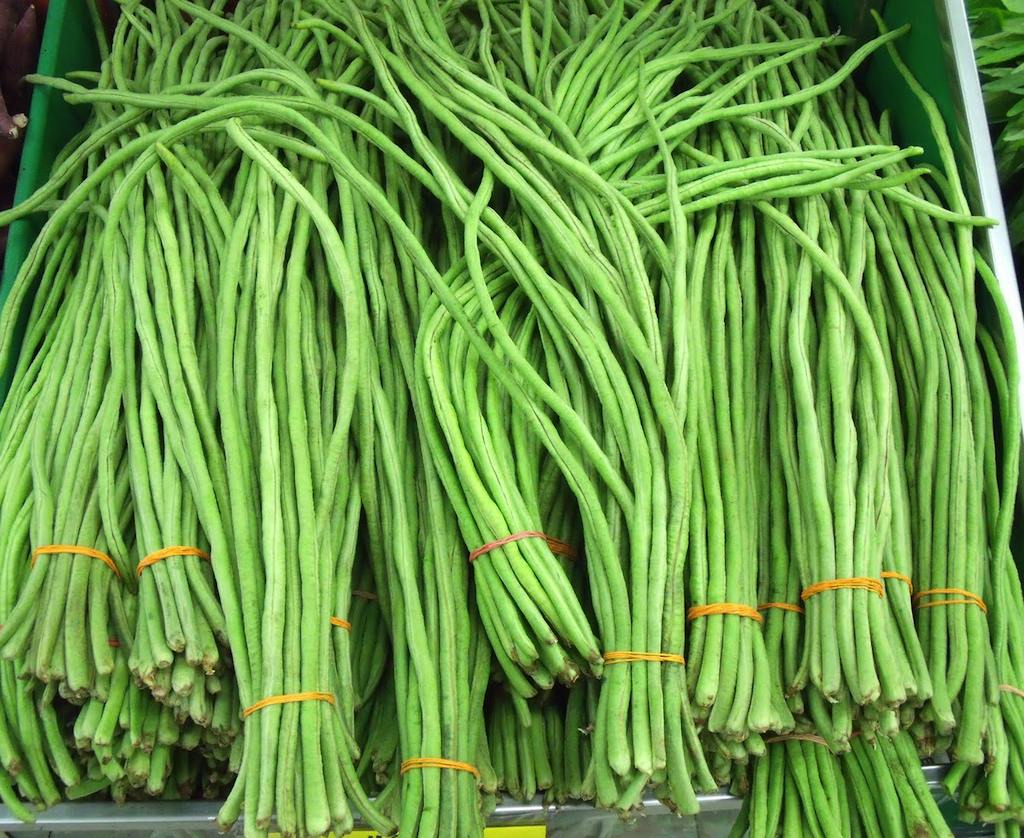
Video: Cowpea harvest and drying for storage
7. Storage
- To store cowpeas, put the pods in a low light place where the climate is comparatively cooler than the other room space.
- The best way to store cowpeas in the fresh form is placing them in your refrigerator, inside the vegetable crisper.
- It will be better, if you can wrap them in a plastic bag, before placing in the fridge.
- For the more extended period, blench them a little into boiling water for 1 or 2 minutes. After that put the soaked pods in a bowl of ice water and then, store them in your fizzer after draining them off completely.
- If you want to get the fresh and crispy form of cowpeas, then avoid the blenching process and go for the plastic warping course instead!
Some more ideas on growing cowpeas in container : cowpeas plant sunlight, soil, water and fertilizer requirement and pest control ideas at sfgate.
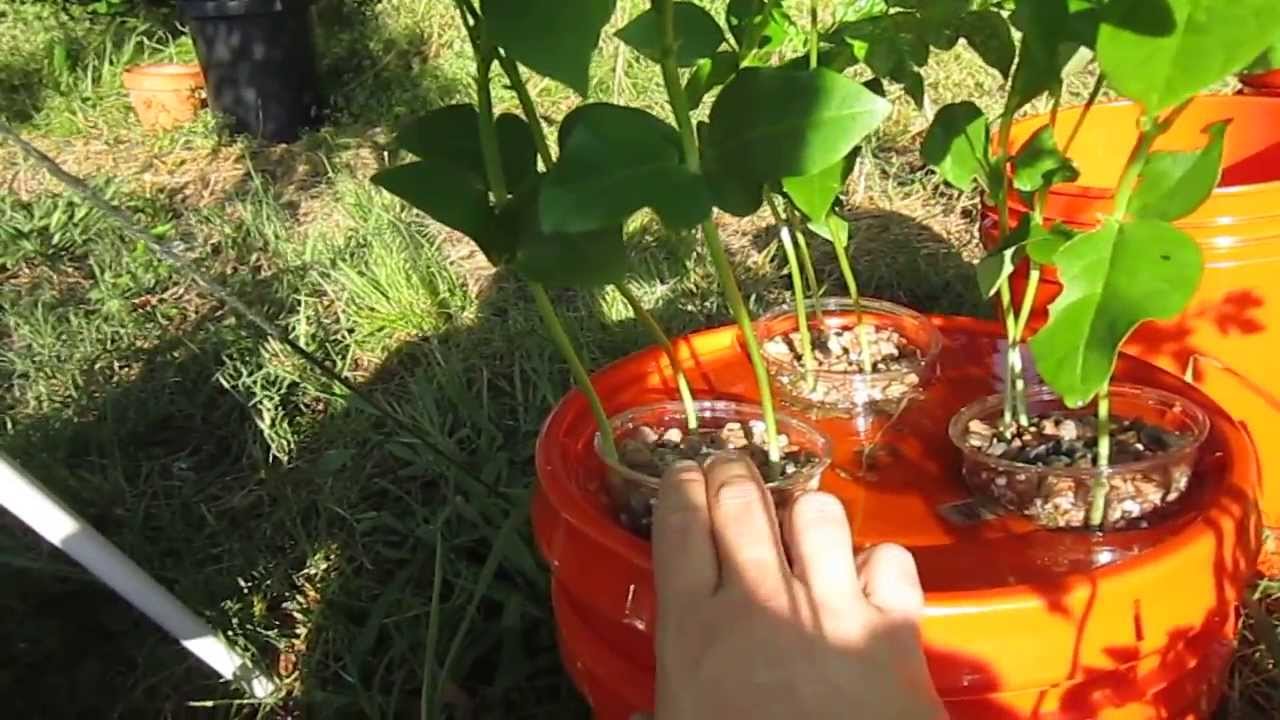
How to Grow Cowpeas in Container:
Cowpeas are one of those wonderful vegetables which grow best in a small container or garden pot than an open place. Thus, many container gardeners pick this vegetable to grow in their small indoor garden area. Let’s take a look at the proper methods of this course of action on this article below-
- To cultivate cowpeas take a medium sized container with 3 to 5-gallon capacity.
- Arranging the potting mix is the very next stage in this matter and for that stir organic compost, peat moss, and vermiculite in equal amount.
- Now, fill the container 3 ½ /4 way full with nitrogen based rich potting mix.
- Plant 2 to 3 seeds in each container and place them 1-inch deep into the soil. Try to grow one plant per each container to provide your cowpea plant sufficient space to grow.
- After pushing them gently, sprinkle a fine layer from the top of your seeds with some additional potting mix.
- Then, water the soil thoroughly, place the pot in a sunny place with full warmth and wait for the germination stage.
- Once you see the germination occurs, try the seedling process and take out all the weaker stems except the stronger one.
- Mulch you plant to protect the base from unwanted weeds and to hold the wet or warm climate for a long period.
- When the plant has grown in taller form and ready to produce pods, fertilize the soil with time released fertilizer like 10-20-10 manure.
- Water your plant routinely or whenever you find the surface of your potting mix looks dull or out of the water.
- Finally, get proper protection from all the possible troubles as we have mentioned above, and you will reach the healthy harvesting stage soon!
Cowpeas Growing Tips:
If you desire to have a handful of healthy and tasty green crops then, it is necessary to follow some fundamental tips on growing cowpeas in your garden, and they are as follows-
- Always start your plantation with a fresh ground or space, whether you are cultivating it in an open garden area or a raised garden bed place!
- Nicely weeded land is eternally beneficial for a healthy future of your cowpeas crops.
- As the well-drained soil type is necessary for cowpea plant thus, loosen the soil by mixing enough amounts of sands, before starting the plantation.
- If you are running through a rainy season then, try to pick your cowpeas a little earlier than the proper harvesting stage, or they may rot on the vine or start splitting open.
- Last but one of the important tips is that water carefully your plants, whenever you are supplying water to the each plant. Make sure that you water force neither wetting the leaves or main stems nor disturbing the fruits at all.
- It will be better if you can tie some interrupted vines or stems with a band or something like that, during the watering process.